|
|
Home | Audio | DIY | Guitar | iPods | Music | Brain/Problem Solving | Links| Site Map
This work is licensed under a Creative Commons License.
Designing with CSS – Part 6: Using Dreamweaver CS3 compatibility checks for browser compatibility
Adobe
Adrian Senior
www.webade.co.uk
www.communitymx.com
www.ukcsstraining.co.uk
Created: 16 April 2007In this final section of the six-part tutorial series on designing sites with CSS, we’ll discuss strategies for troubleshooting display issues and offer suggestions for improving cross-browser compatibility—using the tools provided in Dreamweaver CS3. In the previous sections of this tutorial series, we’ve covered writing CSS syntax, working with selectors, modifying style properties in the Dreamweaver interface, CSS positioning for site layout and building CSS site navigation. Hopefully after following along with these tutorials, you see the benefits of keeping the site content separate from the document that defines the look and feel of a site. If you missed any of the previous sections, it may be helpful for you to review them to become familiar with the concepts previously discussed before beginning this part:
- User Level: Beginner, Intermediate
- Part 1: Understanding CSS design concepts
- Part 2: Defining style properties and working with floats
- Part 3: Using CSS Positioning for site layout
- Part 4: Styling headers and main content
- Part 5: Building site navigation
This article will describe methods for testing and ensuring that your site displays consistently across target browsers. The ability to develop sites using CSS is only the first part of the site project. Selecting the CSS layout options and implementing the design leads to the second part: Testing, adjusting the code, and re-testing until the design displays acceptably in all browsers. As you begin working with CSS, you will discover that you’ll need to modify elements within your layout. Although sometimes these modifications will be minimal, making small fixes will greatly increase the success of your design. There are many tips and strategies available to try when most, but not all, browsers display the site as it was intended. We’ll discuss some ways you can stay on the right path and minimize display issues.
In previous articles in this series, we used the CSS layout pages included with Dreamweaver CS3. Now we’ll learn see how to use the built-in Browser Compatibility Check when in the site testing phase.
Requirements
To complete this tutorial you will need to install the following software and files:
Dreamweaver CS3
Sample files
Prerequisite knowledge
This tutorial describes working with Dreamweaver CS3 to create site pages using CSS and assumes you are familiar with working with both the Internet Explorer and Firefox browsers.(Other browser options: Safari, Opera, Flock, Google Chrome, or compare browsers.) This is Part 6 of a six-part tutorial series—be sure to review Part 1 of this tutorial to understand the concepts discussed in the previous sections before continuing.
Checking browser compatibility
As preparation for testing your site, you’ll set your preferences in Dreamweaver CS3 to select your target browsers. Dreamweaver CS3 allows you to select any of the modern browsers, to test your designs within the different versions. In my experience, the results and feedback provided on problems within the Dreamweaver interface are astonishingly good.
Dreamweaver will use the list of targeted browsers when you deploy the Check Browser Compatibility option. So, our first task is to choose which browsers to use when checking the design, and select the versions of those target browsers that the site will support.
Here are the steps reviewed in the demo:
- Launch Dreamweaver and open the sample files index.html and twoColElsLtHdr.css.
- In the Insert Bar, click the Check Page button.
- Select the Settings option to access the Target Browser dialog box.
- For this tutorial, select 2.0 for Firefox and 7.0 for Internet Explorer.
- Click OK.
- The Check Browser Compatibility command is invoked and the Results panel appears, stating no errors are found.
- Next, select the option to preview the page in IE 6 and notice the extra space that exists between the list items.
- Return to Dreamweaver.
- In the Insert Bar, click the Check Page button.
- Select the Settings option to access the Target Browser dialog box.
- This time, select 6.0 for Internet Explorer.
- Click OK
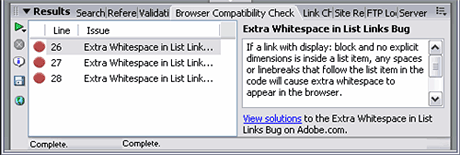
- The Check Browser Compatibility command is invoked and the Results panel appears, stating there are three errors.
- There is one error for each of the navigation list elements.
- The Results panel displays information about the known issue with IE 6 and describes the rendering problem in detail, (see Figure 1).
Figure 1. Detailed information about the display error appears in the Results panel.
- In the Results panel, click the View solutions link.
- A browser launches and displays the CSS Advisor page on Adobe’s website.
- This online resource includes helpful fixes to help resolve specific issues. Frequently, more than one solution is offered in the CSS Advisor, helping me make an informed choice when working to resolve an issue.
- Return to Dreamweaver and select Code view in the Document window.
- You can double-click on an error and the contents will scroll to the offending code snippet.
- For this particular error, we do not need to add a CSS rule to fix the issue.
- Simply removing the whitespace will resolve the display problem in IE 6.
- Switch to Code view and edit the unordered list in the index.html page to look like the code below:
<ul> <li><a href="#">Link 1</a></li ><li><a href="#">Link 2</a></li ><li><a href="#">Link 3</a></li ></ul>By removing the white space between the linked list items, we’ve resolved a known issue with IE 6 rendering.
- Save the index.html page and click the green arrow on the left of the Results panel.
- Select Check Browser Compatibility to invoke the Browser Compatibility Check. The Results panel appears, stating no errors are found.
- Select the option to preview the page in IE6 again.
- Notice that the navigation bar with the unordered list is now displaying as expected.
The combination of the built-in Browser Compatibility Check and the CSS Advisor are wonderful features for both new and experienced CSS developers. Dreamweaver not only encourages you to build pages with proven designs using the included CSS Layout pages, it also allows you to quickly and efficiently test and troubleshoot your pages with just a few clicks.
Using Dreamweaver CS3 to validate code
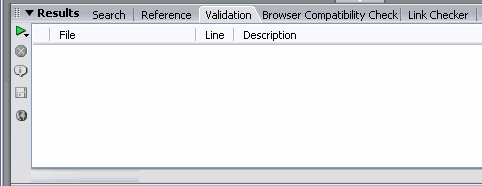
After completing a design and resolving any browser compatibility issues, the next logical step is to validate the code and ensure it meets the W3C standards specification. Meeting these standards says something about you as a designer—it shows you know how to write good code. Even more importantly, standards based pages are less susceptible to rendering problems. Validating the code to ensure it meets the standards usually reduces problems in page rendering. Dreamweaver CS3 makes this easy, because you can access the code validator via the Results panel. The Results panel is accessed using the F7 keyboard shortcut, (see Figure 2).
Figure 2. You can validate code using the Validation tab of the Results panel
In the Results panel, validate your page by following the steps below:
- Select the green arrow on the left side of the Results panel.
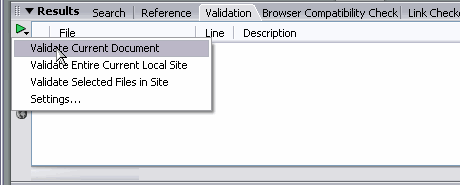
- Select the Validate Current Document option from the drop-down menu, (see Figure 3).
Figure 3. Click the green arrow, then select the Validate Current Document option
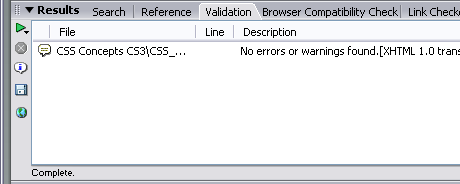
- Dreamweaver reads and validates the code in the current document. In this tutorial, the window states there are no errors found, (see Figure 4).
Figure 4. After validating the code in the current document, no errors or warnings were found.
- After validation, if errors exist they will be displayed in the Validation panel.
After completing the browser compatibility check, testing the display in target browsers and validating the code, you can be confident that your website will perform successfully. All that is left now is to tidy up the CSS file before deploying the site files to the host server. In earlier versions of Dreamweaver, this process involved opening the CSS file and painstakingly moving CSS rules by hand, scrolling up and down repeatedly to look for specific sections of the code.
I’m delighted to say that Dreamweaver CS3 has new features that greatly improve the process of cleaning up the CSS code. In the next section of this tutorial, we’ll explore the drag and drop functionality available in the CSS Styles panel.
Organizing CSS rules using the CSS Styles panel
Dreamweaver CS3 includes many new features, especially in the updated CSS Styles panel and the improved editability of CSS in general. One of the new features I really love is the ability to organize your CSS rules by simply dragging and dropping them in the CSS Styles panel. If you’re aware of specificity and how that affects your CSS designs, then you understand why this feature is so important.
If you are unfamiliar with specificity, check out the Developer Center article that I wrote on the topic, Understanding Specificity.
When working with CSS style sheets, you’ll save yourself time and headaches if you keep your code neat and tidy. An organized style sheet is far easier to read than a disorganized one. Now that the new drag and drop feature is included in the CSS Styles panel, Dreamweaver makes it easy to organize your style sheets.
Here are the steps reviewed in the demo:
- Increase the width of the CSS Styles panel by dragging the left edge to open it.
- The wider panel allows you to see all of the CSS rules.
- Click on each rule in turn and drag each rule next to a similar rule.
- Group similar rules together. For example, put all of the sidebar1 rules together.
- Repeat this process until all of the mainContent rules and other rule types are grouped together.
- Save the file.
- If you view the CSS style sheet in the Document windows, you can see that all of the rules are now organized into groups, making them much easier to read and locate.
Where to go from here
I hope you enjoyed this series of articles. Be sure to take advantage of the included CSS Layout pages in Dreamweaver CSS and experiment with implementing different page designs. If you missed any part of this six-part tutorial series, I recommend returning to Part 1 to review the concepts discussed. If you’d like more information on working with CSS please check out the tutorial series on CSS Design Basics, which will be published in the near future. For the Dreamweaver 8 version of that article series, see Part 1: Learning about doctype.
About the author
Adrian Senior owns the UK-based web design agency Webade, which has been in business since 1998. He is also a member of Team Macromedia and a partner at Community MX. The year 2004 saw Adrian's first trip to America, where he visited Orlando and delivered two sessions at the TODCon conference. Adrian also provides training courses for companies who need to train their designers how to build compliant, accessible web sites using CSS and xhtml. He's been married to his wife, Janette, for 24 years and has two children, Antony and Eleanor.
Home | Audio | DIY | Guitar | iPods | Music | Links | Site Map | Contact
![]()