|
|
Home | Audio | DIY | Guitar | iPods | Music | Brain/Problem Solving | Links| Site Map
This work is licensed under a Creative Commons License.
Getting the Most out of Your OS X Music Player
or Optimze Your Windows Audio Server
I have compiled a brief overview on building the ultimate music server from your OS X Computer, and optimizing the OS for audio playback. Links to several software downloads are provided to give you the opportunity to optimize your computer more efficiently, and without paying someone $200 or so to do it for you. I encourage you to use this a a guide on improvements you can make to your system.
Audiophiles can spend countless hours and seemingly countless dollars on traditional audio components such as speakers, preamps and cabling; adding expensive additions like EMI/RFI treatment, isolation solutions, power conditioning, and more. The below suggestions will provide you with the greatest return for little or no money...all you need is some time. You may also want to check out: Build an Affordable Music/Audio Server with the all NEW NM24 Tube DAC
Use a dedicated computer for music playback
Today’s computer’s are general-purpose machines designed to do quite a bit, and are extremely noisy environments as a result. We suggest you choose a Macintosh mini and dedicate it to just playing music only. Avoid using the system for email or printing or other tasks while listening, but if you still want to use the mini for other tasks while not listening to music or if you are not concerned with attaining optimal audio playback then you can surf the Web or do some simple tasks while playing your audio. You may also want to use the system to watch TV using EyeTV, or streaming video such as Netflix. Just make sure all apps are shut down, and you do a re-boot when you want to listen to optimal audio. Obviously, there should not be any login items except for your media player.
Choose an appropriate computer
As for choice of computers, Intel based machines are great and from my point of view there is only one choice and it is a Mac mini. Yes, I used Windows for years and was a software engineer on the Windows platform for years, but was converted to OS X about 7 years ago.
Optimize the Hardware
Mac Computer Settings - Basic "Dos and Don'ts"
- Get a Intel Mac Mini (Yes as the title suggest we are using OS X for this project, but you can use many of the techniques below with a Windows PC.) Considering what audiophiles spend on equipment and cables, the $599 spent for a new basic Mac mini should be within reach for most.
- Have a third party vendor install a SSD as your boot-drive (you will save a lot of cash if you do not order your SSD from Apple), and use your OEM internal drive as either your audio storage drive or as a back-up (my preference). Here is a link to the fastest SSD drives. Storage Search SSD. If you did not order your SSD from Apple, then you will need to install a TRIM utility. Trim Enabler is free and is a reliable TRIM utility. Initialize the drive without journaling and get at least a 64 Gb SSD, to go any smaller may present problems when you update your software; this is especially true if you have some apps installed. You can now purchase an external Thunderbolt SSD for under $500 or less.
- If you have a choice between a 5200 RPM hd or a 7200 RPM hd, then go with the faster drive. Some sources claim that the faster the drive the better the audio quality (purely subjective.) Copy, burn, and access speeds are considerably faster especially if using Firewire 800 or Thunderbolt as the interface. Do buy an external hard drive with its own power supply.
- If you are doing a clean install then you do not want to install the various apps contained on Install Disk 2 (Garage Band, iLife, iMovie, Quicktime, iPhoto, iDVD, etc.) If they are installed, then you can uninstall via CCleaner. I am not sure you have this option (selecting what apps can be installed) anymore with Lion, and Mountain Lion which can only be downloaded from the Apple Store now.
- Use an external drive for audio playback (my preference) or back-up. Connect your HD to your mini via FW800 or Thunderbolt for optimal bandwidth and speed.
- Upgrade to 8 Gb of RAM Again, do not buy the RAM from Apple. You can get it at about half the price elsewhere and install it very easily yourself.
- Buy or build a decent C7 AC power cord (This is a BIG audio improvement at a minimal cost. The stock cable is subject to EMI and RFI. Obviously you will not notice the difference until you swap out the OEM cable. We will provide instructions on building a C7 cable for the mini.)
- Power your mini with a DC power source if you are a die-hard. (They claim a big increase in audio quality and there are kits available, but it is relatively costly.)
- Avoid purchasing gimmicky items like: wrap around components to protect your mini from EMI and RFI. With the mini's solid aluminum enclosure external interference is minimal, if it exists at all. No need to buy gold plated TOSLINK cables either.
- If you want to use your mini for tasks other than audio then you may want to partition the drive so that one partition is optimized for audio and the other is a standard configuration. If you do this or want to use an external Thunderbolt SSD for boot-up, then you will need to go to System Preferences -> Startup Disk and choose the drive you want to boot-up. This will have to be done each time you want to switch the boot drive.
- Burn all of your CD audio to AIFF files using iTunes. Only AIFF is both lossless and contains all of the meta-data of the CD (artwork, etc.) WAV does not contain meta-data.
Once you get set-up then here are some simple rules to follow:
- Don't share audio device and storage buses. There can be conflicts, but I have daisy chained FW800 with great succes and so you may want to experiment (most HDs and DACs have interface options.)
- Do use USB2, SATA or a NAS for audio storage in conjunction with a FireWire audio device. For example, if you are using an optical port to stream your audio into your DAC, then use FW800 or USB to connect to the audio source.
- Do experiment with different USB ports on your computer. Not all ports are equal and some will actually sound better than others.
- Do use FireWire, SATA or a NAS for audio storage in conjunction with a USB audio device.
- Don't daisy-chain any other FireWire component with a FireWire audio interface (See above comment. FW800 may be an exception to the rule due to the increased bandwidth and speed.)
- Don't use a "hub" or port expander with an audio interface
- Don't store audio files on the system disk (see Music Storage)
- Don't use Internet web browsers while listening to music, especially when playing high resolution audio
- Don't run multiple audio applications (except iTunes) at the same time
Note: To make your own hardware repairs or to install some component in your Mac, then iFixit.com is a must use resource. They also sell tools for pulling the glass off of an iMac, etc., and all at reasonable prices.
Optimizing Software and OS
Tutorials to learn more about using OS X These tutorials do not cover much of what is below, but may still be of some help.
iTunes Preferences
• Disable the Crossfade Songs in Playback Settings
• Disable the Sound Enhancer n Playback Settings
• Disable the Sound Check in Playback SettingsMac OS X
You can download this OS X script (It is a virus/malware free text file.) that will set settings to maximize the Mac's playback potential. The following will be disabled (There are commands to re-enable the settings): Spotlight, Dashboard/Dock, Spaces, Finder, Journaling, Insomnia Settings, and Time Machine. Some of these you can do manually via the System Preferences. Also, you can type (or for us lazy folk--copy and paste) the desired line of code into the Terminal and run it alone rather than run the entire script. If you want the setting turned back on, then there is code that shows you how to do that. Note: You may want to try the suggestions below first. If you are using terminal commands, then just copy and past the commands into the terminal. Finally, using CCleaner and/or TinkerTool will do most of it for you (explained below.)
Getting Started
For those who want to use the terminal, or learn how, there are some terminal commands that show you how to perform the desired task, and for the rest of us there are the System Preferences.
To open the terminal so that you can run some of the script commands: Applications -> Utilities -> Terminal.app
To open the System Preferences goto Applications -> System Preferences. I would drag the icon to the Dock. While doing this you may also want to drag the Audio Midi Setup and Disk Utility to the Dock. To do so goto Applications -> Utilities -> and drag both utilities down. Play with them a bit to see what their capabilities are.
In Lion the user/library folder is not visible. This is where the .plist, etc. files are contained to turn it on via the Terminal then use the following code:
chflags nohidden ~/Library/
If your all of your drives are not showing on your desktop then goto Finder -> Preferences -> General and select the items you want to appear.
Since you cannot use a mouse in the terminal, then you will need to use OS X keyboard short cuts. Here is a list of OS X keyboard short cuts.
Manually Disabling and Enabling
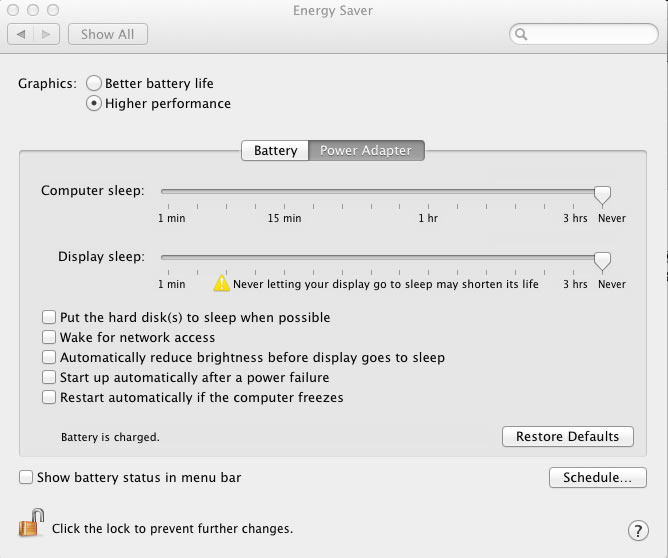
Energy Saver
Disable computer sleep, hard disk sleep in the System Preferences -> Energy Saver (See image below.)
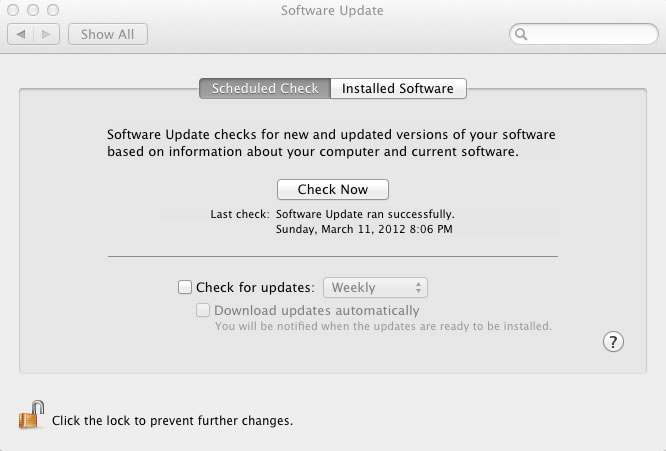
Software Update
Disable " Check for updates" in Preferences -> Software Update Will will still want to check for updates and you can do it manually from the same window, or click on the Apple in upper left of system menu and select Software Update.
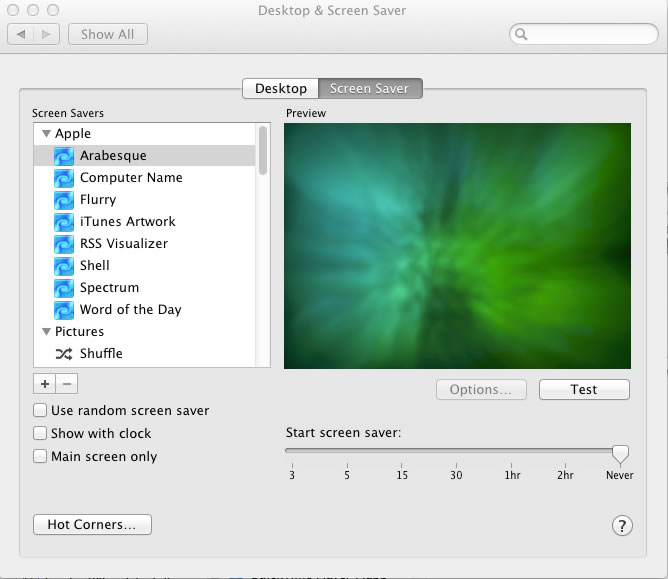
Screen Saver
Disable the Screensaver System Preferences -> Desktop & Screen Saver (see image below.)
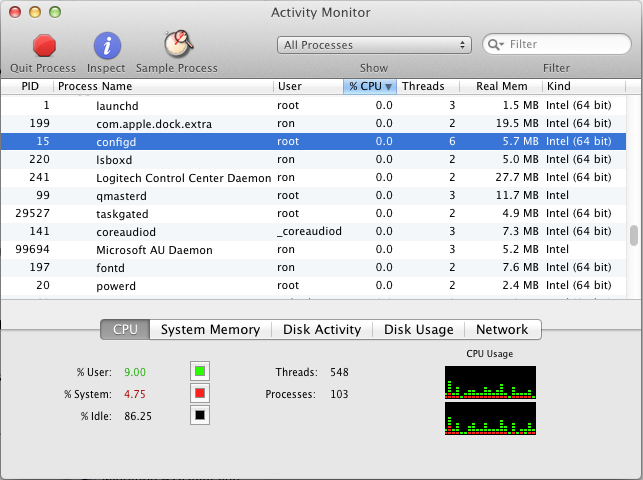
Activity Monitor
List of OSX Processes: To see what apps are running you can go to: Applications -> Utilities -> Activity Monitor. Image below.
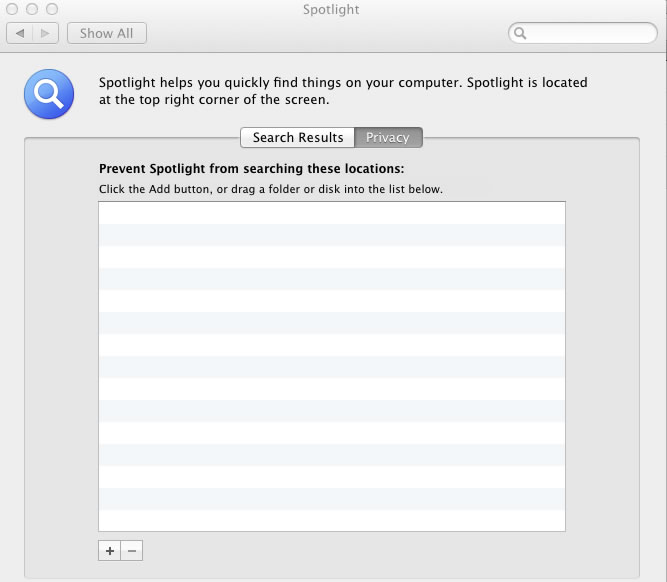
Spotlight
To disable: System Preferences -> Spotlight -> Privacy, click on the + on the bottom left and then drag-and-drop the HD's that you want to turn off Spotlight indexing. Your backup drives should be manually turned off during audio playback, but if it is an internal drive then you can turn off the Spotlight indexing or not and be sure that Time Machine is off (below.) Note: Once you drag a hard drive over to turn off indexing, then you will have to rebuild the index if you wish to use spotlight in the future (just select drive in below window and click on - ) It will take some time to rebuild the index. The one drive that you do want to turn of Spotlight indexing is the disk used to store audio
Time Machine
To disable Time Machine you can slide the On-Off slider to "Off"
Disable your media drives by going to System Preferences -> Time Machine -> Options and make selections. Image below
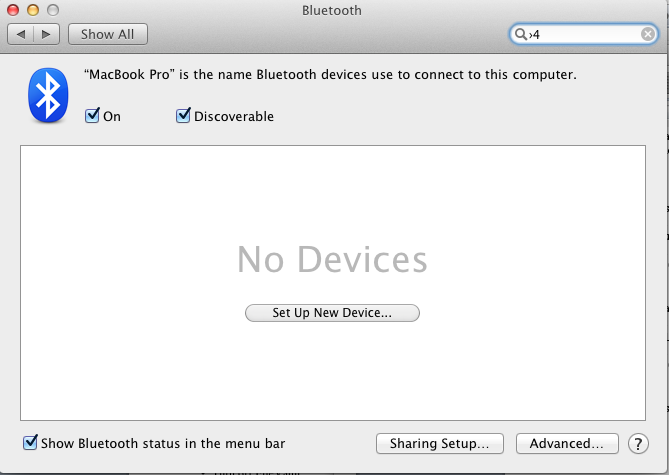
Turn Off Bluetooth and Wi-Fi and other unused services via System Preferences -> Bluetooth and make selections. Image below.
Dock
The Dock does not take up much memory---about 32.8 Mb to be exact. I prefer to use the Dock for easy application/utility access. If you do use it then, goto System Preferences -> Dock and disable all of the animation options. If you do not want the Dock around then you can dispose of it by typing the following into the terminal.
Create a 2D Doc: If you have issues with 3-D, then
defaults write com.apple.dock no-glass -boolean YES
killall DockTo Kill the Dock You don't want it...woe is me
tell application "Dock"
quit
launch
end tellBut wait, you decided that you want the Dock back...too bad you killed it. Actually, just enter...
killall Dock
Disable Dock Shadow From the Dock pane deselect Enable Dock shadow.
Dashboard
To disable and free up system memory...
defaults write com.apple.dashboard mcx-disabled -boolean YES
killall DockTo bring it back...
defaults write com.apple.dashboard mcx-disabled -boolean NO
killall Dock //This will restart the Dock and Dashboard
Kill A Process
Sometimes you just need a process to stop running. If you want to kill it in Terminal with out using Activity Monitor, find the process ID (In Activity Monitor) and then use the following command. Only really useful if you don't like much clicking or are writing a program.
kill PID 478
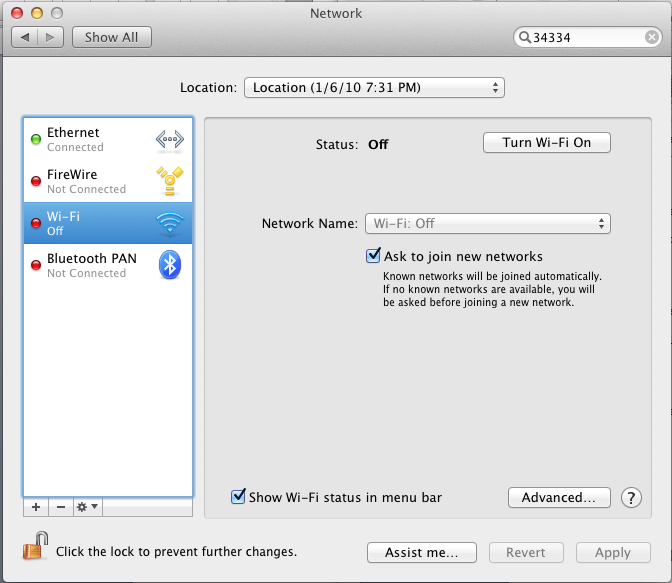
Airport To turn off the Airport go to System Preferences -> Network and click on Wi-Fi in left column and make selections. Image below.
Show Hidden Folders in the Finder
A lot of the files in Finder are hidden. This is probably a wise choice by Apple as there are countless things you can screw up. But if you want to take a look at how many there are and what they are you can show them within Finder. Be careful as these files are needed by the system, if you screw something up don't come complaining. Repeat the command with false to revert. The image above, click for larger version, show the amount of files there actually is, with these hidden there is only 4 shown normally.
defaults write com.apple.finder AppleShowAllFiles TRUE
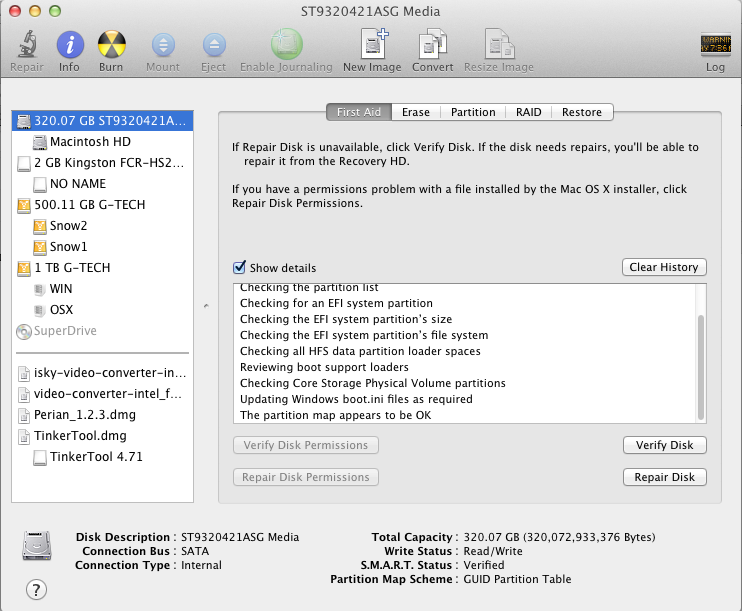
Repair Disk Permissions. Applications -> Utilities -> Disk Utility. See image below.
Language Removal Tools
By removing all of the languages that came with the install will free up considerable memory--especially important if using a small SSD. Monolingual is free as is iCleanLanguage for Mac. Warning: some people have experienced problems with Monolingual in the past so you may want to check the status of the software by doing a Web search. Be careful what you remove. Only a reinstall will put the languages back so decide whether you really need the extra space by removing them. Personally, I have removed the languages from four different Mac's (Snow Leopard and Lion) with no issues.
Free Utilities
CCleaner is now available for the Mac and can do a lot of system maintenance BELOW for free. Before doing any of the below, run CCleaner first since it performs many of the tasks below including uninstall.
You may also want to install TinkerTool and use some of its capabilities.
Task to be Performed on Regular Basis, and Some Hints Using CCleaner and/or TinkerTool will do most of them for you.
- Repair Disk Permissions Navigate to Applications > Utilities > Disk Utility. Select your Macintosh HD and select Verify Disk Permissions. If needed you can then Repair Disk Permissions.
- Clear out login items Its good to check that unwanted programs are not starting up when you login to your Mac. This can be done from System Preferences > Accounts > Login Items.
- Clear out unwanted applications Go through your applications folder and see if you can save yourself some disk space by removing any applications you no longer use.
- To Create Shortcuts on the Desktop use aliases. To move the app from it folder to the Desktop will destroy the apps paths...analgous with pulling up a tree and sticking it in the ground elsewhere. It is now dead.
- Clear Desktop Its been reported numerous times that having a clear desktop can increase the speed of your Mac. So either put your files in folders or delete them!
- Empty Trash. Check what's in there then save yourself some space and empty it.
- Turn off Universal Access (if not used) Navigate to System Preferences > Universal Access and turn off anything you're not using.
- Turn off speech recognition (if not used) Navigate to System Preferences > Speech Recognition.
- Turn off internet sharing (if not used) Navigate to System Preferences > Sharing > Internet
- Check dock for unwanted apps. Your dock should only contain your most used applications so take a look through to see if there is anything you can remove or uninstall.
- Remove dock animation Navigate to System Preferences > Dock then deselect Animate Opening Applications.
- Avoid animated desktops Navigate to System Preferences > Desktop & Screen Saver then deselect Change picture.
- Remove animation effects. You can turn them off from the Finder pane within Tinkertool.
- Remove or deactivate unwanted login items from the Login Items pane.
- Turn Off Graphic Effects (Finder tab). You may already have done this with Tinkertool
- Turn Off Animate 'Opening applications' and 'When alert in background' (Dock tab).
- Run Software Update. The latest updates sometimes provide speed increases as well as fix bugs and vulnerabilities.
- Update other applications. It's always best to run the latest versions of your programs.
- Reboot your Mac Periodically. After doing all this optimization it might be an idea to reboot your Mac. If you use sleep mode a lot, you should reboot periodically.
Home | Audio | DIY | Guitar | iPods | Music | Links | Site Map | Contact
![]()