

Below are examples of what links will look like within the content div.
|
|
Home | Audio | DIY | Guitar | iPods | Music | Brain/Problem Solving | Links| Site Map
This work is licensed under a Creative Commons License.
Orb Button Effect - Different Colored Links and Rollover Images Script: Part III
With a dash of object oriented programming added for taste.
This set of tutorials will show you how to create a very basic mouse over effect in html/css, and define link properties for different parts of the web page. Therefore this tutorial will spilt into 3 parts:
Orb Button Effect - Photoshop Part I : will show how the button is made.
Orb Button Effect - DW Script Part II: will show on how to make a simple basic mouse over effect with html/css.
Orb Button and Colored Links - DW Sript Part III: will show you how to create div's to use animation and then set specific link colors throughout the pages.So far you have created an Orb button using Photoshop or Fireworks. After creating a hover and visited state for the button, you then embedded it into your page using some simple script. If you did it correctly you couldn't help but notice that you are limited with what you can do with your links. If you do not know what I am talking about then go back to the page you created with the script and create a simple text link. In this tutorial you will learn to create as many colored links as you may want on the same pages as your animated Orb link. The first thing to do is to learn the basics of object oriented programming (OOP) so as to put things into context.
Overview
Object-oriented programming (OOP) is a programming paradigm that uses "objects" – data structures consisting of data fields and methods together with their interactions – to design applications and computer programs. Here are a couple of links that you are encouraged to go to: a short Wikipedia definition and in-depth Sun OOP tutorials with Java.
In this tutorial you will be creating several classes in the form of Div's, and within each of those you will create objects that will take the form of "colored links."
A class defines the abstract characteristics of a thing (object), including the thing's characteristics (its attributes, fields or properties) and the thing's behaviors (the things it can do, or methods, operations or features). One might say that a class is a blueprint or factory that describes the nature of something. For example, the class Dog would consist of traits shared by all dogs, such as breed and fur color (characteristics), and the ability to bark and sit (behaviors). Classes provide modularity and structure in an object-oriented computer program. A class should typically be recognizable to a non-programmer familiar with the problem domain, meaning that the characteristics of the class should make sense in context. Also, the code for a class should be relatively self-contained (generally using encapsulation). Collectively, the properties and methods defined by a class are called members.
An object is a pattern (exemplar) of a class. The class of Dog defines all possible dogs by listing the characteristics and behaviors they can have; the object Lassie is one particular dog, with particular versions of the characteristics. A Dog has fur; Lassie has brown-and-white fur.
We will use 3 different Div Tags in this lesson and within each tag we will define a class. Each class is where we will define our link colors, but realize that you can also use the class to define fonts, headers, etc. To create a div go to Insert -> Layout Objects -> Div Tag. In DW there are 2 different types of div's: AP Div and Div Tag. A standard div will just appear in the normal flow of the page, and is useful because you can apply whatever styling you want to it. This means that it is positioned around the other elements and its position and the position of other elements around it will be adjusted based on its position, size, etc. We will be using the Div Tag in this lesson.
In Dreamweaver an AP (Absolute Positioned) Div is positioned using absolute positioning. This means that the position is set using an x and y coordinate system and can be placed in a position that will not effect or be effected by other elements on the page. This means that you can specify exactly where you want it to appear on the page, but things do not always work the way they should in the browser world. Consequently, you should use AP div's only if you are willing to test your pages in different browsers and you should also have somewhat of an understanding of CSS.
Objective
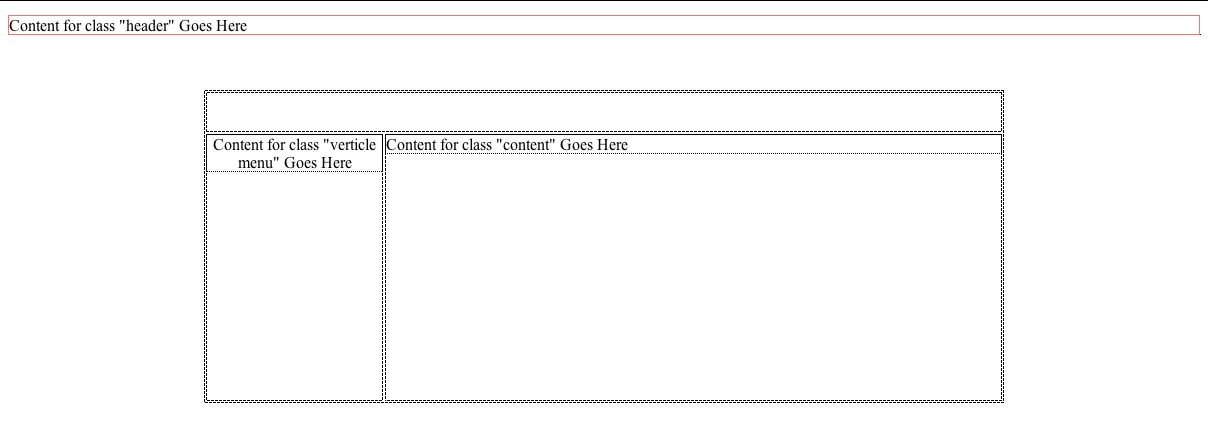
As stated earlier we will create 3 different div's in this lesson: header, vertical menu, and content. You will create a page with a layout table. The header div will sit outside of the table and we will use it to place our logo or a banner if you have one. In the table will be a div that will contain a vertical menu, and a div that will contain the page content. All div's have been named accordingly.
Tutorial
Step 1: Creating the page and layout table
Create a new page and save it. Before creating your layout table you may want to hit the return key so that you will have some room to insert your header div later on. To create a table go to Insert -> Table. Set the properties of the table to the values in the Properties panel below:
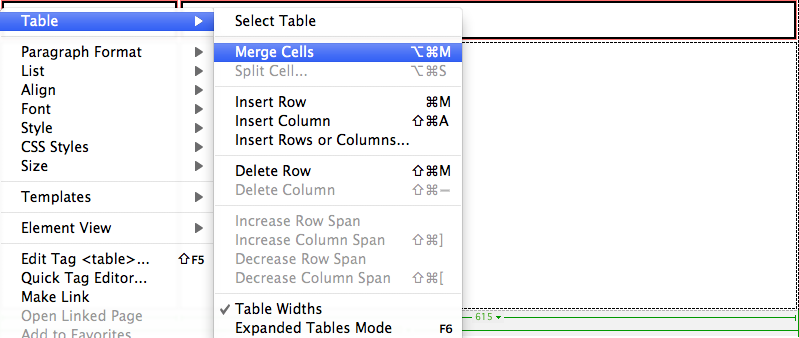
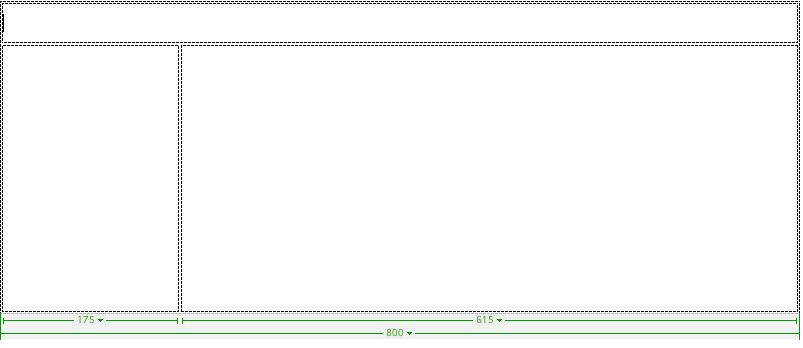
Resize your table, and then go to the to row. Select the top row and then right click on it to merge the cells Table -> Merge Cells
so that you have a table that looks like the one below.
Step 2: Insert the Div Tag's
Before doing anything change your view to Split.
If you do not see the above buttons then go to View -> Toolbars -> Document
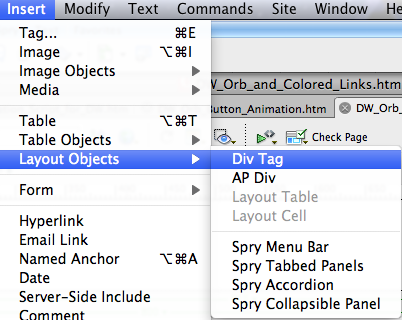
Let's start by creating the 3 Div Tags that we will be using. We want to create the first div above the layout table and use it for our Orb/banner/logo. Click on the page above your layout table and insert the div: Insert -> Layout Objects -> Div Tag
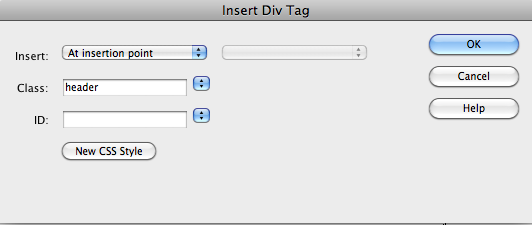
A dialog box will appear once you click Div Tag. Name your div header. At this point you do not need to concern yourself with the ID.
Once you name your Class and click ok the following will appear in the code view:
<div class="header">Content for class "header" Goes Here</div>In the design view you will see something like the selected div below. When it is not selected the div appears as a black and white dotted line:
Using the above step create your "vertical menu" div and your "content" div. Note how the cells were formatted in the table below prior to inserting the div's. The bottom left cell was set to: vertical = "top" and horizontal = "center". In the content cell vertical = "top" and horizontal = "center".
Step 3: Inserting the Code
The first thing to do is to put focus on div header and create a link within the code view. In the case below, we are setting the link to http://www.co-bw.com
<div class="header">
<a href= "http://www.co-bw.com"></a>
</div>
You now need to go to the top of the code and below your title insert the code similar to that below. Note: I have my images contained within a folder and the path is declared. The only things that may be different in your code are the paths and image file names.
<title>Orb Animation</title><style type="text/css"> div.header { background-color: #ffffff } .header a, visited { width: 100px; height: 100px; background: #ffffff url(Images_PS_4/Orb_hover.png) no-repeat; display: block; } .header a:hover { width: 100px; height: 100px; background: #ffffff url(Images_PS_4/Orb_over.png) no-repeat; } </style>Now we need to define the link colors that we want for our vertical_menu div and content div.
I changed the the cell color that the vertical_menu div is embedded in to black. Note the additional properties that were set for the vertical_menu div. All of the code below was inserted inside the <style> block above and below the div.header declarations.
div.vertical_menu {
 background-color: #000000
 }
 .vertical_menu a {
 font-family: Arial, Helvetica, sans-serif;
 }
 .vertical_menu a:link {
 color: #999966;
 text-decoration: none;
 }
 .vertical menu a:visited {
 text-decoration: none;
 color: #CCCCCC;
 }
 .vertical_menu a:hover {
 text-decoration: underline;
 color: #990000;
 }
 .vertical_menu a:active {
 text-decoration: none;
 color: #999999;
 }
Now all that we have to do is declare the content div link values. Again, the code below was placed within the <style> block we created above.
div.content {
 background-color: #ffffff
 }
 .content a {
 font-family: Times New Roman, Times, serif;
 color: #000000;
 }
 .content a:link {
 text-decoration: underline;
 }
 .content a:visited {
 text-decoration: underline;
 color: #999999;
 }
 .content a:hover {
 text-decoration: none;
 color: #990000;
 }
 .content a:active {
 text-decoration: underline;
 color: #000066;
 }
Below is a "live" shot of what you have been working on:
My Table
End.
If you clean-up XHTML then you will want to turn off the remove empty tags or your <a href= "http://www.co-bw.com"></a> that we use in the header will will be deleted. Or you could just insert a . <period> between the a tags and give the period the same color as your background.
Home | Audio | DIY | Guitar | iPods | Music | Links | Site Map | Contact
![]()