|
|
Home | Audio | DIY | Guitar | iPods | Music | Brain/Problem Solving | Links| Site Map
This work is licensed under a Creative Commons License.
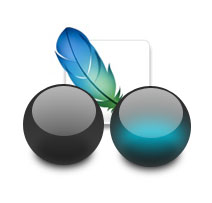
Orb Button Effect - Photoshop/Fireworks: Part I
This set of tutorials will show you how to create a very basic mouse over effect in html/css, and define link properties for different parts of the web page. Therefore this tutorial will spilt into 3 parts:
Orb Button Effect - Photoshop Part I : will show how the button is made.
Orb Button Effect - DW Script Part II: will show on how to make a simple basic mouse over effect with html/css.
Orb Button and Colored Links - DW Sript Part III: will show you how to create div's to use animation and then set specific link colors throughout the pages.**note** this is a very basic tutorial and though we have use Photoshop to create the 2 Orbs that will be used, you can just as easily use Fireworks.
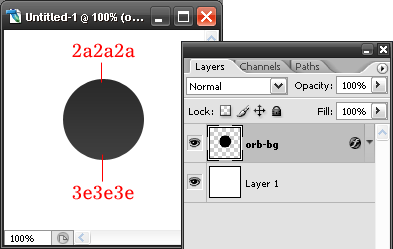
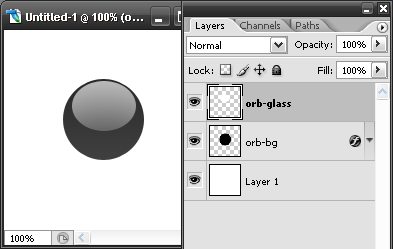
Start by creating a document of any size that you want, as later on we are going to crop it to the desire size. Here for this tutorial, I’ll be using 200×200 px. Fill the background with white color. Create a new layer, name this layer as - orb-bg, with the Eclipse Tool, draw a perfect circle of size similar as shown as the above picture. Give the circle a gradient color of #2a2a2a on top and #3e3e3e at the bottom.
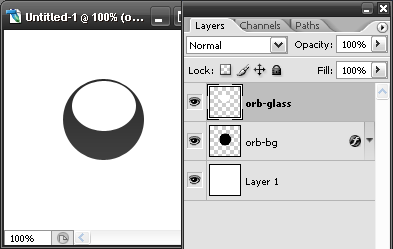
Secondly, create another new layer. Name this layer orb-glass. Using the Eclipse Tool again, draw an oval shape as how it is shown on the above image, with white(#fffff) color fill of course.
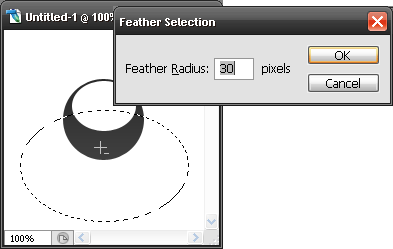
Then use the round marquee tool, draw a marquee selection 1/3 below the orb-glass which was created on step-2, as shown in the image. Open up the feather option by going to Select > Feather or with the shortcut key Ctri + Alt + D. Give it a 30px feather. With the orb-glass layer select, press delete twice.
After the deletion, you will come close to what’s shown in the above image. Change the opacity of the orb-glass if you wanted to.
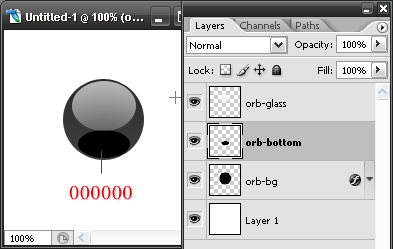
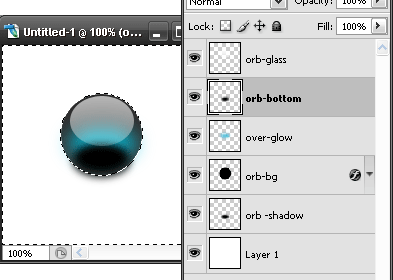
Make another new layer in between orb-glass and orb-bg. Name this layer orb-bottom. Using again the Eclipse Tool, draw a small oval shape at the bottom of the orb with black(#000000) fill. As how is shown on the above image.
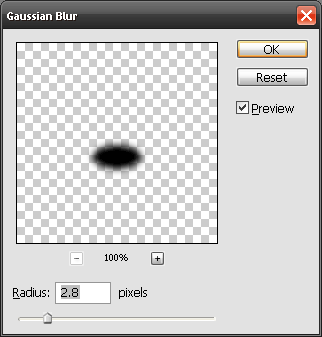
With the orb-bottom layer, selected, bring out the Gaussian Blur window by going to Filter > Blur > Gaussian Blur. Give a 2.8px of blur.
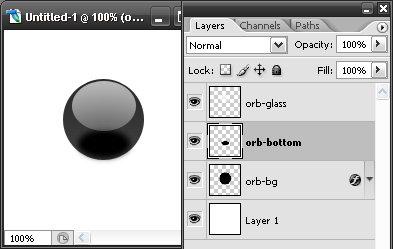
If everything is on the right path, you will have something like is shown on the image. However, it is still not done yet as we are goin to make the mouse over effect glow.
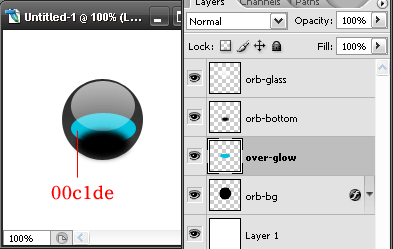
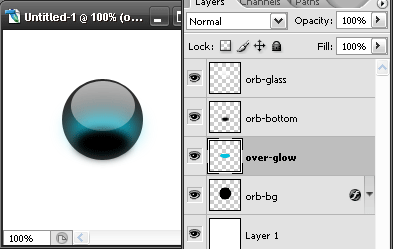
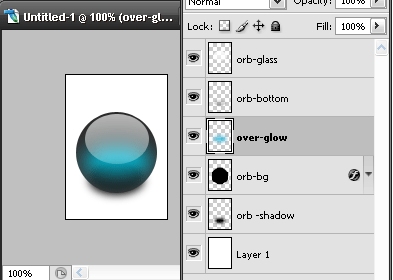
Create another new layer in between orb-bottom and orb-bg. Name this layer over-glow. With the Eclipse Tool, draw another oval shape like what is shown in the image. Of course with the fill color of #00c1de
With the over-glow layer selected, bring out the Gaussian Blur window again, Filter > Blur > Gaussian Blur, this time give a 9.0 px blur to it. Then you will have the glow effect as what is shown on the above image.
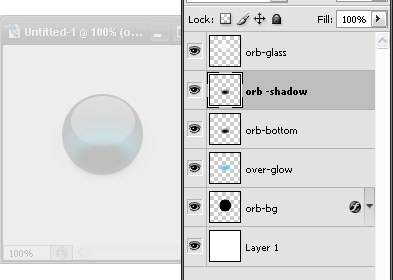
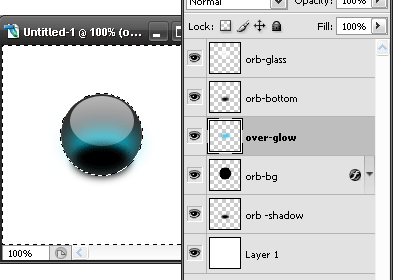
Now, duplicate the orb-bottom layer, name this layer orb-shadow.
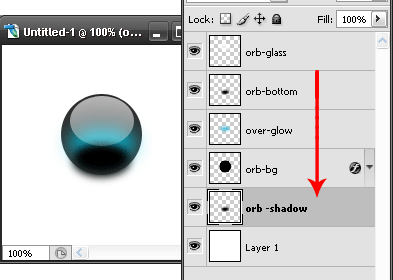
Then, shift this orb-shadow layer down, right below orb-bg layer. With the orb-shadow selected, press the ↓ key around 4 - 5 times to shift the orb-shadow object 4 pixel down.
Now you will have the shadow for the orb done.
Ctrl + left click on the orb-bg thumbnail to have a marquee selection over it. Then Inverse the selection by going Select > Inverse or with the shortcut key Shift + I. With the over-glow layer selected, press Delete to clear what is outside the orb button for this layer.
With the marquee selection still active, select the orb-bottom layer and press Delete again to clear what is outside the orb button for this layer
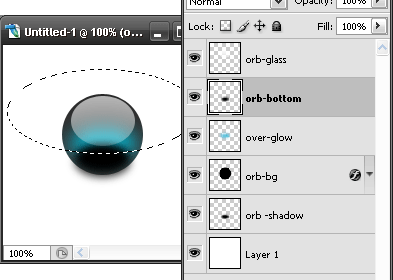
Now the final step to complete the orb button. Using the round marquee tool, draw an oval marquee selection as shown in the image. Bring out the Feather window, Select > Feather or with the shortcut key Ctri + Alt + D. Give again 30px feather. With the orb-bottom layer selected, press Delete twice.
This will be the mouse over effect for your orb button. You can add any icon on the orb if you want to, but for here I will just left it blank.
Now is time to export the required images to be use during the html progress later on

First , crop the images which was done from the above 15 steps to a smaller size. Select the Crop Tool (in case you don’t know, the crop tool is at the tool bar with the logo shown on the small image at the corner. Select the appropriate size to crop. After the selection is confirmed, double click on the selection.
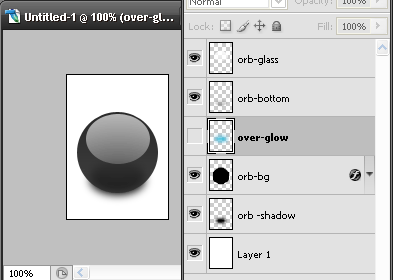
Now to export the default mouse image, hide the over-glow layer by clicking on the eye icon.

To Export, go to File > Save For Web or with the shortcut key Ctrl + Alt + Shift + S, choose your desire option. In here I will use the .jpg file format with 60% quality. Save the file as mouse-active.
Now for the mouse over image. Unhide the over-glow layer by doing the same thing on how to hide it. Again Export, go to File > Save For Web or with the shortcut key Ctrl + Alt + Shift + S, with the same option, save the file by the name of mouse-over.Now we are done with the required images. For the html/css part, please proceed to Orb Button Effect - Dreamweaver Part II
Home | Audio | DIY | Guitar | iPods | Music | Links | Site Map | Contact
![]()