Home | Audio | DIY | Guitar | iPods | Music | Brain/Problem Solving | Links| Site Map
This work is licensed under a Creative Commons License.
Add Internal Blue tooth Capability To Your iPod 4G
by fstedie on December 30, 2007
If you're like me, you've often asked yourself why Apple has not added native Bluetooth capability to their iPod line up. Even the iPhone only supports mono Bluetooth!
Sure, there are numerous adapters that plug into the iPod's dock connector to give you wireless music, but they are clunky, they come off easily, can't use them with your case and you have to charge them separately!
So, here is my way to add "native" internal Bluetooth support to your 4G iPod. The same method may be used with other iPod versions, I leave that up to you.
You can also check out my new Bluetooth 5G iPod Video at iPodHackers.net
Required: A steady hand and decent soldering skills. Oh, and you must be willing to live with the possibility that you will destroy your iPod. I'm not responsible if you screw up and burn up your iPod!
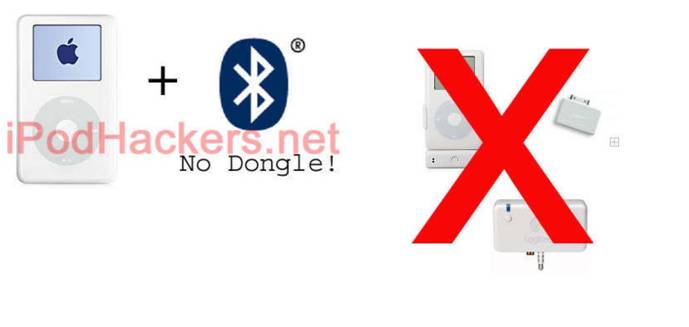
Step 1: What You Need Materials and tools:4G iPod Voltmeter A few lengths of hook-up wire Phillips screwdriver Torx screwdriver Xacto knife or razor blade 4G 20GB iPod 40GB/60GB iPod metal casing (optional) Jabra A120S Bluetooth Music Adapter** Bluetooth stereo headphones (A2DP compatible)
** Make sure to pair the adapter to your headphones prior to starting this project, it will make testing much easier in the end** Note: I am using a 20GB iPod which I have already converted to use Flash memory (see my instructable on how to do this). Removing the original 20GB drive gives me enough room to install the Bluetooth circuit board. If you want to keep your hard drive, you might want to procure a 40GB or 60GB backing for your iPod so that you have enough room.
Image Notes
1. Jabra A120S, charges via mini USB and is controlled by a single-button interface.Step 2: Open Your iPod
There are plenty of instructions on the web outlining the best ways to crack open your iPod so I'm not going to do so here. I'm guessing that if you're willing to do this hack to your iPod, you already know how to open it. So, switch your iPod to "hold" and open it.
Once open:
Disconnect the battery
Disconnect the ribbon cable for the headphone/hold jack
Disconnect and remove the hard drive.
Image Notes
Take your time. Use a non-marking tool to get it started and the flat head to finish the job.
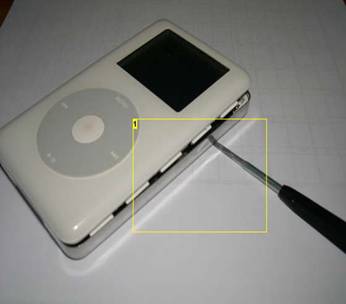
Image Notes
Unplug and separate. Be careful, the ribbon cable and connector separate easily!
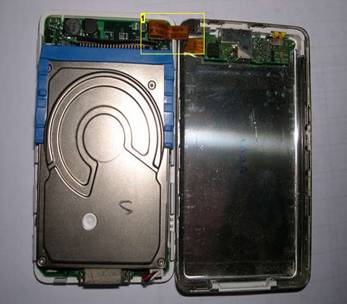
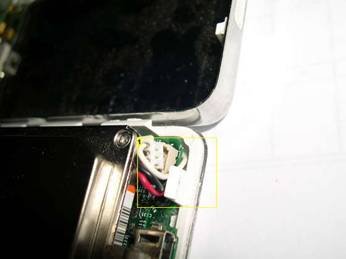
Image Notes
1. Unplug the battery before removing the drive and do not plug back in until completely finished with the soldering.Step 3: Modify Headphone Jack
The Jabra unit usually gets its input through a standard mini headphone plug but we'll be connecting directly into the iPod's headphone jack circuit board so take your small Phillips screwdriver and remove the whole assembly from the metal backing. Don't lose the screws!
Using your tiny Torx screwdriver, remove the while plastic bezel from the circuit board.
Locate the Ground and Right/Left channel pins on the circuit board and solder three wires approximately 3" long. These will go to the Jabra Bluetooth circuit board. Trim a small portion of the white plastic bezel as shown to allow room for the wires.
Image Notes
Remove assembly from case by removing three Phillips screws.
Remove plastic bezel from circuit board by removing two Torx screws.
Image Notes
BEFORE: back of headphone jack assembly.
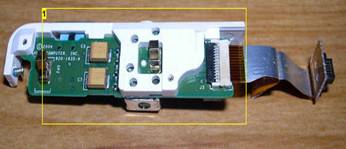
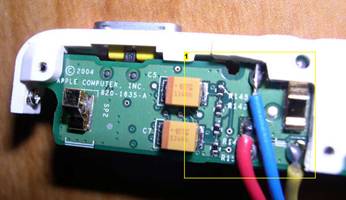
Image Notes
1. AFTER: Back of headphone jack assembly after soldering of wires. Note that you will need to trim the plastic to allow room for the wires.
Image Notes
1. Positive and Negative Power from iPod Battery
2. Left, Ground, Right channels to iPod headphone jack.
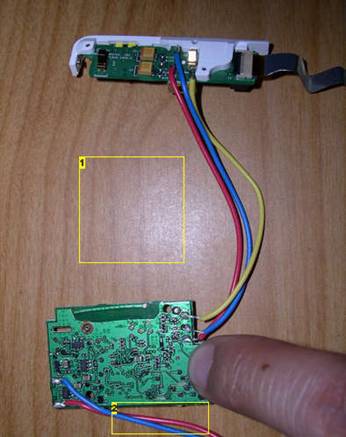
Image Notes
1. Completed assembly
2. To iPod battery power via C22 pads on circuit board.Step 4: Modify the Bluetooth Adapter
Remove the two Torx screws from the Jabra unit and use a small screwdriver to crack open the case.
Carefully remove the battery from the back of the case and/or simply remove the two wires at the circuit board. We won't be needing the battery anymore since we'll be tapping into the iPod's battery!
Using your soldering iron, remove the three wires of the input cable.
If you're keeping your hard drive, you may need to remove the USB connector from the Bluetooth circuit board to give yourself a bit more room. The connector is only used for charging the unit so you won't be needing that either. Using the flash card I I had plenty of room so I kept it.
At this point you may or may not decide to keep the original pushbutton switch. I am sure you can replace it with a bigger separate switch, but I wanted to keep my iPod looking stock. Maybe I'll add a switch if I can find one that is small enough to put on top of the unit.
Image Notes
Remove the two screws and use a small flathead to crack it open (there is a little bit of glue).

Image Notes
Battery is glued to the bottom, carefully pry it out.

2. REMOVE
Image Notes
3. REMOVE
1. From top: Left, Ground and Right channels.

Image Notes
1. Put these in your junk drawer, you won't be needing them.Step 5: Connect Your Bluetooth Adapter To The iPod
If you haven't already done so, solder the three signal wires coming from the headphone jack to the circuit board. You did remember to make a note of which wires were which right?
Take another two 4" wires and solder them to the battery input terminals of the Jabra board. It turns out that the voltage of the Jabra battery is almost identical to the voltage output of the iPod battery so we simply need to jack into the iPod board for power. Although I would later like to wire into a switched-power location (probably from the HD adapter), I probed and found that the two empty pads next to the battery connector would work fine (labeled C22). I don't know what part of the circuit this is but I decided to take a risk and wire into it anyway since I figured the current draw from the Bluetooth adapter is not that great. It worked just fine.
Image Notes
Completed assemblyTo iPod battery power via C22 pads on circuit board.
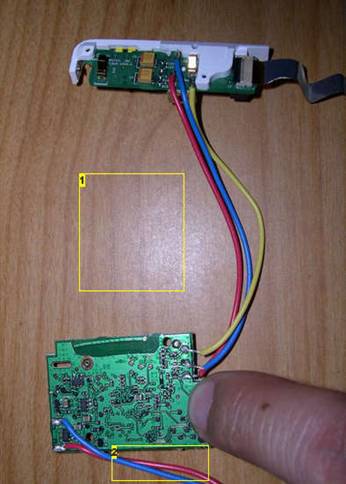
Image Notes
Sorry for the bad picture, but you will find the empty C22 pad set here. Double check your polarity with the battery plugged in using a Voltmeter (just in case I'm wrong). You should see approximately 3.9V

Step 6: Modify iPod Case And Reassemble iPod
I decided to use the switch on the Jabra board by drilling a small hole into the side of the iPod case. Once closed I will need to use a pen or something in order to activate the switch, but that is OK for now since I will only need to use it every once in a while.
Reassemble the headphone jack and re-install into the metal case. Plug the ribbon cable for headphone jack back in. Using piece of foam tape, attach the Jabra circuit board to the inside of the iPod case as shown. Connect the iPod battery and make sure nothing is smoking.
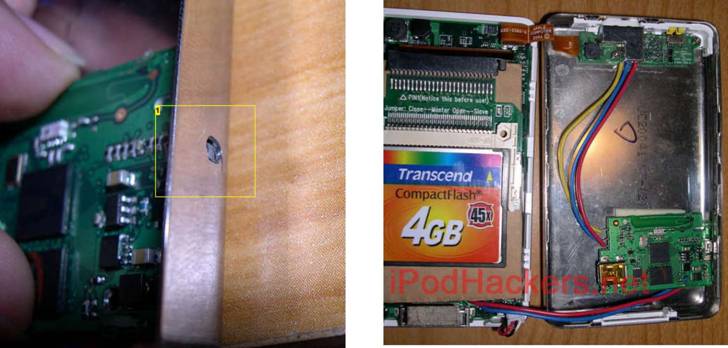
Image Notes
1. I drilled a very small hole to allow me to access the switch on the Jabra and to be able to see the LED.Step 7: Testing
Before you close the case, turn on the iPod and play a song. Turn on the Bluetooth adapter and verify that you get the blinking blue light.
If all went well, you should now be hearing the song through your wireless headphones. I am using Sony Eriksson's HBH-DS200 bluetooth headphone receiver module but you can use any A2DP-compliant stereo headset such as the Motorola S9, etc.
Close the case and enjoy.
SUCCESS!! I introduce to you the world's first stereo Bluetooth-Enabled iPod. Note: Once you close the case you really don't need to use the switch on the Jabra Bluetooth anymore unless you're planning on pairing another set of headphones. If you turn off your wireless headphones, the Bluetooth module will go into standby/sleep mode. According to Jabra, the tiny stock battery is good for up to 250 hrs of standby time. Hooked up directly to the iPod battery, I imagine you'd get over 500 hours standby (that's over 20 days!).
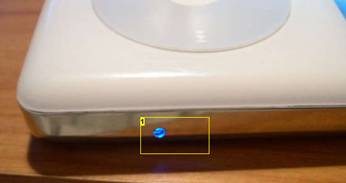
Image Notes
1. Oh yeah, blue means i'm streaming music!
Home | Audio | DIY | Guitar | iPods | Music | Links | Brain and Problem Solving | Site Map | Contact