|
|
Home | Audio | DIY | Guitar | iPods | Music | Brain/Problem Solving | Links| Site Map
This work is licensed under a Creative Commons License.
In this tutorial I will show you how to create a nice loking and professional navigation for a
website.STEP ONE
Start with a New document, I usually start with 800 X 600 pixels and select the Rectangle tool.
STEP TWO
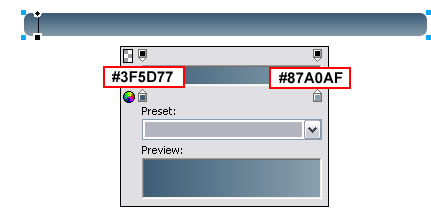
Now, draw a rectangle - 405 pixels of width and 25 pixels of height. Border should be 2 pixels, 1-pixel-soft style and the color #FFFFFF. Set background to Gradient -> Linear with the colors marked on the picture below and place the background like on the picture below, too.
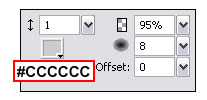
STEP THREEAfter you’ve done that, select the rectangle and set roundness to 60. Select the rectangle again and add the glow effect on the properties panel and change the numbers just like on the picture below.
STEP FOURNow, we’re ready to make borders on the navigation rectangle. Select the Line tool (press N) and draw a line - 22 pixels of height and 1 pixel of width. Background is transparent and the border color is #2C4052 and set border to 1; 1-pixel hard. Now, copy-paste that line and just change the border color to #7F99A9, and place the second line next to the first. See the picture below (zoomed to 800%).
STEP FIVESelect those two lines and place them on the navigation rectangle. See the picture below.
STEP SIX
Copy and paste those two lines as many times as you want and place them on the navigation rectangle so you’ll have “sections”.
STEP SEVEN
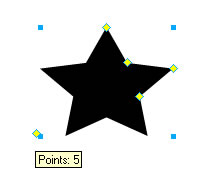
After that, select the Star tool (it’s in the same item place where’s the Rectangle tool and others) and create a Star. Click the Points spot (and hold it) and rotate untill you have 3 points so you have a triangle.
STEP EIGHT
After youve created a triangle, select the triangle and rotate it for 180 degrees (go to Modify on the top -> Transform -> Rotate 180 degrees). Select the triangle and set background to #FFFFFF and its size should be 7 pixels of width and 3 pixels of height. Now, move that triangle on the top of the first section of the navigation rectangle and you have something like I do on the picture below.
The navigation’s done and place any text you want in those sections.
Home | Audio | DIY | Guitar | iPods | Music | Links | Site Map | Contact
![]()