|
|
Home | Audio | DIY | Guitar | iPods | Music | Brain/Problem Solving | Links| Site Map
This work is licensed under a Creative Commons License.
Create a selective JPEG mask
In Fireworks, you can create and save a selective JPEG mask to indicate how the area covered by the mask is to be compressed during export. The mask in this tutorial will be compressed very little to enable the masked area to appear as high quality. The rest of the image will be compressed more to reduce overall file size. This feature usefully blurs areas of less importance and makes important areas appear sharper.
In the following sections, you will create and save a selective JPEG mask, define quality settings for the mask, choose optimization settings for the parts of the image not covered by the mask, and export the image as a JPEG file.
Note: You can save only one selective JPEG mask in a Fireworks document.
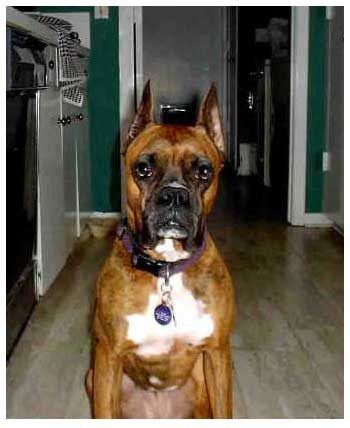
| 1 | From your browser, save the image shown below on your computer by doing one of the following: |
| In Windows, right-click the image and choose Save Image As from the pop-up menu. Then, in the Save As dialog box, navigate to a folder in which to store the image, type a name for the image, choose PNG file format, and click Save. | |
| On the
Macintosh, drag the image from the browser page
and drop it on the desktop.
|
|
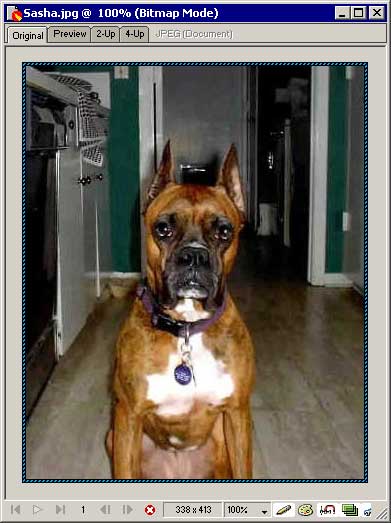
| 2 | In Fireworks, choose File > Open, navigate to the image, and click Open. |
| A blue striped
border appears around the outer edge of the canvas
to indicate that Fireworks is now in bitmap
mode.
|
|
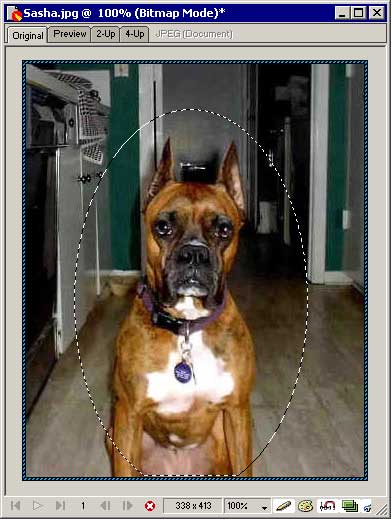
| 3 | Click the
Ellipse Marquee tool.
|
| Drag to select
the area to export with high quality.
|
|
| 4 | Choose Modify > Selective JPEG > Save Selection as JPEG Mask. |
| The Selective
JPEG mask appears as a translucent red
object.
|
|
Home | Audio | DIY | Guitar | iPods | Music | Links | Site Map | Contact
![]()