|
|
Home | Audio | DIY | Guitar | iPods | Music | Brain/Problem Solving | Links| Site Map
This work is licensed under a Creative Commons License.
Create a Linear Gradient Background Using Fireworks
Ron McComb
You can create a very professional looking Web page using Fireworks. This tutorial will show you how to create the linear gradient vertical bar, import it into Dreamweaver, and then create the page with a centered body.
Note: All of the images on this page have been optimized to 73%...hence, some blurriness.
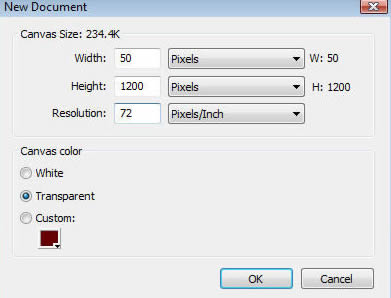
Step 1
Open Fireworks, and create a new document. Set the Width to 50 pixels, Height: to 1200 pixels, Resolution to 72 Pixels/Inch, and give it a Transparent background. You will set the Width to 10 pixels once you create the image, but for now you need to have a large canvas to work with. Here are the settings:
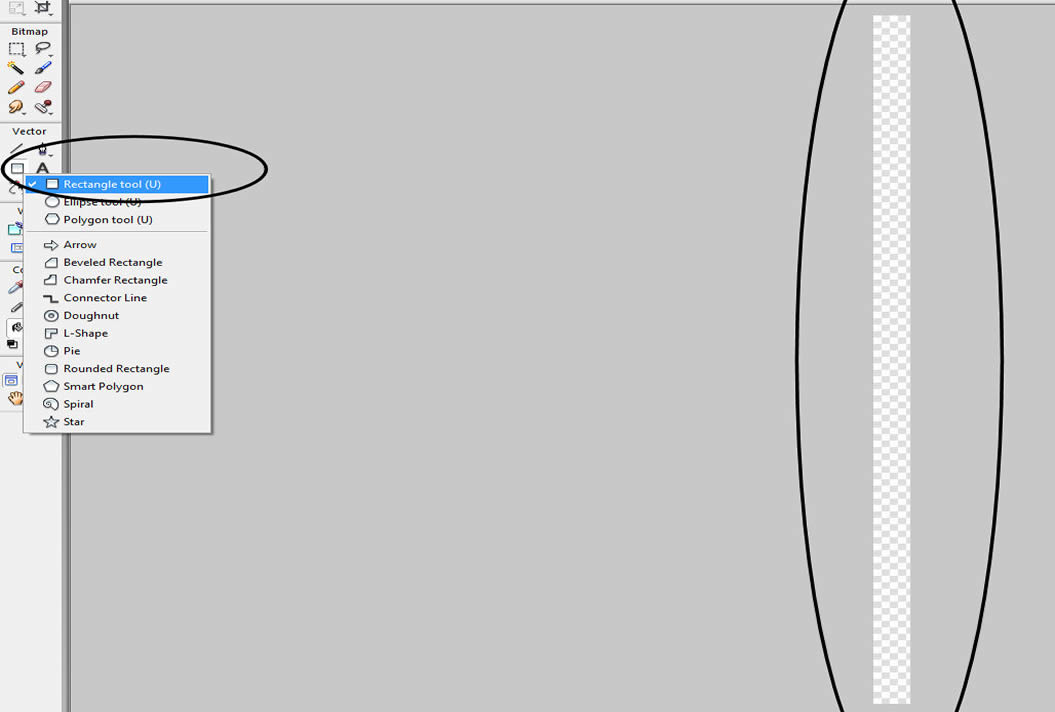
Step 2
Before you perform the next step notice the appearance of your canvas...the vertical checkered rectangle. Once your canvas looks like this go the your tool bar on the left and choose your Rectangle tool as shown in the image below.
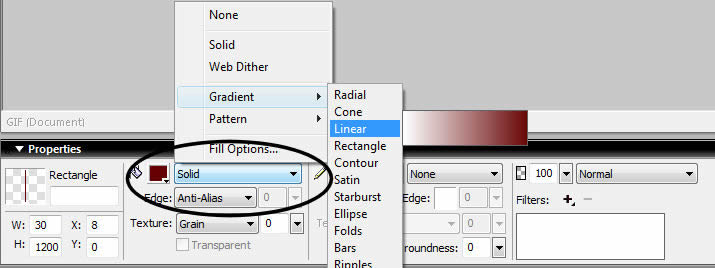
Step 3
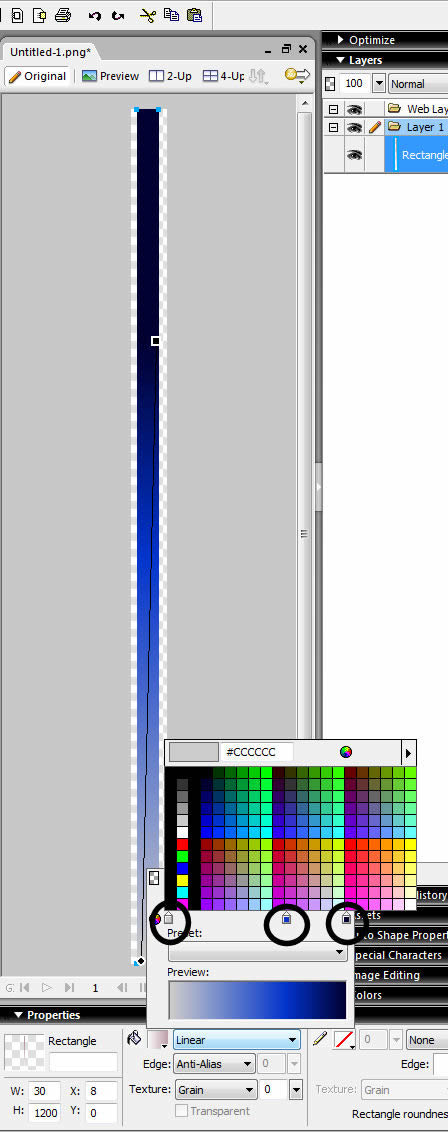
Draw a rectangle that will fit within your canvas, and then go to the Properties bar and select Gradient > Linear
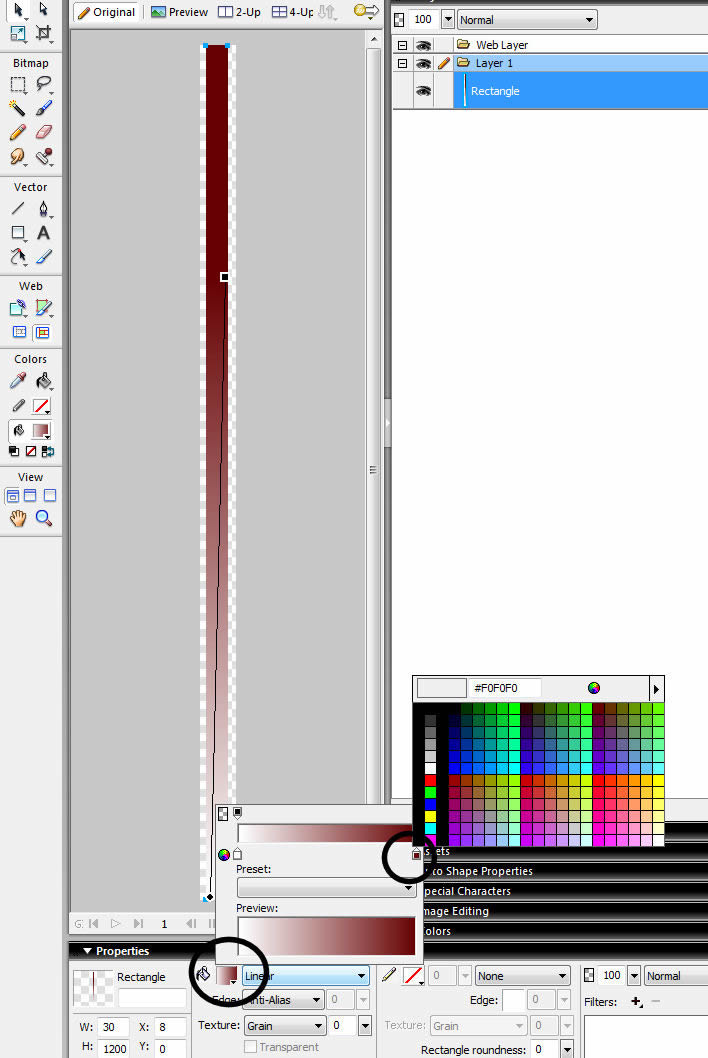
Step 4
When you created the Linear gradient the Fireworks created a small square and a circle joined at the center of your image. Select the Pointer Tool in the upper top left corner of your tool bar to manipulate how you want your image to look. Grab the circle and drag it to the bottom of your image. Now grab the small square and move it toward the top of your image. Things may not line up like you want, but don't worry about this.
Step 5
To change the colors of your vertical just click on the lower pointer of the colored gradient (see image above) and select your color. To give it greater color depth you can insert an additional color by clicking on the color gradient where you would like the new color to begin (see image below) and a new pointer will appear, again choose the color that you want. Finally, add the bottom color by clicking on the pointer. In this example we have three colors, and have finished the vertical bar. Try experimenting with different color combinations to maximize your desired effect.
Step 6
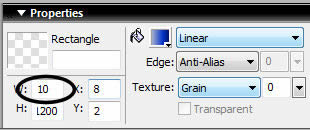
Let's now narrow the width of the bar. Go to your properties bar and set the Width to 10 (pixels).
Step 7
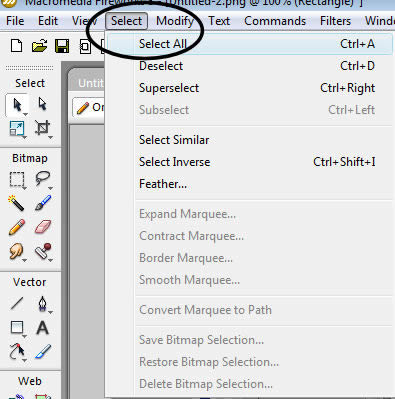
Now we need to clean things up. The first thing to do is to go to the file menu bar and Select All
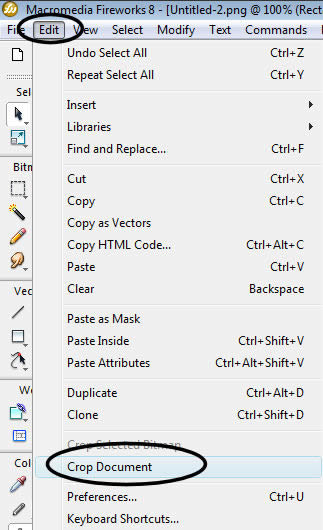
Now go to the Edit and select Crop Document
Finally, before we start importing into Dreamweaver we need to save the file into the Images folder of our site. Save the file as a jpg or gig. Better yet, you can optimize the image by exporting it to the Web...merely go to File and select Export Wizard.
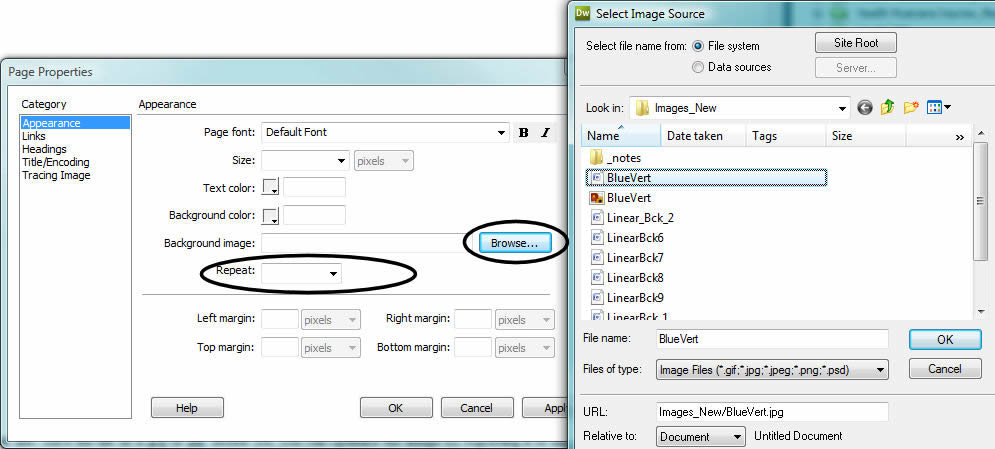
Step 8
Now we are ready to build the page. Create a new page, and then select Page Properties by going to the Modify in on the main menu or Page Properties on your Properties bar. Once you are in the Page Properties, then you want add a background image. Select the vertical bar you just created, and set the Repeat to "Repeat-X"
This is what it should look like:
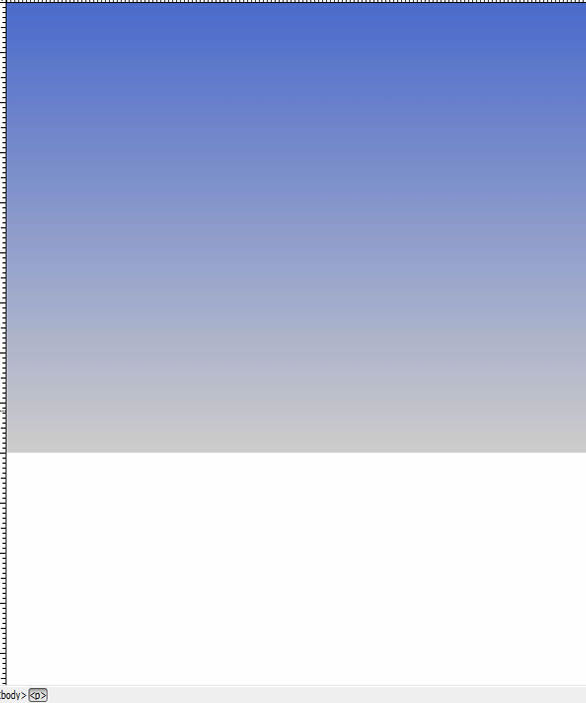
Step 9
After you apply your vertical bar you will get a page that looks like the one below...this is the bottom portion of the page. Note the white space below the bar. Remember the bar only goes down to 1200 pixels. Now we need to color the background of the page so that it matches.
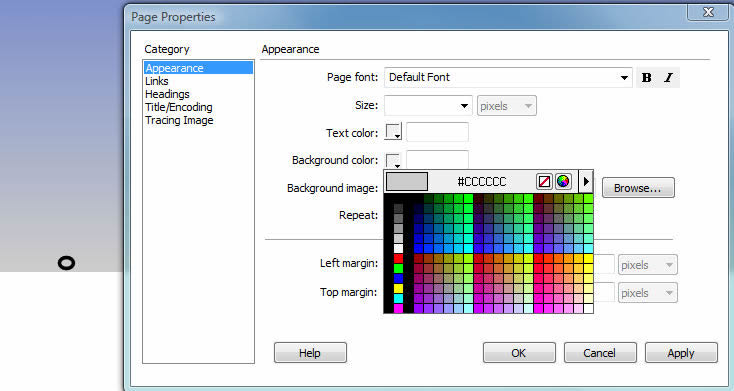
Got to the page Properties bar and select background color. Drag the eye-dropper over to the bottom of the bar, where the circle is drawn and select the color. Apply.
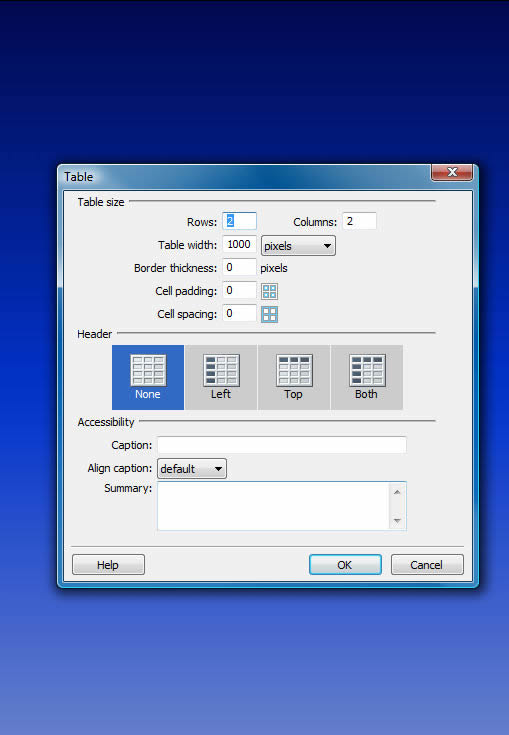
Step 10
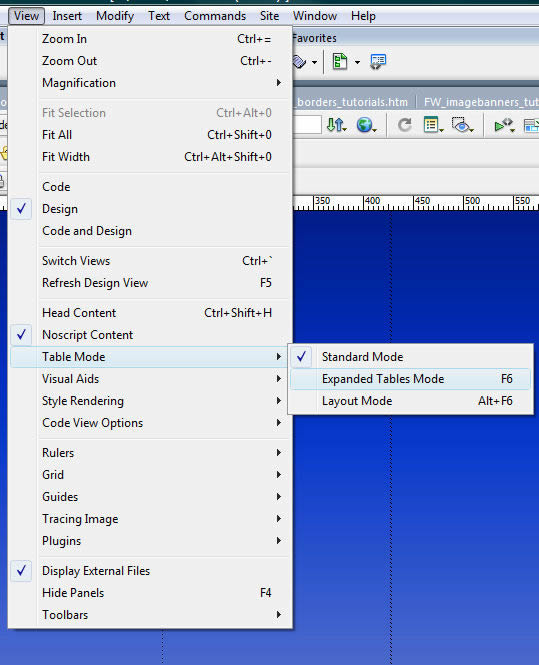
Before building a layout table make sure that you are in Expanded Tables Mode.
Create a table with the dimensions below. Note the Cell padding and Cell spacing.
After merging some cells, centering the table, adding some color to the cells we are left with something like this. This table is being viewed in Design mode. Once you view it in the browser, then the edges will disappear and the cells will appear seamless.
Experiment with different color schemes, but most of all enjoy.
Home | Audio | DIY | Guitar | iPods | Music | Links | Brain and Problem Solving | Site Map | Contact
![]()