|
|
Home | Audio | DIY | Guitar | iPods | Music | Brain/Problem Solving | Links| Site Map
This work is licensed under a Creative Commons License.
Running Puppy Linux inside OS X
Sometimes it's nice to have a secure and familiar OS that you can use from any machine. Puppy Linux is just that: a really lightweight, CD-based Linux distribution, designed for maximum portability. If you're using a PC, you simply boot and run Puppy Linux from a CD, storing your settings and changes to a file on your hard disk or flash drive. What's awesome is that it's so compact, you can fit an emulator, the CD ISO, and the save state files all on a flash disk or SD Card, making it one tiny little OS package that you can carry in your pocket.
Using Q, the OS X port of the QEMU virtual machine, you can create a small footprint, virtual Puppy Linux box that will run under OS X and fit on a flash drive. In addition to its portability, this is one of the easiest ways to get Linux running on your mac.
You could have a little portable Linux box running on your Mac in a half hour. So let's get started.
Download Puppy ISO and Install Q
- Go to the Puppy Linux download page and get the latest ISO (currently 3.0) - Link
- The latest Q version and documentation is here - Link
- Grab the latest stable build, and copy the Q app to your Applications folder
Make a New Guest (Virtual) PC
- Run Q, then click Guest PC -> New Guest PC
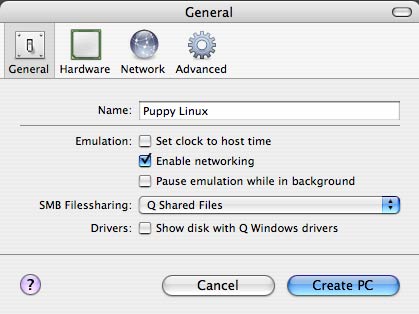
- Call it Puppy Linux (or whatever), and select Q Standard Guest as the OS type/
- Under general, unselect "set clock to host time".
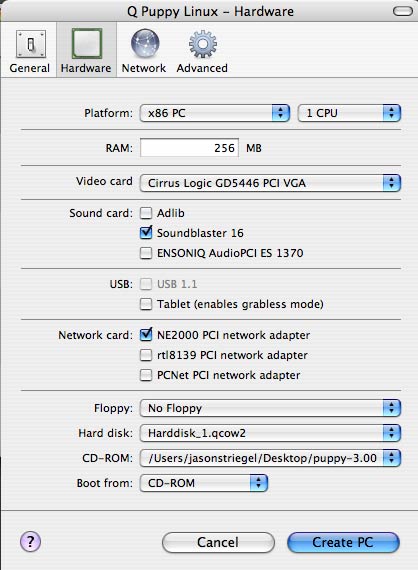
- In the Hardware tab, set your RAM size to 256MB, pick the Soundblaster if you need audio (it eats a lot of CPU, so leave it out if you have a slow machine).
- Make a hard disk image that's appropriate for your storage device. I'm making a 1GB file that I can put on an SDCard. You probably don't need anything near that much, since Puppy only stores save data there and promarily runs from the ISO. The qcow format will start out small, and grow to the file size you specify.
- Under CDROM, select the Puppy Linux ISO that you downloaded.
- Make sure to select Boot from CD-ROM. Puppy is set up to boot from CD and store saved settings to disk.
Start the Puppy Linux Install
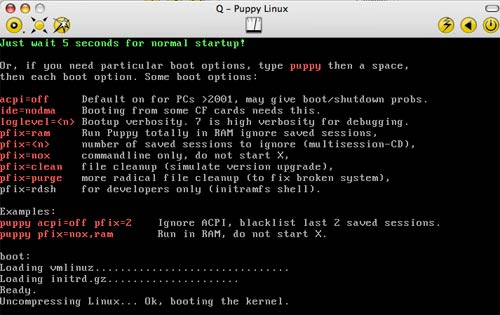
When you've finished updating the settings, click the little play icon to start booting from the ISO image. You'll see the normal start-up stuff, and it'll ask you a couple questions before booting X Windows.Note: choose the XVesa server as your X server. The Xorg server didn't seem to work for me and I had to restart the virtual machine.
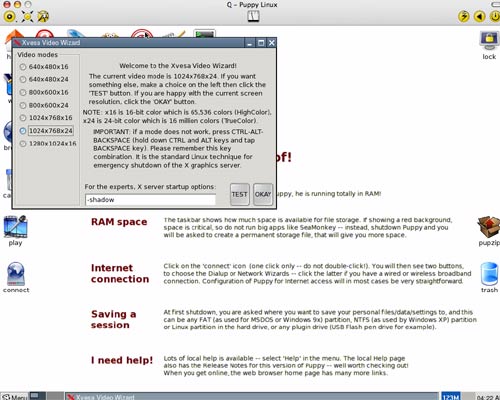
Once X Windows loads, you'll get to choose your video resolution. There weren't any widescreen resolutions enabled by default, so I'm using 1024x768, which fits in a decent sized window.
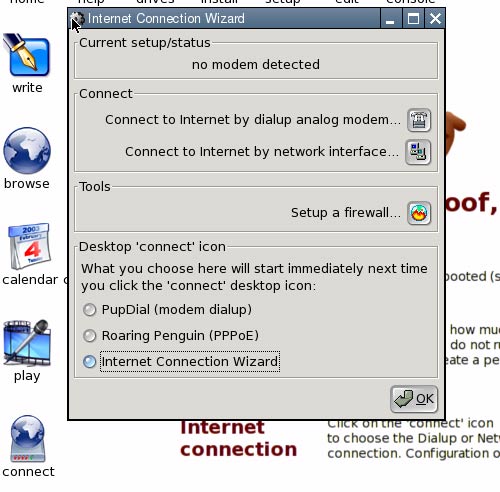
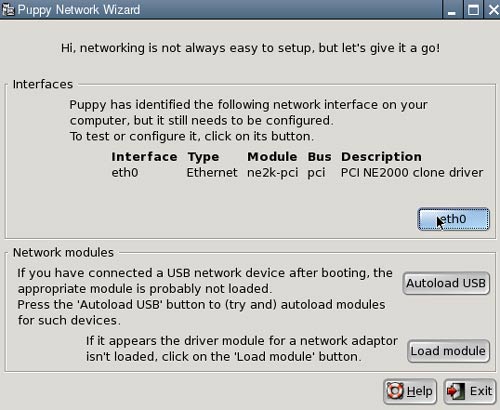
Network Setup
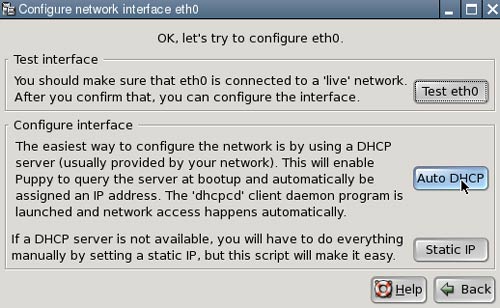
You'll also want to set up your network connection at this point. Just click on the connect icon, select the eth0, and set it up to use DHCP.
Format the Virtual Hard Disk
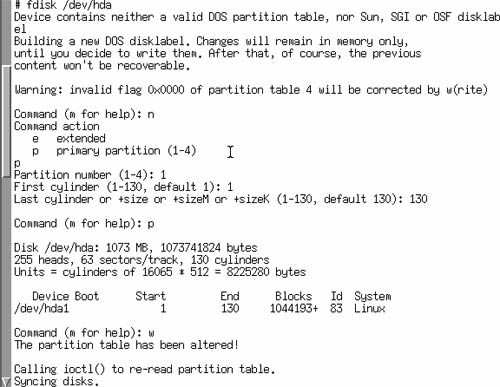
This is the only really technical step. Inside the virtual machine, Puppy can't see your real harddisk or thumbdrive. Instead, we've created a virtual disk image that the emulator is able to see. At this point it's just a raw drive that hasn't been partitioned or formatted, so we'll be making a ext3 partition on it. This will house all of Puppy's save state information and is updated every time you shut down the Linux OS.
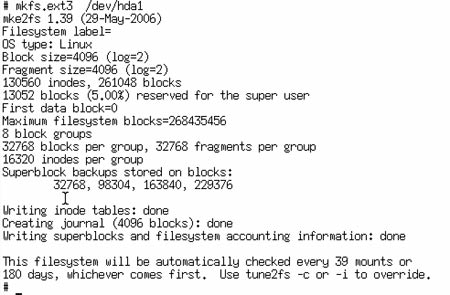
Click the console icon on the Puppy desktop to get a terminal window. Then use fdisk and mkfs.ext3 to partition and format the virtual disk. Your virtual disk will show up as /dev/hda. Refer to the images to see the details, but the cheat sheet is below.
# fdisk /dev/hda
n
p
1
return
return
w
# mkfs.ext3 /dev/hda1
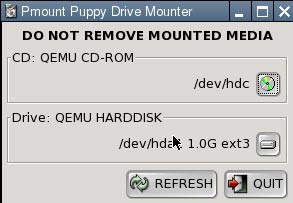
Finally, exit the console, and click on the drives icon. Select the /dev/hda1 disk you just made. It will now be mounted and available within Puppy.Tell Puppy to Save to the New Virtual Disk
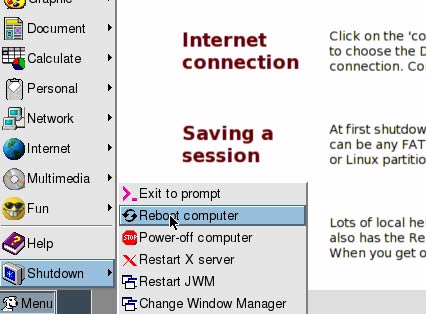
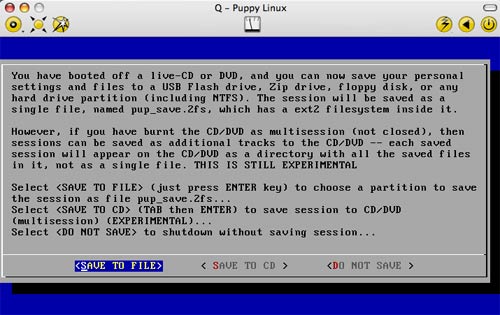
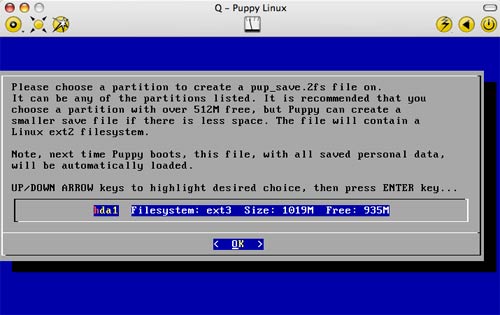
Reboot the OS from the Puppy menu and you'll be prompted to save your session. Choose the hda1 disk you made, and choose a save size that's smaller than the full disk size.
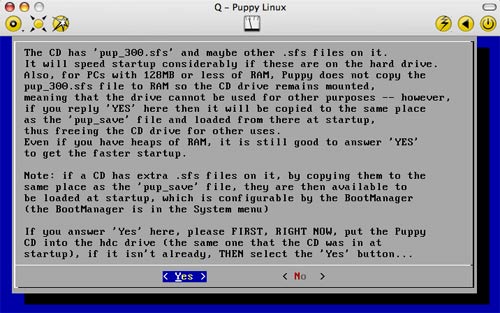
After you've chosen your save options, you'll also be asked to copy some of the data from the CD ISO to this drive. Puppy doesn't know you're using a disk-based ISO instead of a CD, so it normally caches this stuff in RAM. To save a little RAM, choose "Yes" to copy this to your virtual disk. Puppy will treat this like a normal file and you'll save some extra RAM and have a faster startup.Puppy should then reboot with your saved settings intact. If Puppy stalls during boot saying it's loading from the hard disk, you need to go back and make sure your settings are configured to boot from the CD ISO.
Put your Puppy on a Flash Drive
You may want to copy the Q application binary, Puppy ISO, and virtual machine files over to your flash drive. This will let you run your private OS on any mac you happen to be on. You'll need a little space. The Q virtual machine is about 25MB. The Puppy ISO is about 100MB, and your virtual machine files will grow to the size of the hard disk you created. Depending on how big of a drive you make, you should be able to squeeze everything on a 256-512MB drive quite easily.
Do the following:
- Copy Q.app from the Applications folder to your flash drive
- Copy the Puppy ISO to your drive
- You'll find the virtual machine state file (.QVM) in your Documents/QEMU folder. Copy that one too.
My SD Card drive is pretty slow, so an alternative is to put the Q binary and the ISO image on a CD. Doing this will shorten your boot time, as well as the time to load any applications from the ISO image.
Update the .QVM Package's CD Path
However you set things up, you'll need to edit your virtual machine config and adjust the settings to point to the new location of the ISO. This is most easily done by editing the configuration.plist file inside the .QVM package.
Just right click the .QVM file on your flash disk, and click "Show Package Contents." Open the configuration.plist file in TextEdit or Property List Editor and look for the long string that contains the parameters for the virtual machine. If you adjust it so that it contains "-cdrom puppy-3.00-seamonkey.iso" instead of a full file path, you can move the ISO file right inside the QVM package and have a self contained package that contains both the ISO and hard disk image.
You can now hop on any computer, run Q.app from the flash disk, and then drag the .QVM file to the Q icon on the taskbar. Your private little Linux box will boot right up! For bonus points, drop a Windows and Linux QEMU executable on the drive too. You should be able to boot your same Linux virtual machine on all three platforms. How slick is that?
Other Resources:
Lifehacker's Taking Puppy Linux for a Walk - Link
Puppy Linux downloads and community forum - Link
Q (QEMU for OS X)- Link
QEMU open source processor emulator - Link
Home | Audio | DIY | Guitar | iPods | Music | Links | Brain and Problem Solving | Site Map | Contact
![]()