|
|
Home | Audio | DIY | Guitar | iPods | Music | Brain/Problem Solving | Links| Site Map
This work is licensed under a Creative Commons License.
Make Your Own Patch Cords/Cables
If you are into building your own effects pedals one of the first obstacles is connecting everything with the appropriate patch cord. The problem with buying patch cords is 1) it is hard to find that perfect length, and 2) the cost. Here is a simple project for the beginning DIYer. You can create top quality patch cords at a fraction of the cost of buying them.
First of all, the cheapest place I've found for cable and connectors is http://www.redco.com Thanks to Chris Burnell for that recommendation. They've been great every time I've ordered.
I'll document the process here for your typical pedal patch cable. The process is exactly the same for a 25' instrument cable, there's just more cable in between your connectors.
Here's a 90° connector, assembled and disassembled. This is the most basic connector available and cost about $1.00. You can get gold plating, colored boots, etc. if you're in to any of that. A solid metal plug is probably a good idea if your stuff gets used hard.
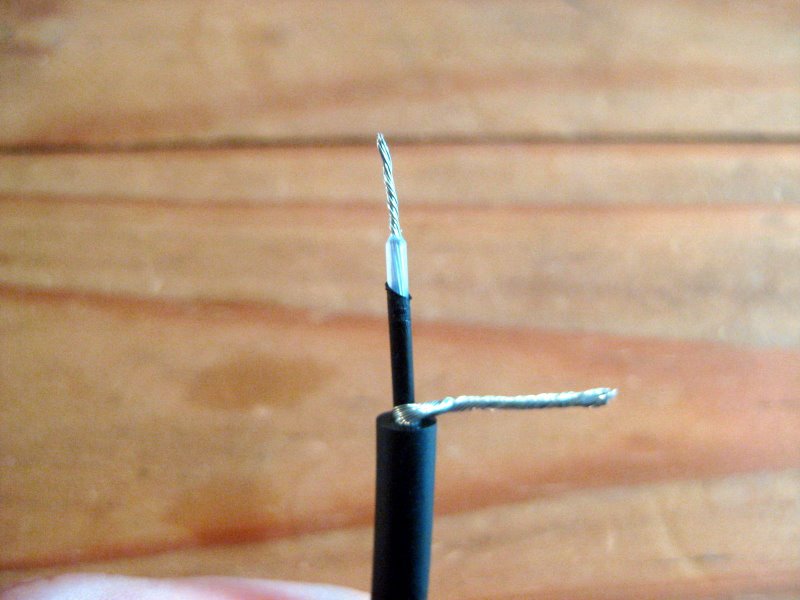
So, it's pretty simple! We need to make two connections. The tip (signal) , and the ground. Stripping the wire properly is important. Step 1 is to strip back the outer most insulation. This will expose the mesh of ground wire. Twist this off to the side. Next you have another black layer of PVC insulation that is extremely thin. it's here to help with microphonics. This layer is actually conductive so it's crucial that it is stripped back further than the clear inner insulation. If you strip the inner black/clear layers to the same length, it's possible the conductive PVC layer could contact the tip which would cause problems. Of course the final step is to strip some of the clear insulation and twist your center conductor. When you're done, your cable should look like this! Adjust the lengths of wire and strip for your connectors. Every one is a little different.
Now you're ready to make some connections!
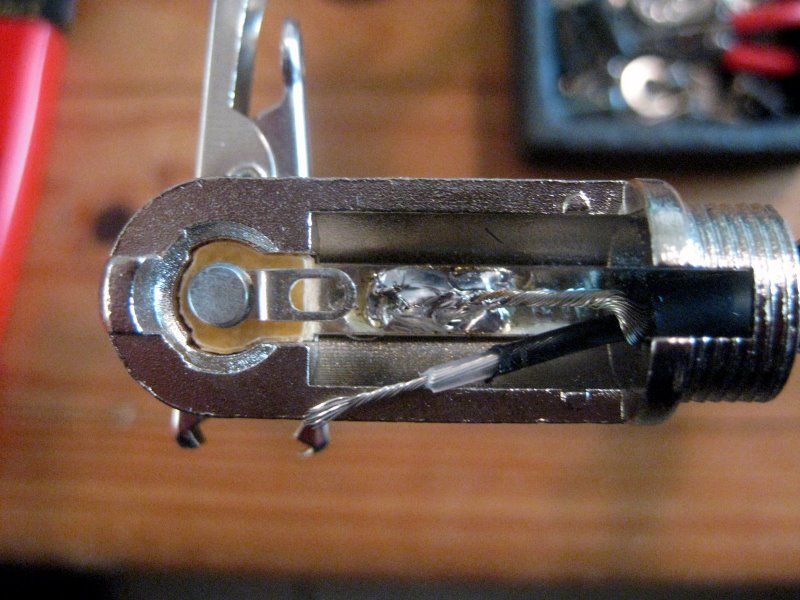
First I make the ground connection. I like to go nuts with this connection because, well, why not? The easiest way I've found is to make a little pool of solder on the plug. Then tin the ground wire. Then place it on top of the pool and heat them simultaneously. It'll suck down and make a nice solid connection. Like this!
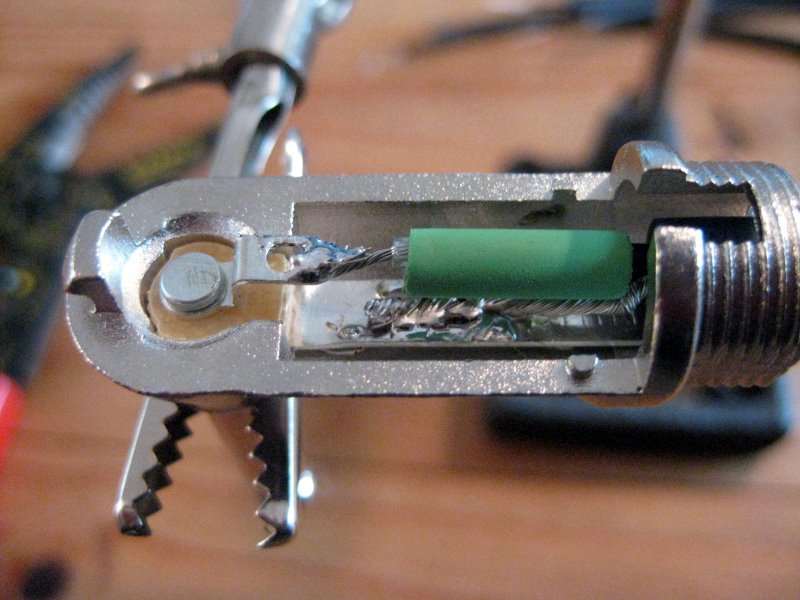
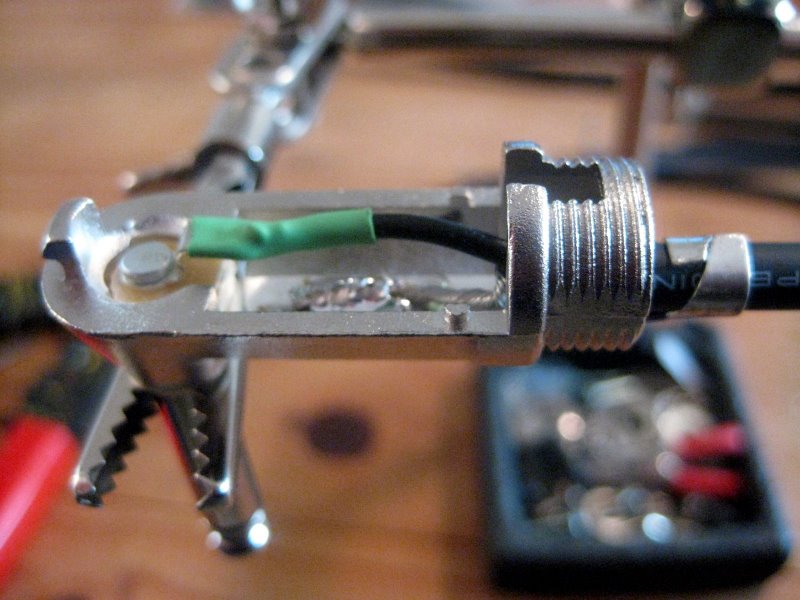
Next you'll connect the signal wire. I like to use a little heat shrink here although I'm sure it makes no difference. If you are going to use heat shrink, obviously you have to slide it on before making the solder.
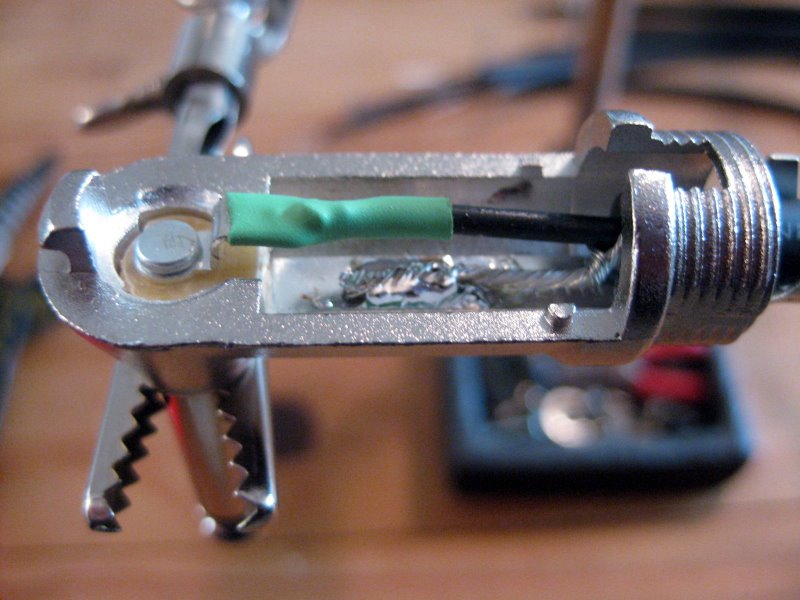
The next step is to crimp the cable to the connector and incorporate some stress relief. I simply crimp the cord lightly, then slide it to allow some slack, then finish the crimp. You can see the slack in the signal wire.
Re-assemble the connector and you're done! REMEMBER!!! (can't stress this enough) that when you go to do the 2nd connector you have to slide the "boot" on first.
A few notes. The mogami "mini" instrument cable is about 1/2 the cost of standard and is great for patch cables. It does 180° bends nicely. For the 25' cables I used the standard mogami cable and the new Neutrik "silent" jacks. They are phenomenal. They work exactly as advertised.
Total cost to build a patch cable like this is under $3. Compare to a Mogami/Neutrik cable at $20 in the store. The 25' cable with the Neutrik Silent jack is ~$80 in the store and under $30 like this.
So if you want good quality cables, it's worth it to build them yourself. Plus, it's easy and fun!
Home | Audio | DIY | Guitar | iPods | Music | Links | Site Map | Contact
![]()