DIY Tube Dampers
Build them for less than $5 each
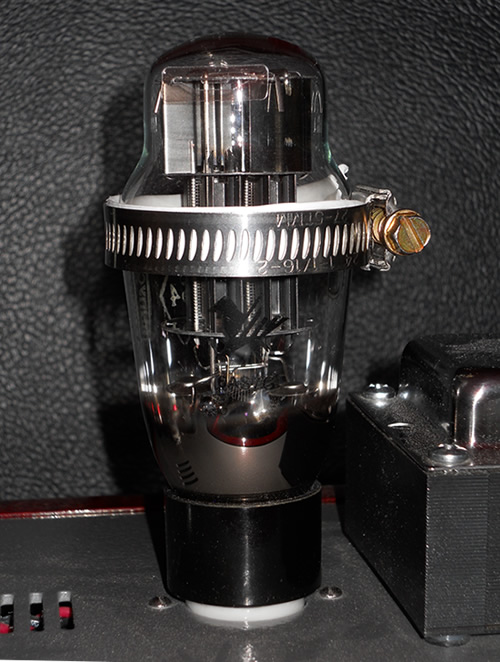
Image 1: Completed tube damper on a 6AS7 tube
There is some controversy when it comes to tube dampers; some swear by them and others think they do nothing to improve the quality of the audio at all. Personally, I realized I needed some dampers when my tubes started producing a high-frequency sound when they were on for more than an hour. The solution was obvious, but the options were not. Tube dampers will run anywhere from $10 to well over $200. The dampers that you will learn how to build below will cost around $5 each. Initially they may appear to be a bit crude, but in reality they actually are rather sharp looking and add a "retro" look to your system.
Materials
- Stainless Steel Hose Clamp
- Teflon Tubing*
*Teflon tubing may be purchased from VHAudio.com. Some may be concerned about the Teflon tubing melting. Rest assured there is no problem since Teflon melts at 640 degrees Fahrenheit and solder melts at around 400 degrees Fahrenheit. Stainless steel hose clamps are available at almost any hardware store. You may want to take measurements of your tube before heading out, or take one with you.
Tools
- Exacto knife
- Ruler--preferably metric
- Small slotted screw driver
- Paper and pencil
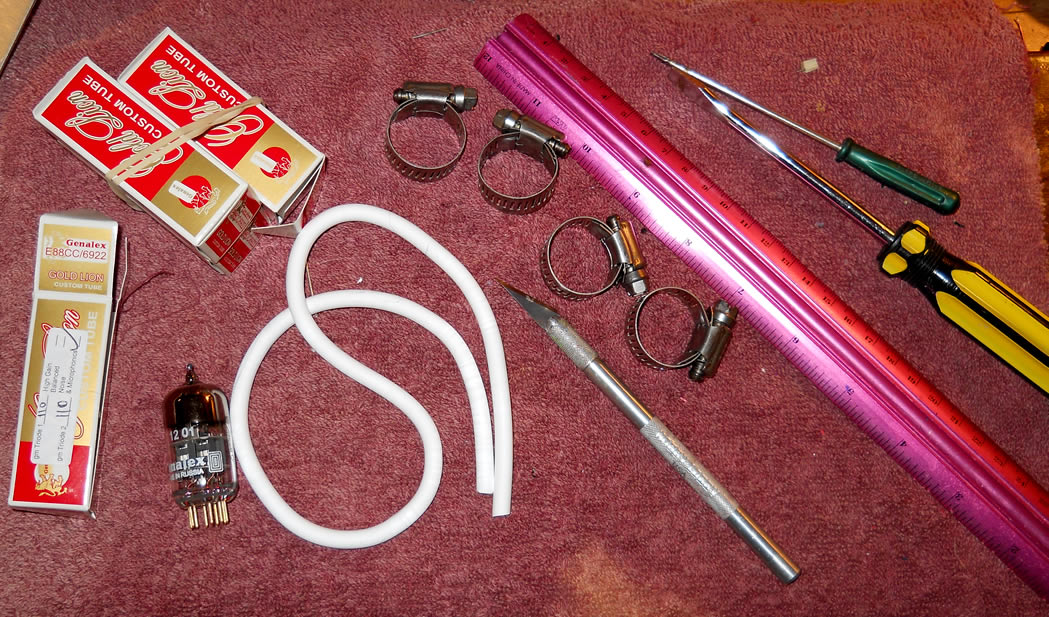
Image 2: Tools and materials
Procedure
- Size clamp
- Measure diameter of clamp
- Find circumference/length of tubing
- Cut tubing to length
- Slit tubing
- Flatten tubing
- Insert tubing in clamp
- Place clamp on tube, position the clamp and tighten
- Done
Before starting you may want to wipe the clamp(s) with a cloth and denatured alcohol to remove any grease or grime.
Step I
Place the clamp over the tube so that it fits loosely as in Image 3. I use the widest part of the tube for this step--an example is the tube in Image 1.
Note of Caution: The metal on the clamps can be very sharp so use care.
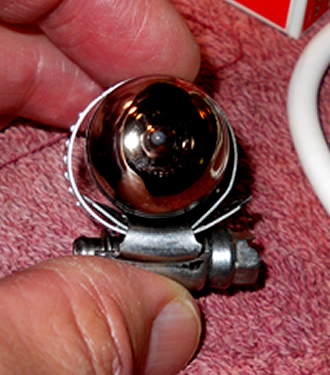
Image 3: Sizing the clamp
Step II
Once you have sized the clamp as in Step I, the measure the diameter of the clamp. Here you want to measure the length across at the widest point. A metric ruler is far more accurate.
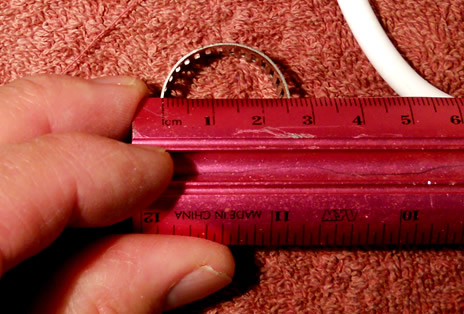
Image 4: Measuring the diameter
Step III
Since we are placing our tubing around the inside of the clamp, then we can determine the length of the tubing by finding the circumference of the clamp. Circumference of circle = 2*Pi*radius. Since we measure the diameter then the length of tubing = Pi*diameter; where Pi=3.14. Example: Suppose the clamp has a diameter of 24 mm, then the length of the tubing will be 24 mm * 3.14 = 75.36 mm. Here I would round up to 76 mm. Below (Image 5) shows all of the steps used to find the circumference/length of the clamp (please pardon the sloppy writing.)
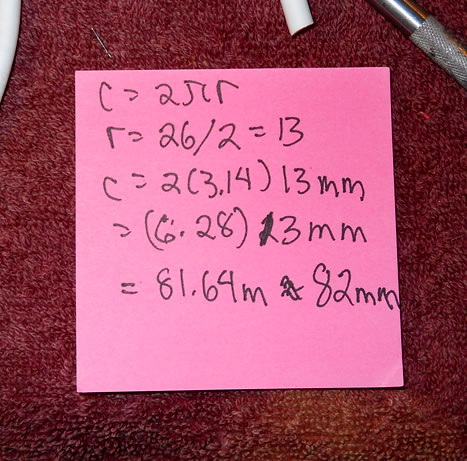
Image 5: Finding the circumference/length of the clamp
Step IV
Once the circumference/length of the clamp has been calculated, then measure and cut a piece of Teflon tubing of the same length.
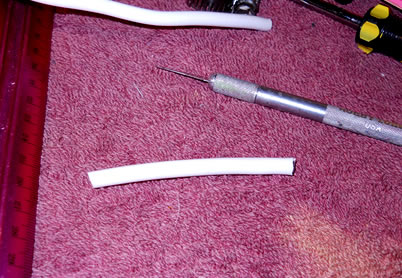
Image 6: Tubing of proper length
Step V
Once you have a piece of tubing of the correct length, then carefully make a slit down the entire length of the tubing. The objective here is to slit the tubing and then open it. When making the slit be careful not to cut through the bottom side of the tubing. You also want to make the cut as straight as possible, and watch those fingers.
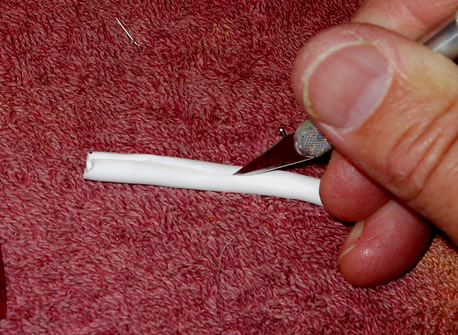
Image 7: Making slit down entire length of tubing
Step VI
Once you have made a slit down the length of the tubing, then open it up and start flattening it. To flatten the Teflon you can roll it between your thumb and index finger, or while holding it fully open carefully pull the outside of the tubing over the rounded edged of a desk or table.
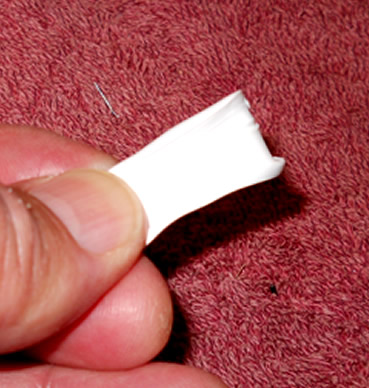
Image 8: Flatten tubing
Step VII
Place the flattened piece of tubing inside of the clamp. It is easier if you place the inside of the tubing against the clamp. You may experience some frustration here, but it will work out.
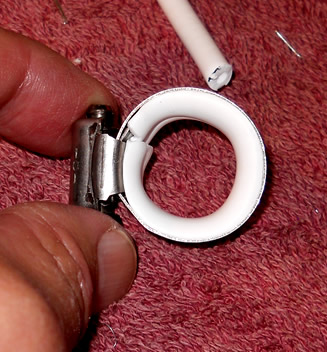
Image 9: Placing tubing inside clamp
Step VIII
Once you have placed the tubing inside of the clamp, then it is time to place the damper over the tube. Initially this can be frustrating, but once the tube has been used for a few hours then the Teflon will "settle in." Put the damper in position on the tube, and you may want to orient the screw so that it is on the backside of the tube (if tube is visible.) Once in position, then tighten the clamp being careful not to tighten it so much that you damage the tube, but tightened enough so that when the metal clamp expands with increased heat that it does not fall to the base of the tube.
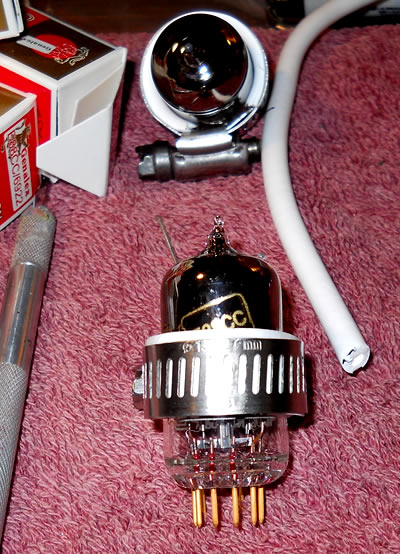
Figure 10: Positioned and tightened damper
Finished
Below are a couple of images of the dampers on some E88CC's. You may want to experiment and by moving the dampers to different positions on the tube and listen for any audible changes. Enjoy.
Image 11: Tubes, beautiful tubes!
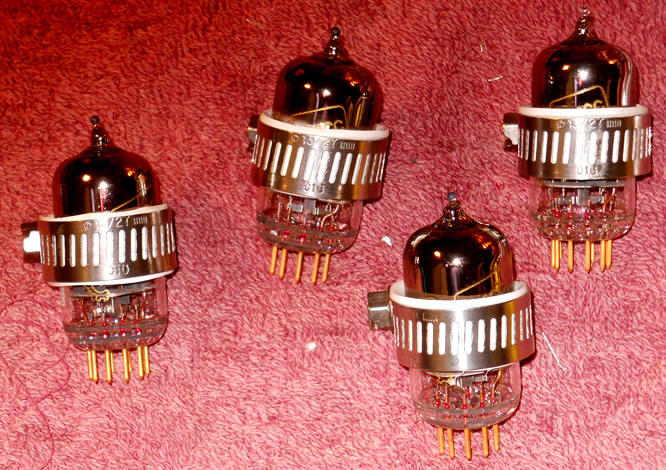
Image 12: Ready for action
