Home | Audio | DIY | Guitar | iPods | Music | Brain/Problem Solving | Links| Site Map
This work is licensed under a Creative Commons License.
DIY Shielded IEC Power Cord
WARNING: You will be working with AC power. If you do not know what you are doing then please do not try this modification. You can die or be seriously injured if you do not do things properly. Having read this you release us from all liability.
One significant upgrade that the consumer can address in an attempt to improve audio quality is to replace the OEM AC power cord. This can be done easily enough by constructing one ,or buying one (plan on spending some big money here). For the ultimate improvement in the power supply, then along with a new power cord one may want to invest in a an AC-regenerator. An AC regenerator generate a pure sine wave that is noise free, and takes your existing system to the new level of sonic performance. There are also upgrades where the components internal power supply is replaced with an external one. For example, the Macmini's power source works by converting the incoming AC to DC, that then powers the system. This can be down via mods by using batteries as the primary power source, or using linear power supplies ($799), or laboratory power supplies, etc. All of these are needed to replace the original source. Some of these may work great, but once you replace the manufactures power unit it will nullify the warranty. Ultimately, the biggest bang for the buck is to construct a quality power cord. The problem with a "good" cable is that it can easily cost $299 for a "cheap" one, start using high-end components then a pre-made power cord will cost anywhere from $500 to $2500 (sometimes more.).
One of the best values in the DIY arena is the IEC power cord produced by Bottlehead, Corp. For less than $100 ($84 today) you can get everything needed to build a six foot cord. These are extremely well designed cords and use hospital grade components. I use them, and have been more than satisfied with the performance. In a couple of instances I replaced the male receptacle with Furutech ones (only because I am a push over for Furutech and had a couple laying around from an earlier project.) But, the BH cord is very hard to beat, uses the helix braid for audio design, and is a great beginning project for the DIYer. The beauty of the BH design is that it is based on sound physics and extended listening tests. No mumbo jumbo here.
When I use the BH cord there is one thing I like to do. Namely, I like to put some copper tinned braided sleeving over the wires for shielding. To protect the wires after they have been braided I also like to wrap them in some Teflon plumbers tape. The wire that BH supplies with the kit is high-quality Carol solid copper core wire, with Teflon insulation. More than adequate for power cord purposes. In fact, you will be hard pressed to find a better wire on the market for the price...if you can find any at all. It is not an easy task to buy decent copper wire on the Web in small quantities. So, if you are serious about building some AC power cords then seriously give the BH kits a try. In fact, for us that is the only available option for the DIYer. That being said I will link to their site where the instructions are provided. I am not encouraging anyone to use these instructions in an effort to avoid buying from BH, to do so would be unethical and is not condoned. Using these instructions I will show you how to do add tinned braided sleeving to your BH cord. If you do not intend to do this, then you should just stop here and exit the page or you can visit this page to learn how to build a shielded IEC power cord. Moving right along. If you reside in an area like me where there is a lot of RFI and EMI, then using braided sleeving is almost a must. In fact, I even braid cables and some interconnects inside of my components. So, here we go.
Building the AC IEC Power Cord
- Purchase a Power Cord Kit from Bottlehead
- Use these instructions to build your Power Cord Kit from Bottlehead (Link coming soon...need permission)
- After step 5 of the BH instructions you want to put the tinned braided sleeving on. Here is how to do it:
| Below: It is extremely important that you connect the braided shielding as below. Always connect the ground to the wall socket side. NEVER connect to both the equipment and socket side. |
 |
| Below: To keep the braid from fraying solder the edge of the braid. Note the screwdriver being used inside of the braid. This is to keep the braid from collapsing on itself and makes working with it a lot easier. |
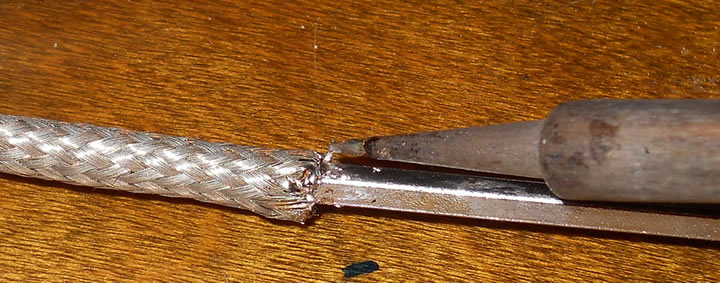 |
Below: Attaching the ground wire to the braid. This will be connected to the ground of the male end/wall socket side. |
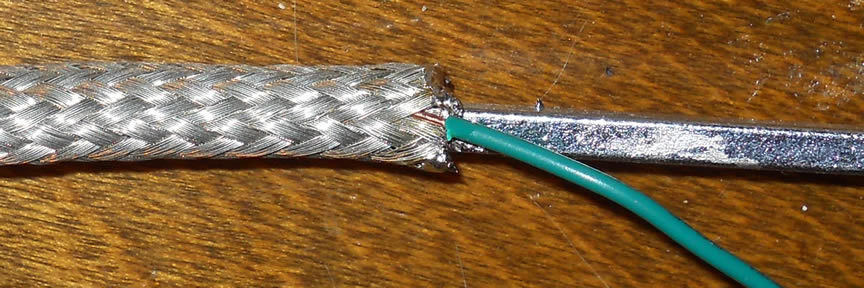 |
| Below: finishing up with the ground wire on the braided sleeving |
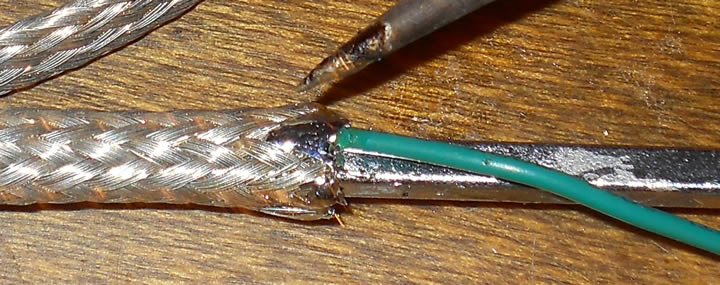 |
| Below: Carefully feed the Teflon coated wires through the tinned copper sleeve. You may also want to put some heat shrink at both ends to help prevent the wire from crimping. Have 1/2" of heat shrink covering the wire. See below. Note below how the wires have been wrapped in Teflon tape. |
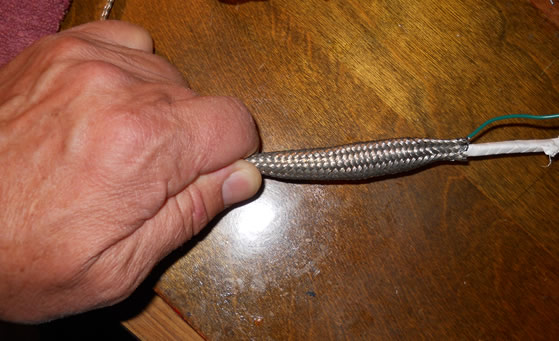 |
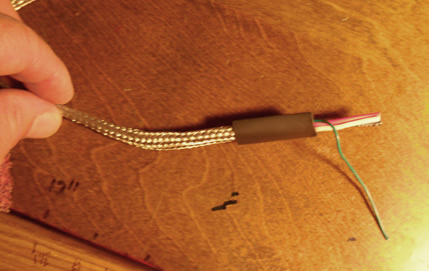
| Below: Some heat shrink to help keep things in place. |
 |
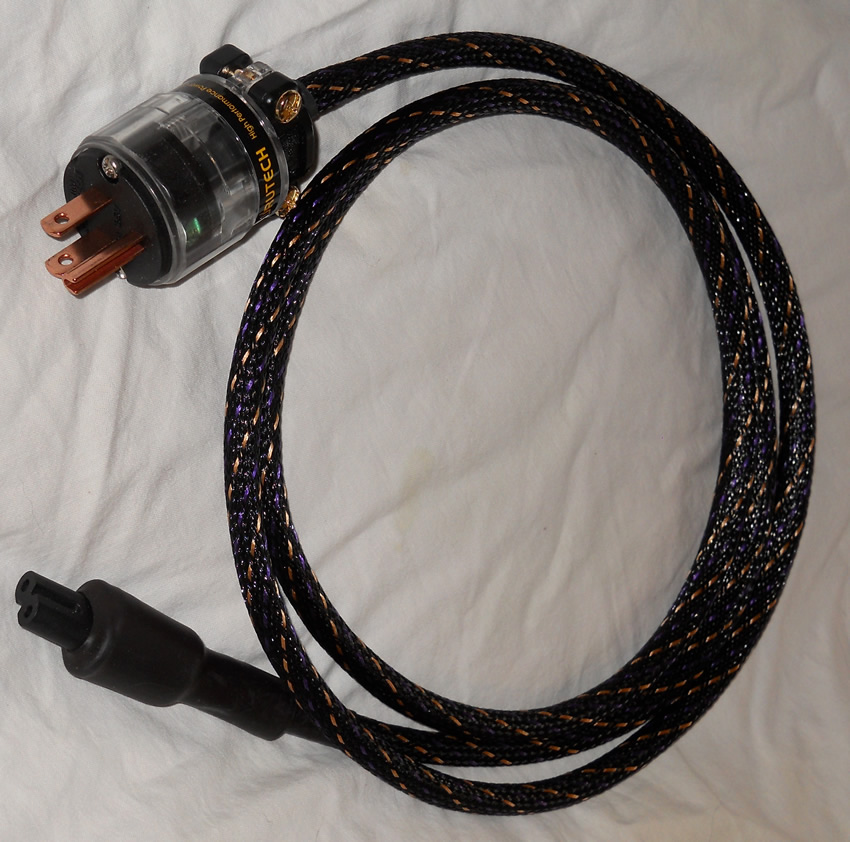
| Below: Here is basically what the finished product will look like. Though this is a C7 power cord, the IEC will look pretty much the same. This cord looks different from my other BH cords (didn't take any pics of them). The reason is that BH provides enough wire to make a six foot long cord, but I only needed/use three foot cords with my reference system. Not wanting to waste any material, I used the BH components to build a 3' IEC cord and used the leftovers to build a 3' C7 cord. For the C7 I used Furutech that I had on hand (from an earlier project.) I also had some extra nylon braided sleeving that matched some interconnects I had built and so I decided to make a matching power cord (such vanity!) One thing I do like besides the obvious, about using tinned sleeving, is that it will give the power cord a smoother feel than the helix wires alone will. |
 |
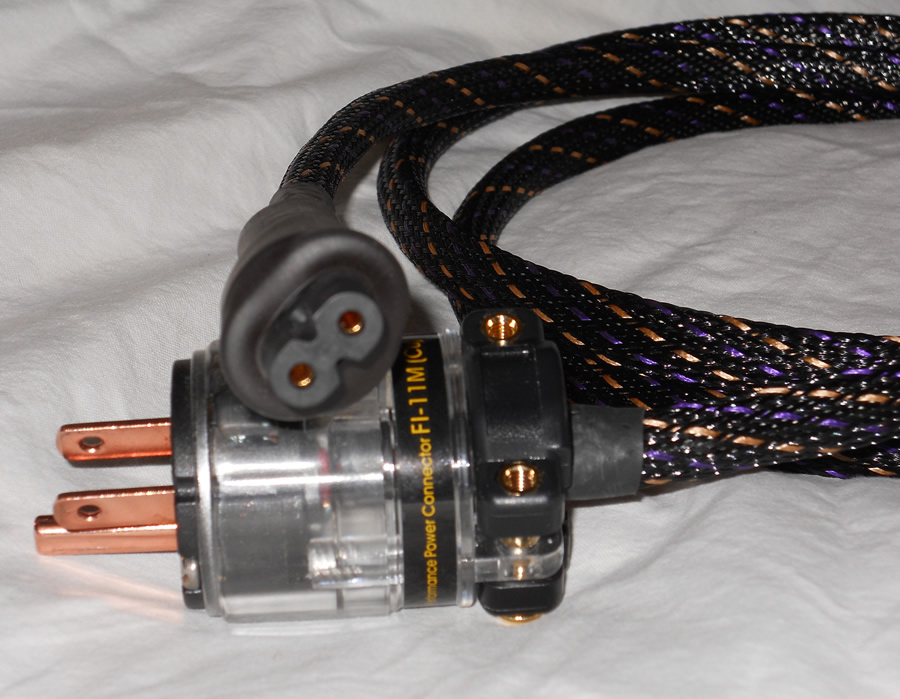
| Below: Another view of the finished C7 power cord. Note the shrink wrap is not used in the same way as the BH cord. This is because when I built the IEC cord I used all of the shrink wrap. In fact, I followed the instructions fully with the exception of using 3' wire lengths and adding the tinned braided sleeving. |
 |
| Many thanks to the folks at Bottlehead for their help, cooperation, and for providing such superior products to the consumer. |
Home | Audio | DIY | Guitar | iPods | Music | Links | Site Map | Contact