Home | Audio | DIY | Guitar | iPods | Music | Brain/Problem Solving | Links| Site Map
This work is licensed under a Creative Commons License.
DIY C7 for Macmini
WARNING: You will be working with AC power. If you do not know what you are doing then please do not try this modification. You can die or be seriously injured if you do not do things properly. Having read this you release us from all liability.
One significant upgrade that the consumer can address in an attempt to improve audio quality is to replace the OEM AC power cord. This can be done easily enough by constructing one,or buying one (plan on spending some big money here). For the ultimate improvement in the power, then along with a new power cord one may want to invest in a an AC-regenerator that will generate a pure sine wave, noise free and thus take your system to the next level of sonic performance. Finally, there are numerous upgrades out there where the components internal power supply is replaced with an external one. For example, when the mini's power source is converted from AC to DC, then either batteries, linear power supplies ($799), laboratory power supplies, etc. will be needed to replace the AC source. These may work great, but you will nullify the warranty .Ultimately, the biggest bang for the buck is to construct a quality power cord. Granted, the stock AC power cord that comes with the Mac mini works best as an antennae, but that is about it. Some will dispute this, but it can be easily proven by getting a hold of a good cable and then comparing the two. The problem with a "good" cable is that it can easily cost $299 for a cheap one, but a Furutech cable using the same components that are used below will cost you around $550.
Below are some instructions on how to build a quality AC cord for the mini. Since the intended use of the AC cord is for the Mac mini only, then I use 14-16 gauge wire. Warning: Do not use this cord for components that draw a lot of power--it is for the Mac mini only.
Tools:
- soldering station/tool
- wire strippers
- screw driver
- glue gun
- x-acto knife
Materials:
- Furutech FI-11 (Cu) 15A a IEC-C7 (non-polar) plug. $57.00
- Furutech FI-11(Cu) US a three prong AC plug. $47.00
- 2 meters of 14-16 Awg stranded, silver coated, cyro treated, Teflon hook-up wire. You will need three colors for a total of 6 meters. One of the wires will not be used to transmit any signals and can be some cheap stuff from Radio Shack. Warning: Do not use this cord for components that draw a lot of power--it is for the Mac mini only. Approximately: $1.35 X 9 = $12.15
- One meter of tinned copper braid. 3 X $1.00
- Expandable Sleeving 3 X $.90 = $2.70
- Teflon plumbers tape
- Heat Shrink (some 1/4" and 1")
Step 1: The first thing to do is to lay out the three pieces of wire. Place the two "good" wires side-by-side, and then place the cheap wire on top. Starting about six inches from one end, wrap some Teflon tape around the three wires to hold them in place. Do this every six inches. When you are done, then start six inches from the end and wrap Teflon tape around the wires the entire length (this will help protect the wires.) If you prefer you can twist the wires, but since they are being shielded the benefits of doing such will be minimal.
Above: wires secured with Teflon tape
Step 2: Cut the tinned copper sleeve so that a 1 1/2" to 2" of wire will extend from both ends. Get a 2 1/2" piece of wire and solder it to the sleeve. Remember: this sleeve is what is going to protect the wires from any EMI/RFI. The image below shows a wire soldered to the tinned copper sleeve. To keep the edges of the tinned copper braid clean you can insert a Phillips school driver or other piece of round metal that is the size of the opening of the braid. Put some solder around the edge and make sure that all wires are laying flat and there are no frays, then carefully solder the edge of the braid.
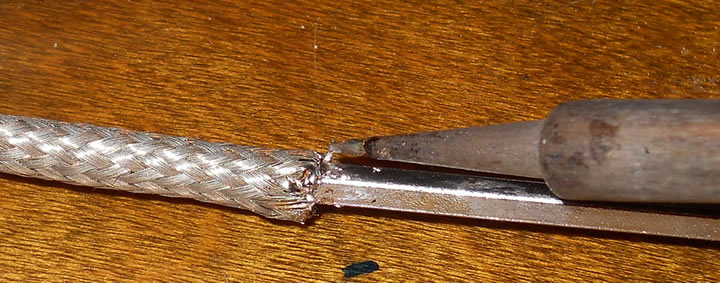
Above: soldering the edge of the braid
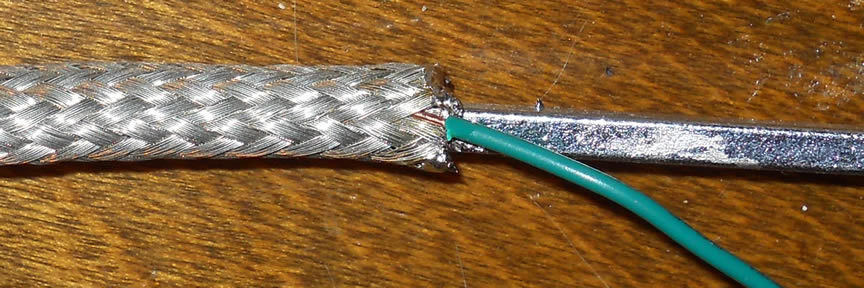
Above: attaching the ground wire to the braid. This will be connected to the ground of the male end.
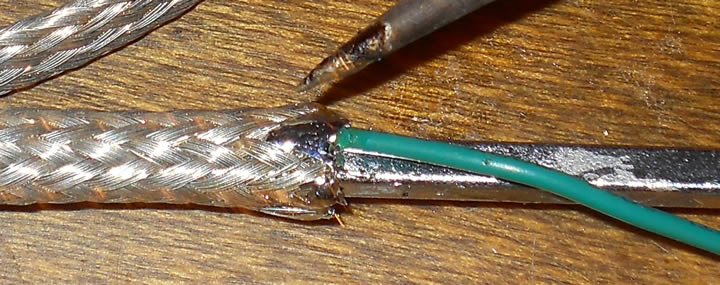
Above: finishing up with the ground wire on the braided sleeving
Step 3: Carefully feed the Teflon coated wires through the tinned copper sleeve. You may also want to put some heat shrink at both ends to help prevent the wire from crimping. Have 1/2" of heat shrink covering the wire. See below. Note below how the wires have been wrapped in Teflon tape.
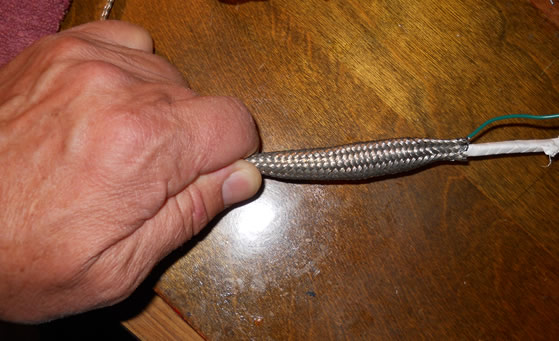
Above: sliding sleeve over the wires
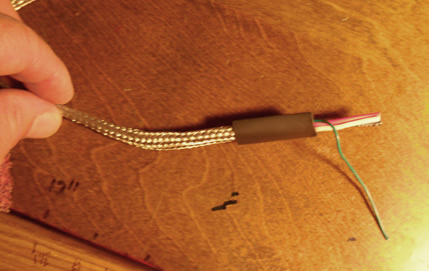
Above: heat shrink to keep things in place Step 4: To get the female adapter to fit properly into the Macmini, then you will have to do some modifications. I first found a cap from a container of guitar cleaner. I cut the the top of the cap and then fed the wires through it. Once this is done, then connect the Furutech C7 plug. Once this has been completed, then fill the cap with some hot glue. Once the glue has dried then you can put the heat shrink in place and shrink it down. Note: Place the exhilarant onto the wire before attaching the C7 plug, and be sure to go over the top of the plug for a secure fit. Sorry that I did not take any photos of this step.
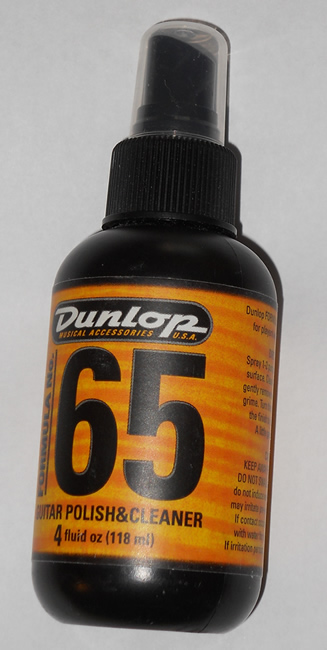
Above: the source of the cap needed so the cable will fit and to give it a clean, professional look.
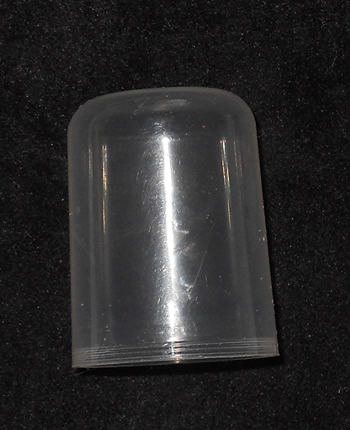
Above: the cap in all of its nakedness. The top will be cut out.
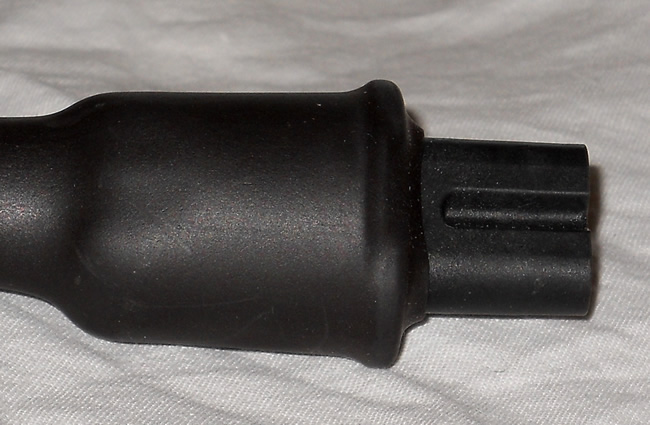
Above: the cap with C7 connected, filled with hot glue, and then some heat shrink. Note how far up I go with the heat shrink.
Step 5: To finish up, my apologies for not having taken any pictures here, you need to connect the male receptacle. This is an easy task. First feed the wires and sleeving through the hole in the bottom of the male end. Be sure to put a 2" piece of heat shrink onto the wire before doing this. Connect all of the wires, making sure that the ground wire from the braided sleeving is connected to the ground plug (the semi-round one at the bottom.) Connect the other two wires making sure that no stray wire is touching anything. Also, try to have as little copper wire exposed as possible. Once you have connected the wires properly and have put the heat shrink in place, then it is time to test. Using your Ohm meter, there should be a setting that will allow you to test whether the circuit is complete. This setting usually looks like some waves coming from a speaker. If you do not know what setting it is, then check the manual. First, put a probe on the ground plug and then on the braided sleeving. You should hear some beeping. Then place a probe in one of the C7 inlets and on one of the plugs at the male end. You should also hear a beeping sound. Then do the same thing with the other inlet and plug. In both cases you should hear a beeping sound. Since this is a non-polar plug, then it does not matter which wire goes where AS LONG AS IT IS NOT THE GROUND WIRE. If everything checks out, then it is time to try it out. Enjoy. Again, you will be working with AC power. If you do not know what you are doing then please do not try. You can die or be seriously injured. Having read this you release us from all liability.
Above: Note that the wiring is different as is the inlet plug. All wires have been connected properly, there is some plastic shielding/wrapt to protect the wires and help keep them in place. Also note that the green ground connected to the shielding has been wired to the male receptacle. Shrink wrap is in place, and once the recetacle cover has been screwed into place then the shrink wrap will be applied. The outer braided sleeving cannot be seen here, but it should be in place before you apply the final touches of heating the shrinkwrap.
Above: Finished cable in all of its glory
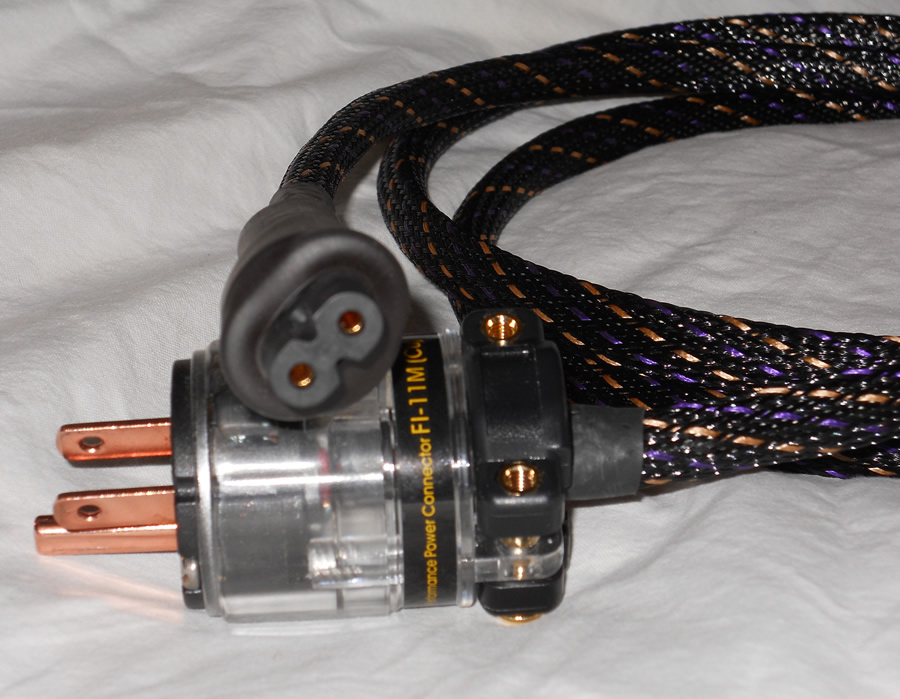
Above: Another view of our finished cable. Note the shrink wrap.
Home | Audio | DIY | Guitar | iPods | Music | Links | Site Map | Contact