Importing Music Using iTunes
Ron McComb
It is easy to transfer music from a CD to anywhere you want. In this tutorial we have chosen to move our music to an external hard drive. In the next lesson you will learn how to import your music using the highest audio codec available at the time writing this tutorial. Before you import a CD, make sure you select the correct audio codec in iTunes.
Step 1
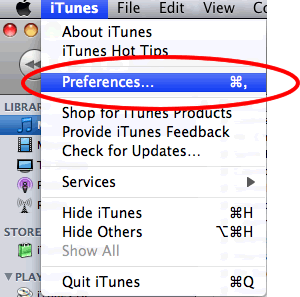
The first thing to do is click on the iTunes menu option on the iTunes main menu bar. Once you do this you will select Preferences.

Step 2
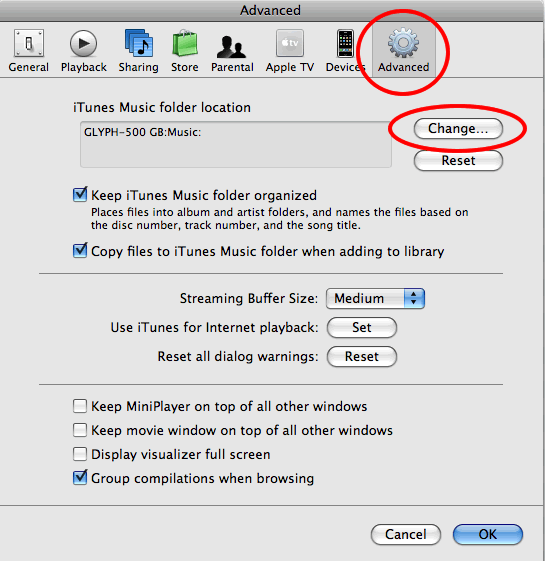
Once you click on Preferences a window like the one below will pop-up. You want to select the Advanced menu option, and we are interested in making a Change.

Step 3
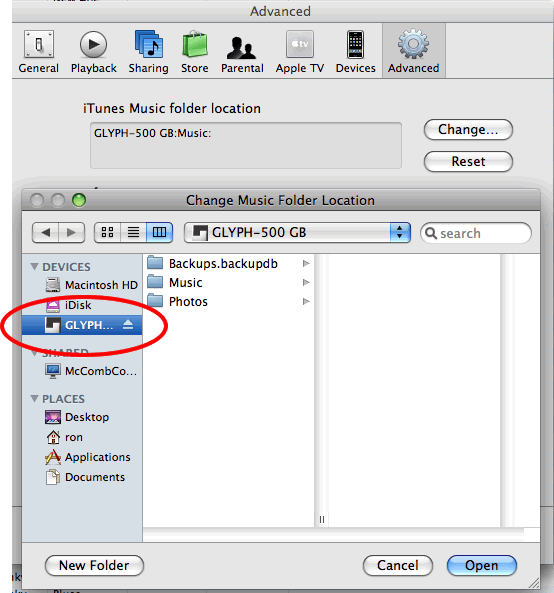
Once you click Change, the Change Music Folder Location window will pop-up. From here you can select any folder or device to save your music to. We suggest that you put everything on an external hard drive that will act as your music repository.

Step 4
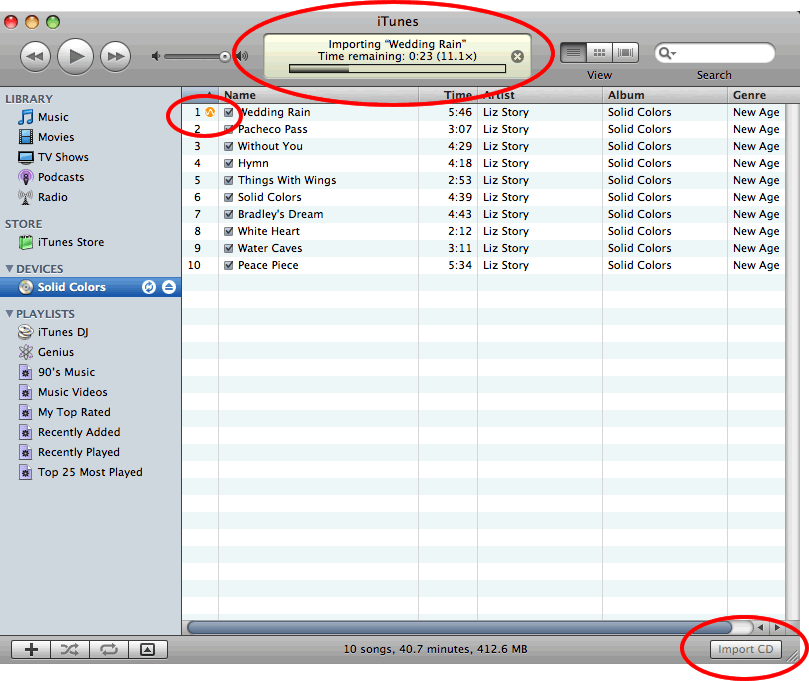
The last step consists of actually importing the CD. A few seconds after you insert a CD a window like the one below will pop-up. On the lower right corner you will see an Import CD button. Click on the button to import your CD. At this time another menu will ask you if you want this process done automatically each time...I selected "yes" in my case since I am importing an entire library. While the audio is being imported you will see the stats of the file transfer in the top center of the iTunes window, a yellow sine wave when a track is being copied, and a green circle with a white checkmark by songs that have been copied successfully. When the CD has finished importing you will hear a chime, and this is your cue that it is time to change CDs. That's it...on the next tutorial you will learn how to choose the appropriate audio codec (quality) that you want to use.
