How to burn a CD in iTunes
By Jerrod H. and Ron McComb (TEWM)
Contributing Editor, iLounge
iTunes is great for playing your tunes on the computer, and the iPod is the undisputed champion of playing personal on-the-go music. However, none of us can fully escape the need for “old-fashioned” CDs every once and awhile—we use them to listen through other devices, share with friends, and backup our music collections. iTunes can help.
Process
iTunes creates CDs from playlists. In previous iPod 101 segments, we learned to create both Manual and Smart playlists. Either type will work for burning CDs.
For Audio CDs, you will most likely want to keep an eye on how large the playlist is in order to ensure that it will fit on one 74-minute CD-R disc (note: iTunes will tell you how large the file is and it's playing time at the bottom of the iTunes window). If you wish to burn more than one CD-worth of songs (for example, for a full-library backup) you can still use a playlist larger than the CD-R or DVD-R’s capacity, as iTunes will ask you if you would like to automatically span your playlist across several discs.
Easy Method
I use the following method.
- Create a "Playlist" where I will dump the music I want to burn to a CD
- Select the songs I want to burn and then drag them to the playlist above.
- Right click on the selected playlist and select "Burn to disk."
- You will be asked what type of CD you want to burn. Choose "Audio CD" if you are going to be playing it on a CD player and/or want the highest quality of audio.
- The following is further detail about the three burning options:
- Audio CD: This is your standard CD. Its main advantage is that audio data is written in a format that is readable by virtually any audio CD player. As one can expect, however, you can only fit 74 minutes of audio using this option.
- MP3 CD: This option burns a playlist to a CD, copying the files as MP3 files, rather than audio tracks. If there are any AAC or Protected AAC files in the specified playlist, they will not be included on the CD. This is advantageous for burning CDs for use in MP3-capable portable CD players or MP3-capable car stereo CD players, because these devices do not presently support AAC.
- Data CD or DVD: In a data CD or DVD, *all* songs in a playlist, regardless of file type, are burned. This option is the best to choose for a backup for two reasons. First, all of your songs - including AAC and iTunes Music Store Protected AAC files - will be backed up. Second, the “Data” option allows you to burn to a DVD-R disc, which holds approximately 5 times as much data per disc (DVD burner or Superdrive required).
Once you have selected a format, click “OK” to return to the main iTunes window.
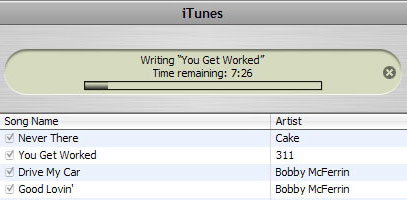
- If your music requires more than one CD, iTunes will prompt you when to load the CDs. It is fully automated and all you need do is feed CDs and write the titles on the CDs.
Older and More Complex Method
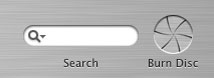
Begin by highlighting a playlist in the source column that you wish to burn. A deactivated “Burn” button will appear in the top right corner of the iTunes window (image below.)
Press the burn button, and the “Safety Cover” opens as iTunes prompts you to insert a blank disc. Your CD tray will open.
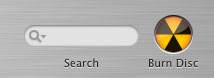
Insert a blank disc. iTunes will check the disc that you have inserted, and prompt you to confirm your intent to burn by clicking the “Burn” button once more. iTunes will now begin the burn.
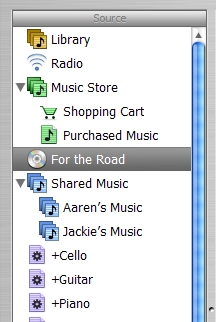
When the burn is complete, you will see a CD icon appear in your “Source” column with the same name as the playlist from which it was created. Congratulations! Your CD is complete. Press the “Eject” button in the bottom-right corner of your screen to eject your CD.

Notes and Tips
- Use smart playlists to facilitate a “rolling” backup of your library. First burn your entire existing library. For the future, create a smart playlist where “Date Added is after [The date of your backup].” Each time you burn this incremental backup, change the date in the smart playlist to reflect the current date. You can also add a criteria where “Date Modified is after [date of last backup]” as well, to ensure that audio files that have *changed* are also preserved.
- It is a good idea, even if you don’t feel like backing up all of your music, to back up your “Purchased Music” playlist regularly, as iTunes Music Store tracks cannot be re-downloaded if you were to lose them. The “Purchased Music” playlist is just like any other, so you can easily select it and click the burn icon to burn a backup (use “Data” mode, of course).
- If you wish to reproduce an album that does not have gaps of silence in between tracks (i.e. Pink Floyd’s The Wall), iTunes can do so. In the main burning preference window, select Audio CD, and change the “Gap between Songs” setting to “None.”
