Sound Design Workshop: On the Bus
Mar 1, 2008 12:00 PM, By Eli Krantzberg
Electronic Musician
Here are some mix-altering sound-design techniques made possible by routing all tracks to a subgroup, which I'll call the master group, before they reach the main output. You do that in most modern DAW software by  routing the tracks to a new bus or aux track, and then routing that track to the main output. routing the tracks to a new bus or aux track, and then routing that track to the main output.
Common effects for which a master group is useful include parallel filtering, multiband compression, voice-over ducking, and rhythm-based gating and filtering. In all cases, the processing applies to the master group or to buses fed by it. In some cases you'll want the unprocessed master group heard in the mix, whereas in other cases you won't. For ducking and pulsating effects, you'll use a sidechain fed by the controlling track (voice, drums, or some such), and typically the sidechain signal will also be heard in the mix.
Detour Ahead
Parallel-filtering effects split the master group into frequency bands, which are then processed separately. Start by creating several send buses on the master group. Next, route different amounts of the master group to those send buses, and insert bandpass, highpass, and lowpass filters to achieve frequency splitting. You might follow each filter with a compressor to create a poor man's version of multiband compression. If you don't want the unprocessed signal in the mix, suppress the master group from the main output either by lowering its level and using prefader sends or by routing its output to a dead bus.
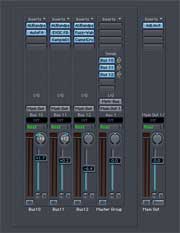
You can get more creative with additional postfilter effects. In Web Clip 1, I took a small mix routed to a master group and set up three prefader sends. To avoid feedback loops, I routed the output of the send buses to the main output and not back to the master group. I placed a bandpass filter on each bus, followed by different modulation effects, and I added a short delay on one bus. Finally, I mixed the four signals to taste (see Fig. 1).
All Aboard
Master-group sends provide the perfect opportunity to get creative with delays and full-stop effects. Automating a send on the master group is the equivalent of automating a separate send on every track in the mix.
With different delay processing on each send bus, you can build a palette of time-based effects to fill the space during pauses in the arrangement. Here, you do want the unprocessed signal in the mix, and you can use either prefader or postfader sends. Automating the sends is one way to control the timing and amount of the signal reaching the delays; another is to automate the return levels. That's the best approach with plug-ins that respond better with their buffers filled before a full stop occurs.
In Web Clip 2, I set up a few sends on the master group with different delay effects. I automated the fader levels on the buses to bring in the processed signal during breaks in the music. You don't need to restrict the effects to breaks, however; you can toggle global effects in and out of the mix anytime.
It's a Duck
To use a track as a sidechain signal for plug-ins on the master group, don't route it to the master group; instead, route it straight to the main output. That's the classic technique for ducking music tracks during voice-overs in commercials and jingles. Insert a compressor on the master group, and route the voice-over track to the compressor's sidechain input. The music will then automatically dip according to the level of the voice.
Many filter and gate plug-ins have sidechains. You can use those to make an entire mix throb to the pulse of a single rhythmic element such as the kick drum. To do that, route the kick drum track to the sidechain input of the filter or gate plug-in and also to the main output. The gating or filtering of the master group will then follow the level of the kick drum.
Eli Krantzberg is a Montreal-based musician, bandleader, and studio owner. Check out his “Logic Tips and Tricks” blog at www.elikrantzberg.com.
|