How to ReWire Individual Reason Instruments into Logic Pro
Sep 11th in Mixing & Mastering by Joel Falconer
Reason doesn’t offer users the greatest control over sound processing. The built-in reverb, compressor and so on will do the trick when you want to start composing a new song, but what about when the composition is done and it’s time to mix?
In this tutorial, we’ll go through the steps required to get your entire Reason rack routing into individual channels in Logic, a simple, handy process, but one that's a dark and mysterious art to many newcomers.
Step 1
Open Logic and set up a new project. Once that’s loaded, you can fire up Reason. Open the apps in this order. Do not change the order around because the Rewire host needs to be loaded before the client.
Step 2
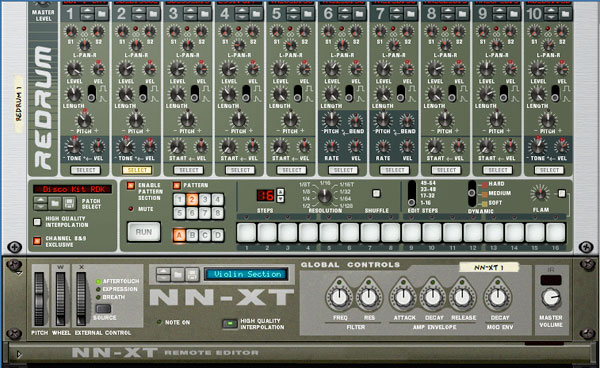
Create a Redrum unit and an NN-XT synth in Reason. Try making some sound with them—you won’t hear anything because Reason has detected that a host is present and set up a Rewire connection.
Step 3
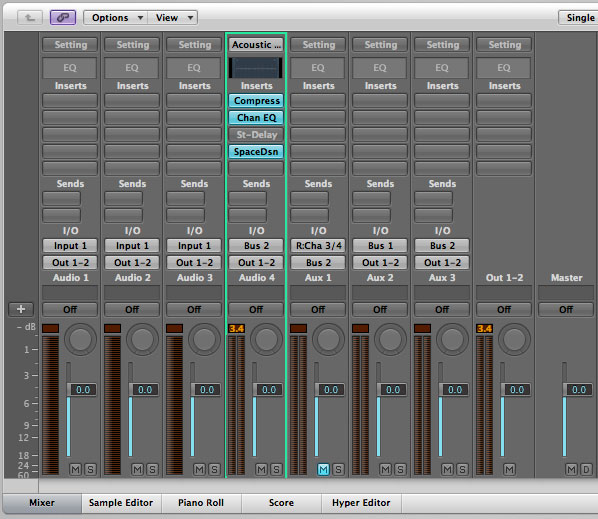
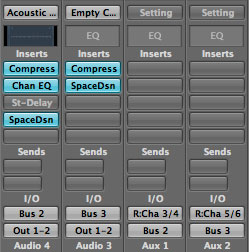
In order to hear anything, we need to finish that Rewire connection on Logic’s end. Click on the Mixer tab and add two new stereo auxiliary channel strips (this option is under the Mixer’s Options menu). Set the input of one to Reasons channels 3 & 4 and the other to Reasons channels 5 & 6.
Step 4
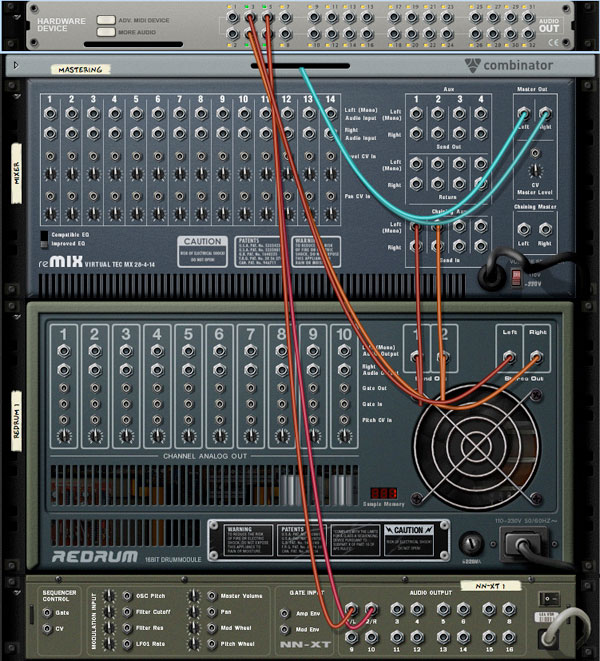
In Reason, press Tab to flip to the back of the rack where you’ll see the wires connecting the inputs and outputs of various devices in the Reason rack.
Move the left and right output wires of the Redrum device out of the mixer and attach them to channels 3 and 4 on the rack device marked “Hardware Device” at the very top.
Do the same with the NN-XTs outputs, attaching them to 5 & 6.
Step 5
You should now be able to hear these instruments. If not, check your faders in the Logic mixer. If you’re going to use Reason like this without recording the instruments to straight audio later, right click on the two aux tracks in the mixer and click “Create/Select Arrange Track” to have the channels appear in your main Arrange window.
Step 6
You can now apply inserts on the auxiliary tracks so you don’t have to use Reason’s terrible reverb unit or any other effects. Select the track in the Arrange window and you’ll see the channel strip settings bar on the left.
Under Inserts, click and hold an empty slot until a menu appears with the various plug-ins available to you.
If this is enough for you, you can stop here. If you’d rather commit the Reason instruments to audio once the samples have been selected and the instruments all sequenced and finalized, go on to the next step.
There are quite a few reasons you might want to do this, though keeping your sequenced audio in the sequencer is best unless you have a specific reason. It’s still important to learn how.
Step 7
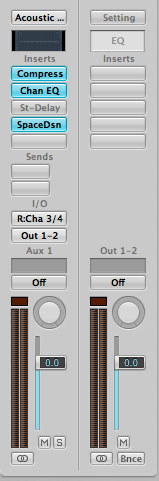
Create two audio tracks using the Track > New menu option. Set their inputs to bus 2 and bus 3 (these are arbitrary numbers, of course).
Now go to your aux tracks for the Redrum and NN-XT and set their outputs to bus 2 and bus 3 respectively.
Step 8
Under Project Settings, go to the Record tab and select “Record pre-roll” with 0 seconds, instead of the count-in option. Count-in wrecks the ability to record from Reason if you’re starting from the first bar of the song (at least for me).
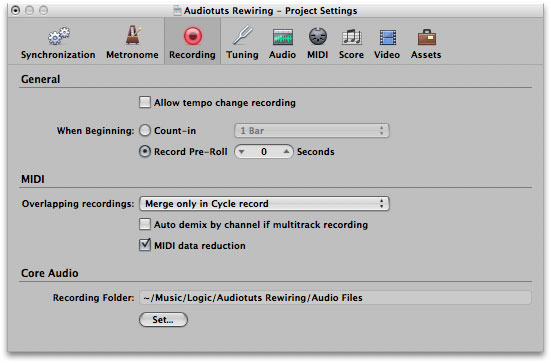
Press record to commit your Reason instruments to audio and you’re now able to edit and chop them up just like any other recorded audio.
If you’re wondering why one would route individual instruments through Logic in order to mix them, listen to the difference in this audio sample. The first four bars are straight out of Reason, and the second set of four bars plays the same audio with Logic’s much better effects processing the signal.
It’s clear that Logic’s audio processing is far better than Reason’s.
