Stereo miking is a great way to increase the sense of depth in your recording of an instrument. Here are six stereo miking techniques you can try out today. We’ll start with the basics and then move to some more exciting options.
Before You Get Started
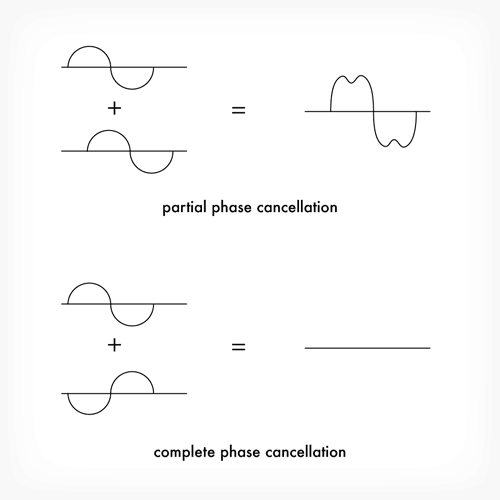
One thing to be careful of in stereo recording is phase cancellation. When using a spaced pair this can be a concern. Phase cancellation occurs when two versions of the same sound, which occur at slightly different times, are mixed together. The result is that when one signal is going into positive amplitude and the other is going into negative amplitude they will cancel each other out and when they are both going the same way they will boost each other.
When two signals are out of phase you will notice a warble in your sound or, if the two signals are 180 degrees out of phase, you will get silence. You will not notice this when the two signals are panned hard left and right. So, to avoid any surprises always check in mono.
The way to minimize your chance of running into phase problems is to use coincident pairs (where the two mics are very close together) or to use the 3:1 rule (place the mics 3 times as far from each other as they are from the sound source).
Spaced Pair
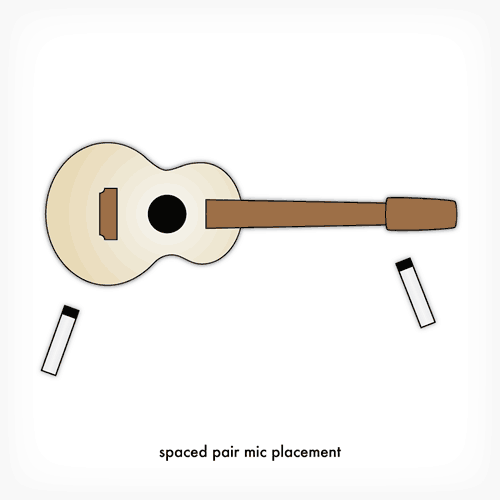
Spaced pair miking is exactly what the name implies. Two cardioid microphones are placed apart from each other to produce two different recordings of the same instrument. I suggest trying two places on the instrument that produce different tonalities. For example, on a guitar you may want to have one mic on the bridge and one on the nut.
X-Y
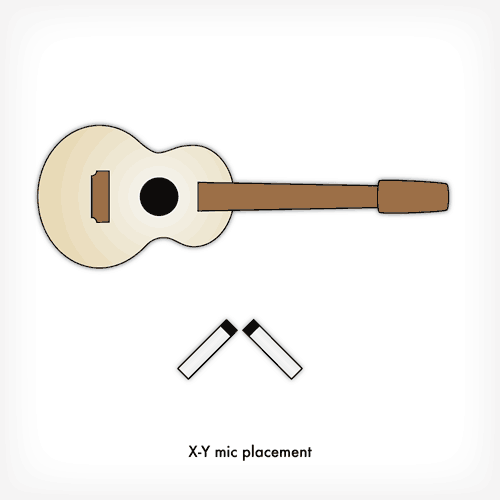
The X-Y configuration takes two cardioid microphones and places them with heads together at 90 degree angles. The result is that the mic on the left will pickup the right side of the room and the mic on the right will pickup the left side of the room.
Blumlein Pair
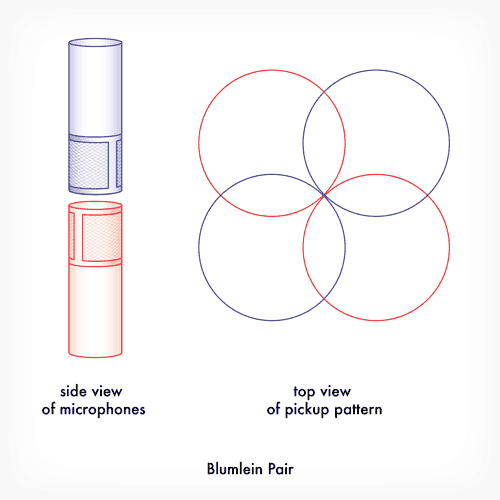
The Blumlein Pair is much like the X-Y technique with one variation. Two bi-directional mics are used at 90 degree angles. The result of this technique is that one mic will pickup the front left and back right of the room while the other picks up the front right and back left of the room. This technique is best if you have a nice sounding room to record in.
ORTF
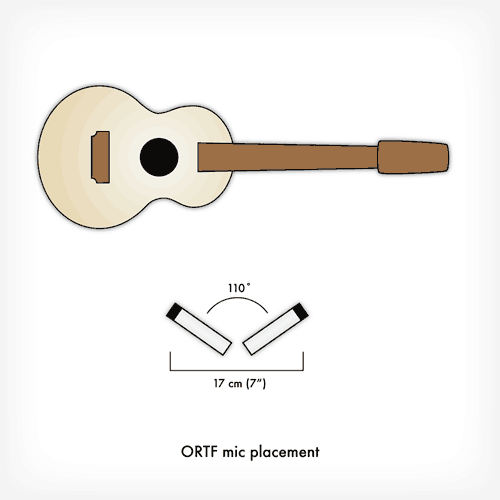
The ORTF technique is named after the French television and radio commission who invented it (Office de Radiodiffusion-Télévision Française). This is a binaural mic technique which means it is meant to approximate the response of your two ears. In the ORTF technique two cardioid mics are placed at an angle of 110 degrees with the heads 17cm (7”) apart. The beauty of this technique is that mic placement can be as simple as moving around the room until it sounds good and then placing the mics where your head was.
Mid-side
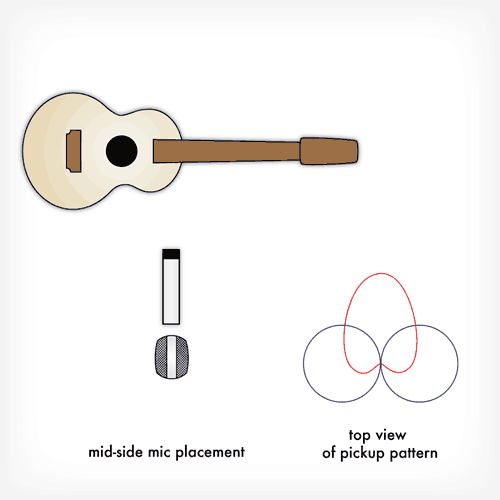
In this technique a cardioid mic is placed facing the sound source and a bi-directional mic is placed perpendicular to the cardioid mic (so it is picking up the sides of the room). They are each recorded onto one track. The track with the bidirectional microphone is then copied and the phase is inverted on the copy. The two bi-directional tracks are then panned hard left and right while the cardioid mic is panned center. By adjusting the relative volume of the cardioid mic we can control how close or far away the recorded instrument sounds.
Note: This technique only works in stereo. If this is played back in mono the two bi-directional tracks will cancel each other out.
Decca Tree
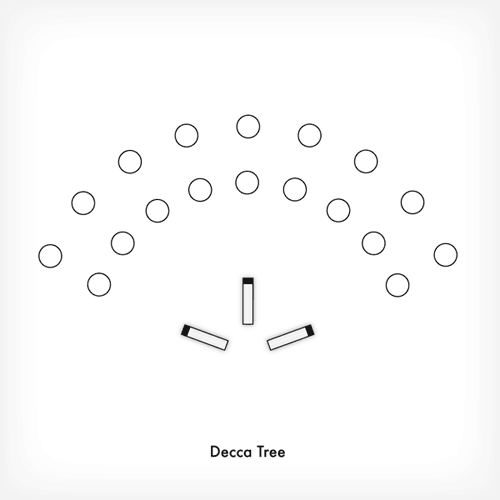
The Decca Tree is used mainly for recording orchestras and large ensembles. It was developed in the 1950s by engineers at Decca Records. The Decca Tree uses a special T-shaped mic stand suspended above the conductor’s head. On the T-shaped stand are 3 cardioid microphones facing left, right and centre which are then panned to match their configuration.
There are no fixed measurements for the distance between the microphones but the standard seems to be around 5-7 feet. The mics are usually placed closer together for smaller orchestras and further apart for larger ones.
