Mastering your tracks can be a bit of a minefield and is often seen as the domain of the professional. However, if your tracks are just for demo purposes, a DJ set or even use on the net, you may want to tackle the job yourself. In this tutorial, you'll learn how to master a track quickly and easily. Mo Volans shows you how...
Software and equipment used
This tutorial was completed in Logic Pro 8 using a mixture of Logic’s native plug-ins and third party processors from Universal audio. Although this specific mix of products is used in the workshop, all techniques are generic and can be translated to any genre of music using similar plug-ins and any digital audio workstation software.
Step 1
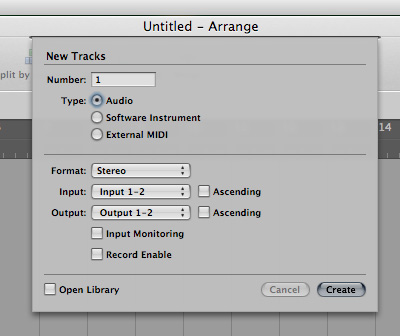
Start by adding a stereo track to accommodate your un-mastered track. This should be an exported or recorded version of your entire mix-down. For best results this should be in the highest bit rate possible. For example, if you original project was recorded at 24 bit then this should also be at 24 bit.
To allow maximum flexibility at the mastering stage there should be as little processing as possible taking place on your exported pre-master. This means no compressors, limiters or EQs on the master output when you commit your final mix to disk. Remember, you can add processing but not take it away.

Step 2
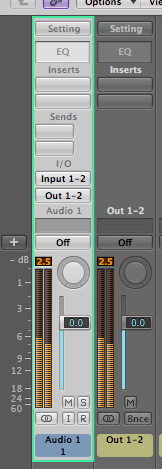
Check you have enough headroom for your mastering processors to work in. Do this by playing back the track at its loudest point and check the maximum level on your master output. Of course, clipping isn’t as critical as it used to be in analogue systems, but it remains good working practice to avoid huge overloads if at all possible.
Step 3
There are obviously a few different ways to construct a mastering chain but the following collection of processors will get the job done with minimum fuss.
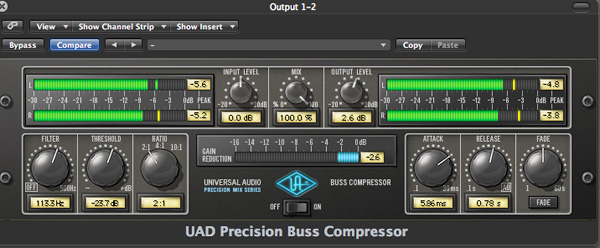
The first plug-in in our chain is a compressor. Strapping a compressor across the entire mix buss in this fashion is known as buss compression and its main purpose is to ensure the dynamics across the entire project are as uniform as possible. This compression will also act as a ‘glue’ for your mix, marrying different elements together.
Long attack and release times and low ratios are the name of the game here, for as much transparency as possible. As far as the type of compressor you use, any compressor of a good quality will do the job, but it might be worth thinking about investing in a dedicated mastering buss compressor plug-in if you strive for absolute quality. With the right compressor you can get away with quite large amounts of gain reduction, whilst still retaining the original feel of your track.
Step 4
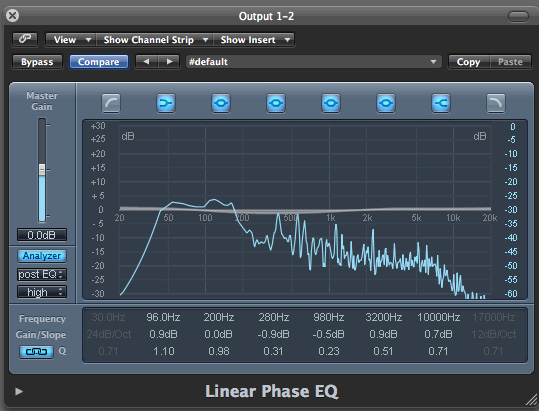
The next stage is to think about whether or not the track needs equalisation. In this case not a huge amount was needed, I just added a very small amount of low end shelving EQ to enhance the bass and so on. Some slight dips in the lower and upper mid frequencies and a gentle boost to the highs finish the process.
Whatever you feel you need to do here keep the Q points low and the amounts you add or reduce to a minimum. This way you won't colour any particular group of instruments too much. If you find yourself adding a lot of EQ in one area it might be time to go back to your mix. If you have access to one, try to use a linear phase EQ or a dedicated mastering plug-in, as these processors impart less ‘character’ to the final mix. If you don’t have any of these, reach for the best you have.
Step 5
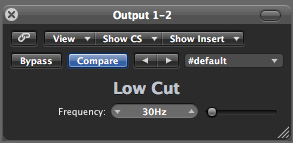
To allow the rest of the processors in the chain to work correctly--and not be overloaded by sub-sonic frequencies--it's a good idea to remove everything under 30Hz at this point. This will allow everything to breathe and remove any unwanted rumble.
Of course, you can do this at the EQ stage but it keeps things clear if a separate plug-in is designated for the task.
Step 6
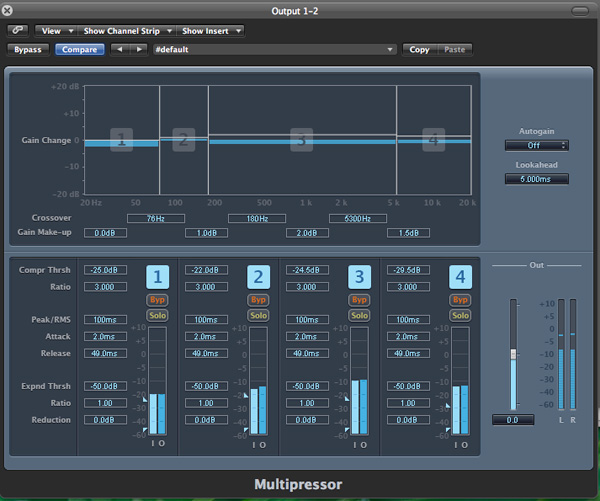
If you feel there are still areas in your mix that are too loud or quiet, even if it's just in a small section of your mix, an excellent tool to use here is a multi-band compressor. Most DAWs come with a multi-band compressor bundled and there are plenty of third party plug-ins around as well. Basically, using this sort of processor you can clamp down on a certain frequency and boost or cut it dynamically. This is much more transparent and organic than heavy use of EQ and it’s well worth looking into.
Step 7
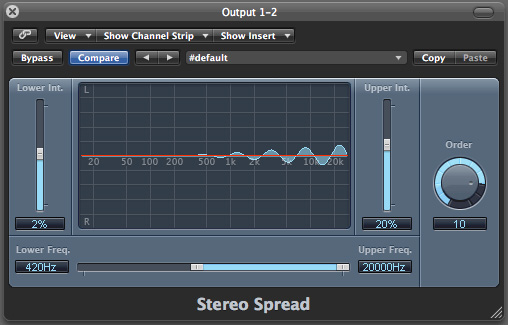
Sometimes some light stereo enhancement can go a long way in the mastering process. Of course, don’t apply this as a rule of thumb as every track's requirements are different.There are a many different available processors for this purpose, so choose a plug-in that suits your needs.
Here you can see Logic Pro 8’s ‘Stereo Spread’. Whatever you choose to use, remember to only spread the upper frequencies of your mix, leaving the lower end of the spectrum intact. Otherwise, you will end up with a confused low-end mix and the master will not translate well to other systems.
Step 8
The final dynamics process in our chain is brick-wall limiting. This is purely here to increase the perceived volume of the final mix. A mastering limiter works in much the same way as any other, the only difference being is that it has a ‘brick-wall’ type setting so that the audio can only reach a certain point set by the user. Add a gain on the input and the result is a dense and maximised sound, making your master sound louder. A dedicated mastering limiter is a must here. Other hard and fast rules include not dialling in too much gain and preserving some of your original dynamic signature!

Step 9
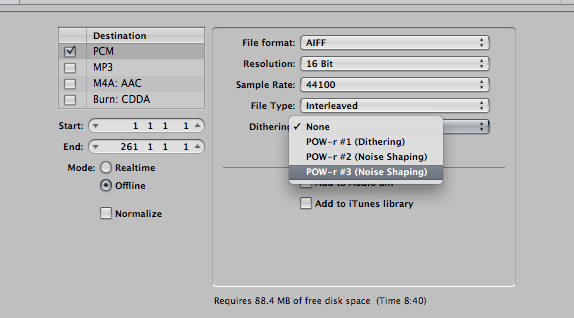
The very last step before trimming and delivering our master is exporting and dithering of the mix. If your mix was recorded and exported at 16 bit then no further work needs doing here (apart from trimming the start and ends of the file). If your mix was mastered as a 24 bit file, however, dithering has to take place at this point. Dithering is a number crunching process that allows a 24 bit file to be reduced to 16 bits without too much loss of quality. This should only be done once during the mixing and mastering stage and it's always a good idea to try and use the best algorithm available. Look for ‘POW-r’ and ‘Apogee’ and you can't go wrong. These are included with most modern DAWs.
Listen to Mo's mastered track, after this process:
Download the Play Pack for this tutorial (4.3MB)
