
With so many things to remember when performing your final mix-down, it can sometimes feel like you're spinning plates. Luckily, there are a few principles you can abide by to get the most out of your mix-down process. Follow these ten tips from Mo to help keep things in check....
Software and equipment used:
The tips here can apply to various DAWs and plug-ins including Logic Pro 8, Ableton Live, Cubase 4 and Reason 4.
Step 1
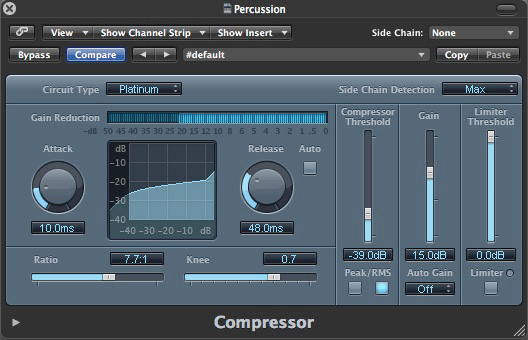
Avoid over-compression
Compression is an essential tool in the mixing process and at some point you will find yourself reaching for your favourite plug-in, but a common mistake is to go too far. Some modern systems allow a nearly unlimited amount of processors to be used, but this sort of power requires the user to have a certain amount of self control. It’s really a case of asking yourself if a signal truly needs compressing or if you are applying the process simply because you can. Music is about dynamics and movement. If you squash the life out of every part in your mix the end result can closely resemble noise.
Of course, there is nothing wrong with selective creative compression as an effect but remember to keep an eye on those gain reduction meters and the amount of compressor plugs across your mixer. Perfect the balance between compressed and dynamic signals and your mastering processors will thank you for it.
Step 2
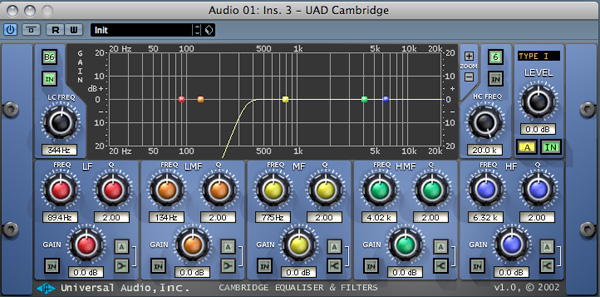
Use subtractive EQ where possible
There is no doubt that some sounds in your mix will need certain frequencies to be boosted or cut. There is a temptation to boost high or low frequencies on every sound, as this may flatter the sounds in isolation. Bring these heavily EQ’d sounds together in the mix and the result may be confused and over-colored. In this scenario it is likely you are listening to more EQ than actual signal.
A good way around this problem is to use subtractive equalisation, as opposed to additive. This involves removing unneeded or problem areas of a signal and boosting the level. This results in the area you want to boost being raised in volume without adding any artificial processing. Using this method you will hear much more signal and less EQ, leading to a clearer and less coloured sound.

Step 3
Keep a backup of dry files
As we progress through the mix-down stage more and more processing takes place and files are often bounced and exported with the new FX destructively imprinted. This is a great way to gain CPU headroom and stop your computer from melting, but if not approached cautiously, excessive bouncing of files can back you into a corner.
You may have found yourself re-loading a project and realizing you over-processed a part in the last session and have to re import and the dry file. Often any edits and automation can be lost in this process, along with a few hours work.
A good workflow technique to avoid this situation is to have a dry version of the part present in your mix. When re-importing the processed sound into your project make a new track and keep the processed channel intact. Turn off the processors to save CPU and mute the channel to take it out of the mix. In some DAWs you can actually hide the track or make folders to contain all your muted sounds. This keeps your work area organised and always gives you the chance to step back quickly and without too much work.

Step 4
Filter bass frequencies for a clearer mix
In most genres of music a good balance in the bottom end is critical to a tight overall mix. The biggest pitfall here is to simply have too many instruments occupying the same frequency range. In electronic music, for example, it is not uncommon to have only the kick drum and bass occupying anything below about 250hz. All other instruments can be safely treated with a high pass filter to avoid anything below this area interfering with these all important instruments.
In other styles of music this extreme filtering may be too much but similar rules apply and a lot of thought should be put into instruments sharing the same frequency. Of course, instruments with a more organic frequency response, such as acoustic guitars, drums, brass and wind instruments, will not react well to hard filtering, so more subtle techniques such as shelving EQs should be employed. Broadly speaking though, carving areas for your low frequencies will result in a generally more coherent mix, whatever style you work with.
Step 5
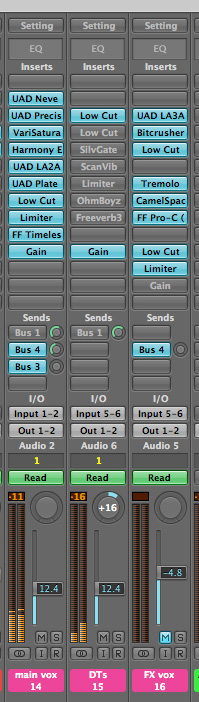
Keep control of vocals
There is no doubt that vocals can be one of the most challenging parts of a project to mix. With problems such as varying dynamics, sibilance, pops, rumble and poor mic technique to tackle, it's no surprise some mixes come undone due to below-par vocal production.
The trick is to tackle these issues with dedicated processors early on in the mixing stage. In fact, it's a good idea to get stuck-in as soon as you have the vocal recording. Simple processes like de-essing, filtering low frequencies and compression will pay dividends when it comes to placing your vocal in the mix. At this point, don’t bounce the vocal down and keep any plug-ins or processors running ‘live’, as it's very likely you will want to change them later.
Once you have applied your processing you may still find there are areas that contain rogue transients or areas of sibilance that the processors didn’t clamp down on. If this is the case try loading the vocal into an external audio editor and manually reducing gain in the problem areas. This can be time-consuming but well worth the effort.
Step 6
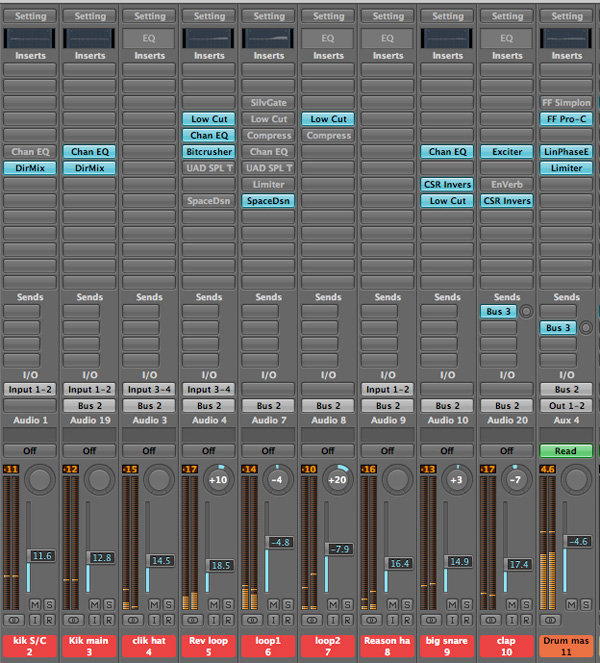
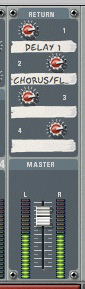
Use sub-groups or busses
This is a simple one, but using dedicated busses to manage the levels and processing of similar sounds can be really useful. This will get around many common problems such as changing levels due to automation, overall cohesion of sounds and general level control in your mix.
Nearly every DAW makes routing tracks to groups a really easy process. They are there for a reason so try using them.
Step 7
Preserve headroom
Although modern DAWs have a massive amount of head-room and bandwidth it's still good working practice to avoid huge overloads across your mix and on the master output. This will ensure dynamics and frequency response are preserved and files are in a good state to be transferred to third parties for purposes such as mastering and remixing. Remaining disciplined from the start of the mixing process will help.
Keep your levels in check and use groups if needed to ensure the overall level being fed to your master output is well below 0db. Aim to finish your mix with the master fader at Unity gain (0db) with around 3-4db of headroom.
Step 8
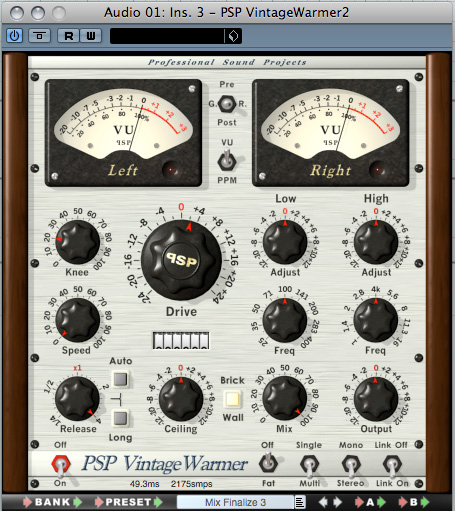
Use saturation effects
If some of your parts feel clinical and dry but reverbs and other effects are not called for, try using a saturation plug-in to impart some extra harmonics and warmth to the sound. There are plenty of plug-ins that perform this task very well and some producers swear by them.
A firm favourite is PSP’s Vintage Warmer, now at version 2. This plug has just about everything you need to achieve that analogue crunch many of us crave.
Step 9
Build the stereo sound-stage
An area just as important as the levels in your mix is the stereo sound stage. In other words, where things are placed left to right. If everything is left in the center the sound can become confusing and unpleasant to listen to.
To use an analogy, picture an acoustic band playing on stage and think about the positioning of the musicians. One guitarist may be to the left while another stands off to one side. The vocals can sit left of center, whilst backing vocals can come from extreme left and right. There are no hard and fast rules here, but try to mix things up a little so an interesting and engaging result is achieved. When you're finished, remember to check your mix in mono for good translation to other playback systems.

Step 10
Less is more!
The most basic but most important tip is this: don't over complicate things. In reality, the mixing process starts as soon as you lay down your first instrument. As things are constructed try to make careful and attentive decisions about which elements you are going to use together.
When it comes to mastering, a solid mix of four or five well-chosen and treated instruments will have much more impact than 30 different sounds fighting for space. If your mix doesn't sound good with a few instruments playing, it's unlikely it will sound any better if you layer another ten on there! In most cases, less really is more.