How to Create Crisp, Controlled Effects with Dynamic Effect Busses
Sep 23rd in Production by Mo Volans
There are times during the production process when you may want to use really intense delay and reverb effects with extra long tails. Using these sorts of effects on vocals, synths and even drums can create real atmosphere and depth but you may find that your signal can become swamped, resulting in a loss of clarity.
Luckily, there is a technique you can use that will help you retain the definition in your mix whilst using these special effects.
Note: this tutorial contains embedded audio that will not display in a feed reader. Click back to the site to read the tutorial with audio or download the Play Pack at the end of the tut.
1. Select Your Sound
First of all, locate the sound you would like to process. This technique works very well with vocals or instrument phrases that have intermittent gaps and pauses. In this case I have chosen to demonstrate the method using a vocal phrase. The performance contains short areas of silence so you should be able to hear the effect clearly.

I am using Logic Pro 8 here but as with a lot of my technique tutorials the process is genuinely generic and can be recreated using any software and the native plug-ins supplied with pretty much any DAW.
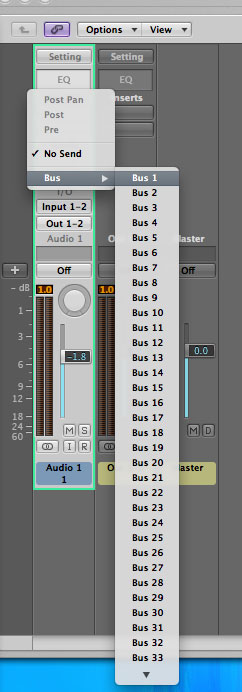
2. Create Your FX Buss
Create a buss and send a healthy amount of signal from the channel to be treated to this new group. You are simply setting up a send/return configuration here, in the same way that you would when using a standard reverb effect.
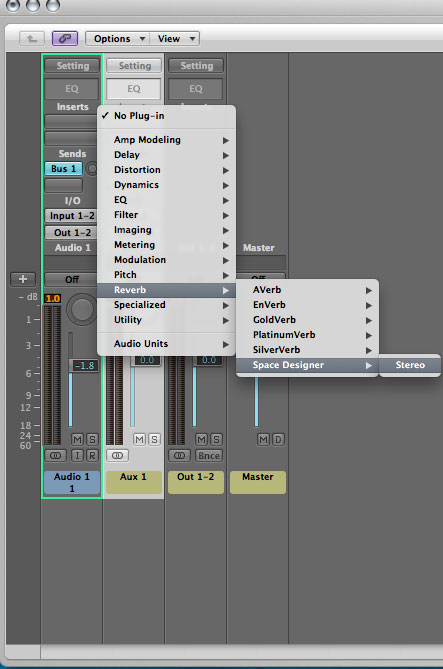
Once your buss has been created, insert a suitable reverb plug-in in the channel. Here I have opted for Logic’s Space Designer convolution reverb but any reverb processor of a decent quality will do. You should now start to hear your signal become reverberated.
3. Choosing Your Effect
Usually when programming a reverb unit or choosing a suitable preset, it is likely that you would proceed with caution, being careful not to dial in any values that would make the end result illegible or unclear. Reverb tails, wet/dry mixes and diffusion settings are often reigned in to keep things under control.
When using dynamic effects busses you can afford to go a little further than you normally would (or even a lot further if you feel the need!) and program in some pretty extreme settings. Long reverb tails are now a really viable option and you can finally utilise some of those huge convolution patches you may have on some of your plugs.
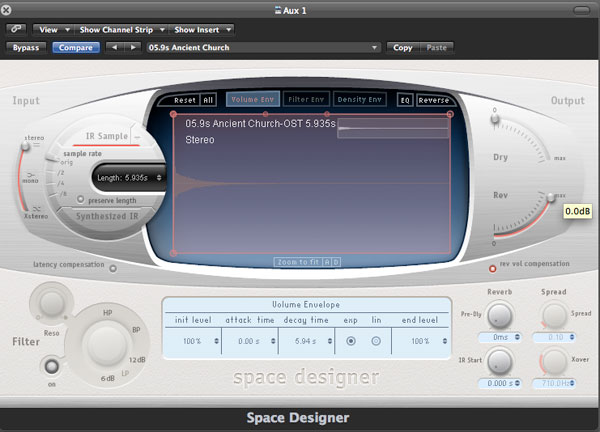
I have used a vast church reverb from Space Designer with a decay of nearly 6 seconds here, but even after striking a basic balance between the vocal and FX buss, the original signal is swamped by the effect, making it pretty much unusable in the mix. This is where the dynamics control comes in.
4. Being Dynamic
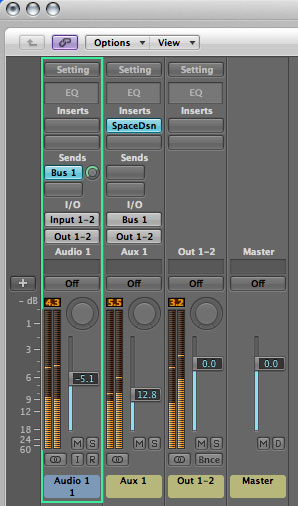
Now add a compressor with side chain capabilities to your effects buss, directly after your reverb plug-in. Feed the compressor side chain input with the vocal signal. Even with basic unaltered settings this compressor should now lower the volume of the reverb return when the vocal is playing.
You should be able to hear this ducking effect pretty much instantly. Of course, some alterations will need to be made before everything is firing perfectly.
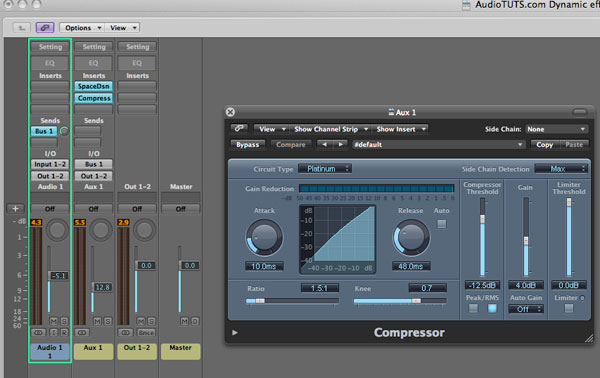
5. Compression Settings
To get things working smoothly, it’s essential that the attack and release times on the compressor are set correctly. If they are too fast the reverb will snap back into the mix during any gaps in your vocal or instrument recording and if they are too slow the reverb signal may not have time to recover and it may remain too quiet.

Obviously every part of the original audio will be different and gaps in the signal may be of varying lengths, so it’s really a case of choosing settings that will work well across the board. Once you have set the attack, release and gain reduction settings you should be able to hear your original audio file clearly and hear the effects raise in volume when it leaves the mix.
6. Other Instruments and Effects
This type of effect can work well on just about any instrument. Even drums can benefit from the process and really interesting special effects can be produced, for breakdowns and areas of interest throughout your mix.
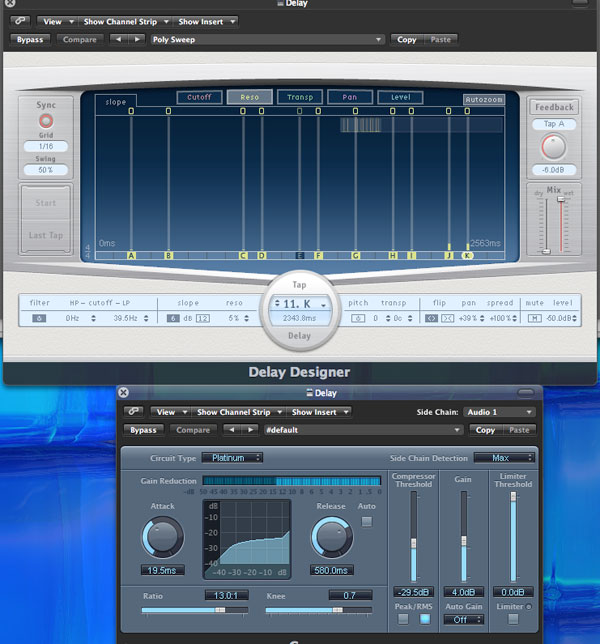
This technique isn’t limited to reverb. Using delay as the inserted effect can also work really well and help to fill gaps in grooves and giving sequences a whole new angle without effecting the clarity of the original signal.
