Even though these tutorials are completed in Logic Pro 8 and in a one particular style of house, the techniques are very much generic and can be applied to any software and genre of dance music.
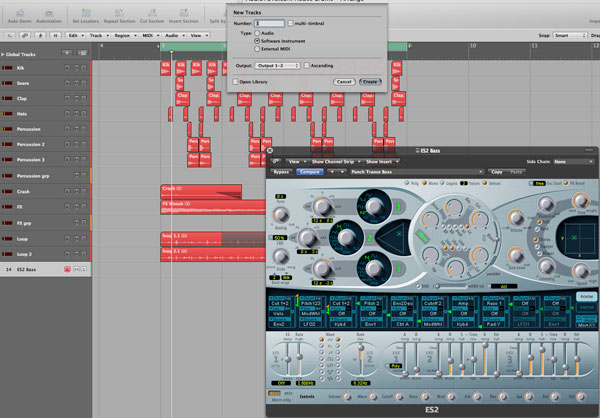
Once you are happy with your drum sound, the next logical step is adding a bass line and before you can do this you need to choose an instrument or sound source. Choosing the right synth to create bass sounds is a subject that’s often debated and although it is true that some synths specialise in producing basses, the truth is that the best synth to use is one that you are familiar and confident with.
Of course if you are proficient in the world of synthesis you should be able to coax a usable bass patch out of most instruments but if you feel less confident opt for a simple synth with a good set of presets and a clear interface.
In this instance I have used a slightly tweaked pre-set from Logic’s ES2 synth. This is a very capable instrument with a pretty complex interface. If you are a Logic user and wish to try something a little simpler head for the ES1. Both synths have a really good set of presets you can use as a starting point.
The main sound I have opted for here has a pretty fast decay and a bright timbre so it cuts through the mix while I’m putting down initial ideas. Of course, this sound can be changed at any time throughout the process. If you having trouble hearing your bass notes at any point you can even temporarily raise the sound by an octave, this way all your notes will be much clearer.
2. Sequence a basic pattern
Now you have your basic sound in place, you are ready to start putting down some ideas that will form the foundation of your bass line. There are a few different approaches here, some people like to use purely step based sequencing, inputting notes manually one at a time. This technique can create similar results to using classic synths and drum machines such as the TR909 and legendary TB303. Although this is a perfectly valid technique the results can often sound mechanical and uniform.

An alternative method that offers results that are more or less the complete opposite of step sequencing is actually playing your bass lines on a keyboard or other midi controller. This approach will give you a much more human sound and impart real feeling to your parts.
I find a healthy mix of the two works well. Try this by playing in a simple bass part, outlining the basic progression you want. Don’t worry too much about the timing and energy of the sequence at this point as we can resolve these issues later using some step sequencing techniques.
My sequence isn’t the greatest in the world but it should demonstrate my point well enough!
3. Getting in time with quantization
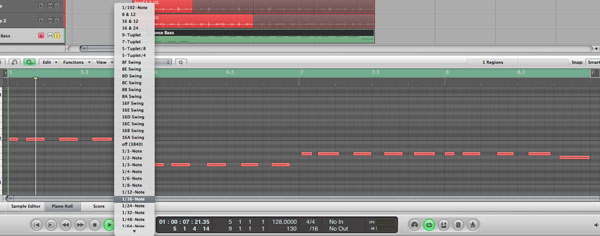
If some of your playing was a little sloppy and you feel this lets the pattern down, then it’s time to reach for the quantize button. Of course you don’t have to quantize everything you play to a grid and you can even create grooves from audio parts and templates if you want to add some swing into your bass part.

For this example I have quantized everything to 16th notes. This will keep things nice and clear and tends to work in this style of house music.
4. Perfecting the groove

Once you have applied the required amount of quantisation to your pattern you can start to perfect the overall groove. It is likely at this point that you start to hear a specific groove and feel evolving and some notes may fall outside of this groove.
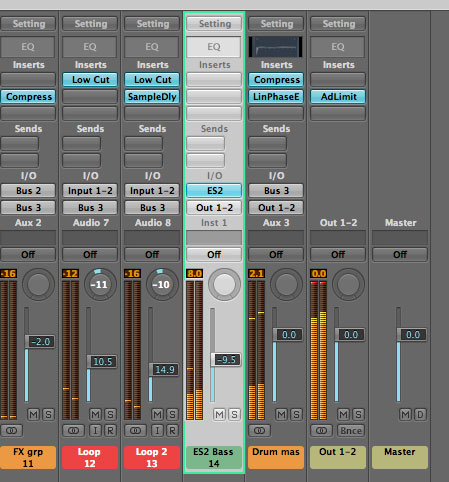
Simply move the notes around until the part feels more complete, after some playing about everything should fall into place. If things still aren’t working it may be time to replay the original pattern.
5. Adding energy to your pattern

At this point things should feel pretty solid but the part maybe lacking energy. There are few ways to remedy this problem. The first is to add some extra notes to your pattern. By carefully inserting notes into the gaps in your groove, you can create a feeling of pace and energy.
The additions that tend to work here are shorter notes, in between the on and off beats. Also try experimenting with notes an octave up or down of the root note and change values such as velocity and aftertouch. These small differences can make a really large impact on the final product.
6. Tweak or change your sound

With your pattern nailed, this is a good point to make sure the main bass sound is doing all the right things. In this case I was pretty happy with it and only altered the amp and filter envelopes slightly and some extra parameters such as Glide and analog emulation, for some extra warmth and interest.
Of course there is nothing stopping you spending a lot of time at this stage getting things right and creating a completely fresh bass patch, you can even replace the instrument. Once you have the MIDI in place you have total freedom.
7. Layering up
If you feel your part still lacks a certain something you can layer extra instruments playing the same midi part. This is a great way of adding movement and dimension to the pattern.
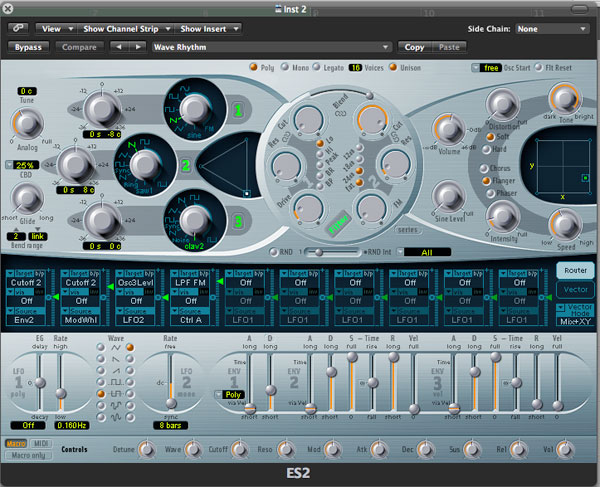
Try layering sounds that you wouldn’t normally associate with bass parts for some diverse and original results. In this example I have used a tempo synced synth part to create extra notes in the pattern. I have also treated it with some distortion, filters, delay and limiting. I have then added a deeper bass part which I have forced to play in mono using Logic’s directional mixer plug-in.
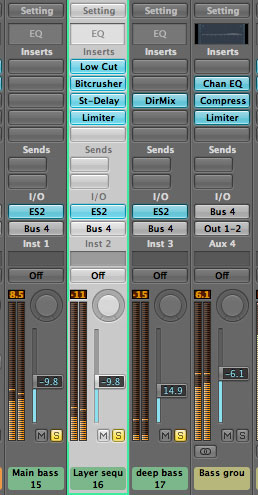
When mixed, the different parts really compliment each other, making the overall sound richer and more involving.
8. Grouping and final treatment
When the parts you are using are complete and you are happy with the way everything is working, you can start to add some final processing to make sure the sounds marry with the existing elements of your mix.
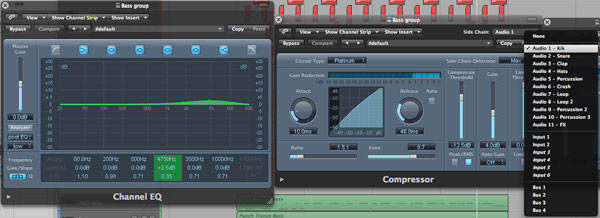
The first thing to do is route all your sounds to a group or buss. This way you have absolute control over all the sounds you are using and altering their overall level becomes an easy job. Once this group is in place you can add any processing needed to gel the parts further and apply overall dynamics and EQ treatment to correct any problem areas.
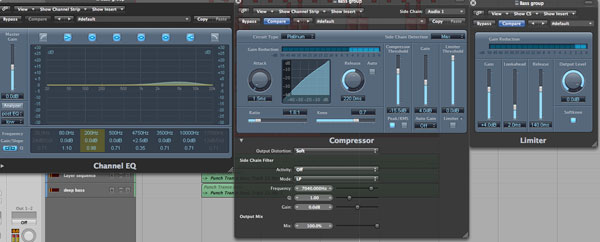
In this case I added some side-chain compression, with the kick drum from our drum track acting as the key input. This allows the kick to be audible above the bass parts, which is hugely important in any music destined for club play. I have also brightened things up with a simple EQ and added some light limiting at the end of the chain to keep any wayward dynamics reigned in.
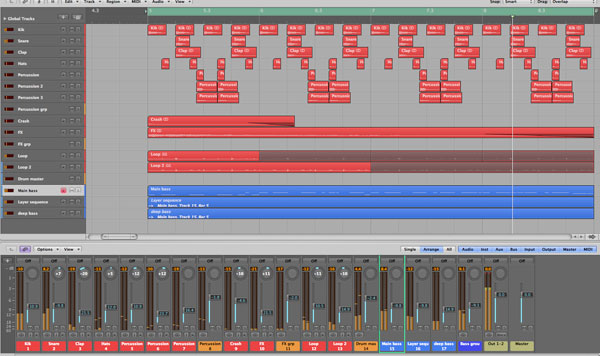
Once all this is in place you should have an effective and well mixed bass pattern. In part three, we’ll look at adding a pad or string part and then move onto leads and arpeggios, FX and fills, and finally we’ll take a look at the different stages of arrangement. Stay tuned.
Final mix
Before you go, listen to the final mix:
Download the Play Pack for this tutorial (15.25MB)