How to Automate Audio Tracks in Logic Pro 8
Aug 29th in Mixing & Mastering by Joel Falconer
Automation is a very convenient feature of most modern digital audio workstations. When the record industry ran on miles of tape, there was no such thing as automation; it was all about manual knob-turning. We have it pretty easy in contrast.
Automation allows you to draw in a set of events that will automatically occur when you play back the track. For instance, you can draw a set of volume changes along your guitar track to hear it creep in and out of the mix. You can also achieve that dynamic stereo panning effect, causing instruments to swoosh from speaker to speaker.
Note: this tutorial contains embedded audio that will not display in a feed reader. Click back to the site to read the tutorial with audio or download the Play Pack at the end of the tut.
1. Turn Track Automation On
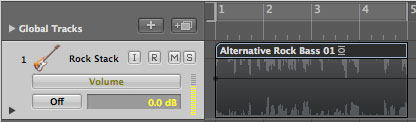
In the Arrange window, drop down the View menu and select Track Automation. You can also use the keyboard shortcut A to toggle track automation visibility. Note that turning the Track Automation option on and off won’t actually turn the automation adjustments off; it’ll simply hide the automation editor from view.
You’ll notice the track size gets bigger and there’s now a straight line running through the middle of your track. This is the line that you adjust to make automation modifications.
2. Place Several Handles
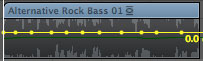
By default, when you turn track automation on, you’re presented with the volume automation controls. Start by clicking on the line in the center of the track in a few places. This will create handles, which allow you to manipulate the direction of the line.
3. Drag the Handles to Form Volume Changes
Now, click and drag on the handles and move them up to increase volume or down to decrease it. Shake it up a bit for the purpose of learning and move one down, the next up, and so on. Then play it back and hear the volume rising and falling. Your track should look something like this:
4. Make the Master Output Track Visible in Arrange Mode
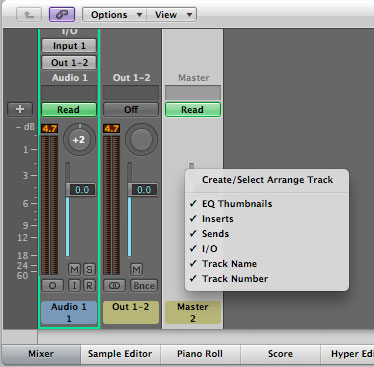
Using automation, we can fade a whole song out (or fade it in) on the master track. It isn’t visible in arrange mode by default. Go to the Mixer tab and right click on the channel that is labelled Out 1-2. Click “Create/Select Arrange Track”. You will now see it in the Arrange window.
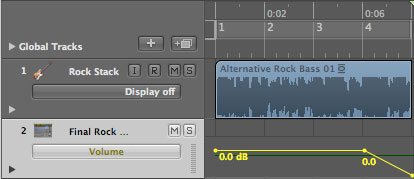
5. Create Two Handles and Fade Out
Now that you can see the master output track in Arrange mode, create a handle at the very end of the song, and one a bar or two before. Drag the handle at the end of the song down to the bottom of the track until you see the track’s volume marked with an infinity symbol.
The first handle is there to make sure you don’t fade the entire song from start to finish, but rather just that last bar or two.
6. Stereo Panning: Left, Right and Everywhere In-Between
You can add stereo panning to your track with automation too. To the left of the track audio you should see the track’s label. Right underneath that label you’ll see a button marked Volume that determines which parameter youre automating. Click and hold until you see a menu pop up, and select pan.
Now you can pan from left to right the same way we automated the volume. Dragging upwards pans to the left, while dragging downwards is a pan to the right.
7. Create a Traveling Fade
One cool use of stereo panning automation is creating a traveling fade. This makes your volume fade sound a little more realistic; rather than just magically disappearing, the sound is traveling in another direction until it can’t be heard.
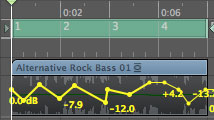
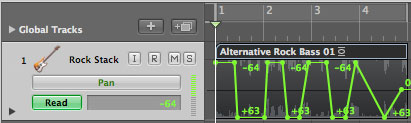
Go back to your master output track and switch from Volume to Pan. You can create a pan that emulates the pattern of your volume automation, but I prefer to create three handles and draw a pattern that looks more like this:

8. Effects Automation
You can also automate effects you’ve added to the track as inserts. Hold down on the automation selector to pop up the menu. In this case I went to 3 Chan EQ since that’s one of the effects I had inserted on the bass. Under the effect submenu you’ll be presented with all the automatable options for that insert. You’ll find EQ has quite a few.
I selected the low cut slope to vary how much low end was reduced at any given time. Here’s what it looked like and how it sounded:

9. Curve Your Automation Patterns
In step 7 I used three handles to automate the pan, but some people prefer to curve a single line rather than create two lines. You can achieve this using the Automation Curve Tool.
In the Arrange window there’s a cursor dropdown menu next to the Snap: and Drag: menus at the top of the window. Select Automation Curve Tool.
Now, click on any of the lines between two handles and drag it until it curves in the direction you want.

10. Remove Automation Handles and Patterns
If you decide you want to remove automation from a track, select the Automation Select Tool from the same place you found the Automation Curve Tool. Click and drag across the automated area, which will select the handles. Press Delete on your keyboard to remove any automation within the selection.
