Mac OS X: Screen Shots and Sharpshooter
One of the best utilities is the screen shot option. The Mac OS has a rather slick method of taking full screen shots and also provides a method of taking a cropped screen shot The problem is that the image is produced as a .png file and saved on your desktop with some long and ugly filename. Consequently, if you take a screen shot via the OS then you have to rename it, and move it... Enter Sharpshooter.
Sharpshooter 1.0.2
About Sharpshooter
A small utility application which aids the management of screen shots taken with the Mac’s built in mechanisms. When you take a screen shot on Mac OS X, Sharpshooter will present a window where you can review the picture and rename it from its default name to something more descriptive.
Key features:
- Rename your screen shots
- Change their image file format
- Move them to a different folder
- Print them out
- Quickly trash the mistakes
- Multiple monitor support options
Download Sharpshooter This is a free plug-in available at the Apple site. After you download it make sure you place it in the Applications folder.
Sharpshooter is an application you may want to startup every time you run your computer. To designate as Startup as a Login Item you need to go to System Preferences -> Accounts. Once there you need to unlock the lock icon on the bottom left side of of the Accounts window, and then click on the Login Items button on the top next to Password. Click on the + sign at the bottom and go to where Sharpshooter is located on your HD...it should be in your Applications folder. If you do not restart your computer, then you will need to start Sharpshooter manually by locating it and clicking on it. If you do not want to use it as a Login Item, then you may want to drag it to your dock.
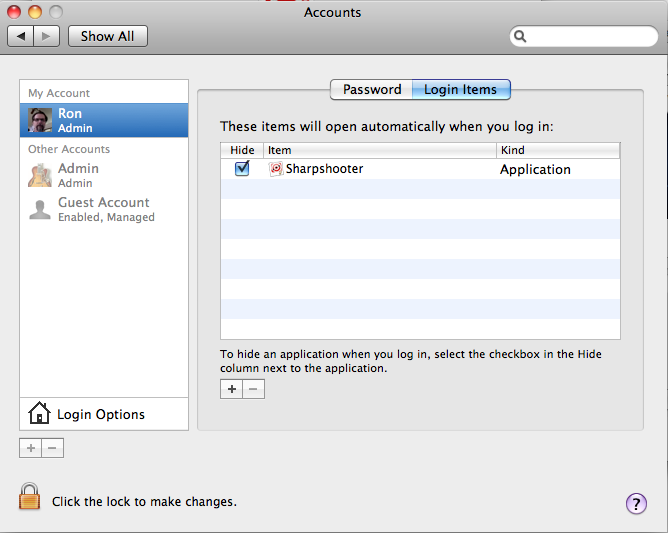
Accounts Login Items...here we are having Sharpshooter auto-start during boot-up.
Taking Your Screen Shot
Below are the Mac OS key commands for taking a screen shot:
Cmd-Shft-3 will produce a screen shot of the entire desktop, and save it as a file on the desktop
Cmd-Shft-4 will allow you to crop the image prior to taking the screen shot, and save it as a file on the desktop.
Cmd-Shft-4 then Space, then click a window: Take a screen shot of a window and save it as a file on the desktop.
Cmd-Shft-Cntrl-3 will take take a screenshot of the screen, and save it to the clipboard.
Cmd-Shft-Cntrl-4, then select an area. Will take a screen shot of an area and save it to the clipboard.
Cmd-Shft-Cntrl-4, then Space, then click a window. Will take a screenshot of a window and save it to the clipboard.
Once you take the screen shot the following Sharpshooter dialog window will open:
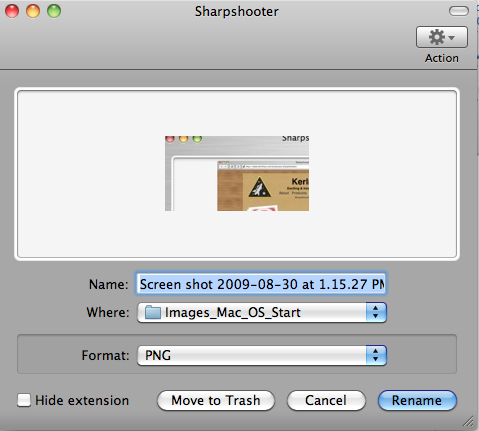
Several things happen once you take the screen shot First, the image is initially copied onto the desktop. When the Sharpshooter dialog appears the first thing you want to do it go to the Name field and give the file a name, you may also want to go to the Where drop-down and select a location where you want the file to stored. Once you click on the Rename button then the image is saved where you wanted it to be saved, and that image that appeared on you desktop is now gone.
Renaming the Image
Set focus to the Name field and start typing.
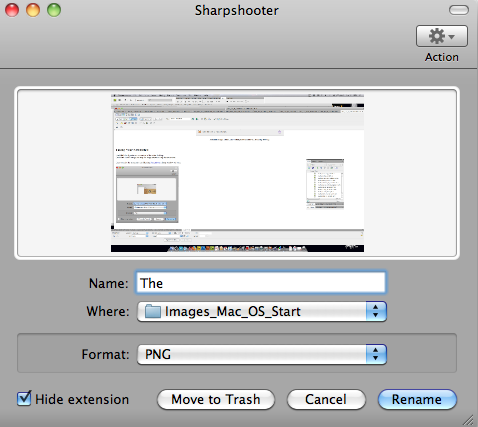
Choose Where to Store File.
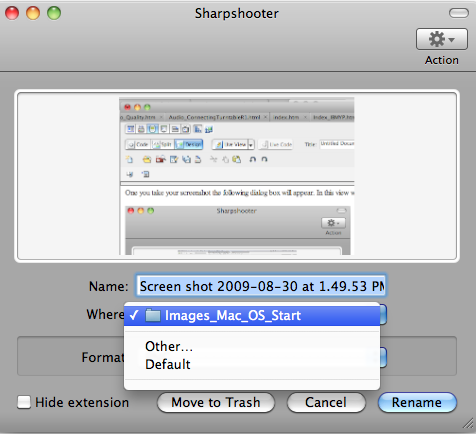
In the view below we are exploring the Where option. If you were to click on Other, then you have the option of selecting any folder on your system as your storage location.
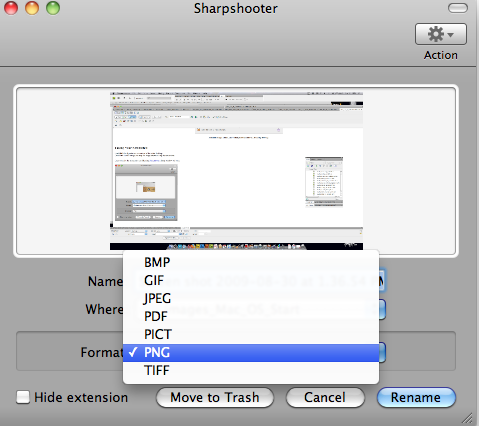
Define File Type
In the view below we are defining the file type that we want to use.
Set Sharpshooter Preferences
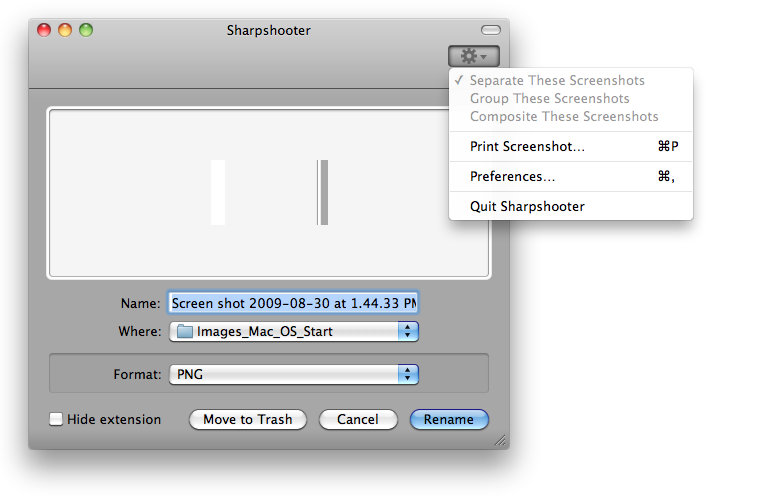
You can set the Preferences of Sharpshooter by going to the Action drop down at the top right of the Sharpshooter dialog. Once there click on Preferences to change them.
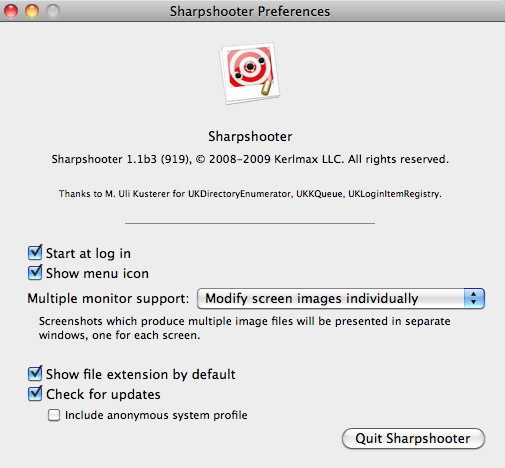
Below is the Sharpshooter Preference dialog box.
That is it. Pretty simple, yet powerful.